Imagine you’re deep in the forest, and suddenly you realize you need a safe place to stay. Knowing how to make a survival shelter can be the difference between comfort and danger.
This skill is not just for experts—it’s something you can learn step-by-step. You’ll discover simple, effective ways to build a shelter using natural materials around you. By the end, you’ll feel confident to protect yourself from harsh weather and stay safe in the wild.
Keep reading, because your survival might just depend on what you learn here.
Choosing The Right Location
Choosing the right location for a survival shelter in the forest is vital. The right spot keeps you safe, dry, and protected. It helps you stay warm and avoid danger. Careful choice of location makes shelter building easier and more effective.
Assessing Terrain And Shelter Needs
Pick flat ground to build your shelter. Avoid steep slopes or rocky areas. Soft soil is better for digging or anchoring. Check for natural windbreaks like trees or bushes. Think about shelter size based on your group and supplies.
Avoiding Hazards
Stay away from animal trails and insect nests. Avoid areas near dead trees or loose branches. Keep distance from water edges that can flood. Watch for signs of unstable ground or landslides. Clear the site of sharp rocks and debris.
Considering Weather Conditions
Choose a spot that blocks strong winds. Look for areas that get sun in the morning. Avoid low spots where cold air settles. Consider nearby trees for rain protection but watch for falling limbs. Plan for shelter ventilation to reduce moisture inside.

Credit: www.youtube.com
Gathering Essential Materials
Gathering essential materials is your first challenge when building a survival shelter in the forest. The right materials determine how sturdy and protective your shelter will be. Knowing where to find these resources and how to use them can make the difference between comfort and discomfort in the wild.
Finding Natural Resources
Look around for sturdy branches and fallen logs; these will form the skeleton of your shelter. Avoid dead wood that snaps easily—choose flexible but strong branches instead. Leaves, pine needles, and bark are excellent for covering and adding protection against rain and wind.
Notice the terrain. Is there a nearby stream for water? Are rocks available to anchor your shelter? Use your surroundings smartly to save time and effort.
Using Tools Efficiently
If you have a knife or hatchet, use it to trim branches cleanly and split wood for better fitting. Sharp tools can speed up your work, but handle them carefully to avoid injuries. Without tools, sharpened stones or hard sticks can still help you cut or dig shallow holes for shelter support.
Think about how each tool can serve multiple purposes—like a knife that can cut rope, carve wood, or prepare food. How can you maximize the usefulness of what you carry?
Collecting Insulating Materials
Gather dry leaves, moss, and grass to create a soft layer inside your shelter. This insulation keeps cold and moisture out, making your space warmer. Avoid wet or damp materials as they can cause discomfort and even illness.
Look for natural padding under trees or near decayed wood. Collect enough to cover the ground where you’ll rest, but also to stuff between walls for extra warmth. What natural materials around you offer the best insulation?
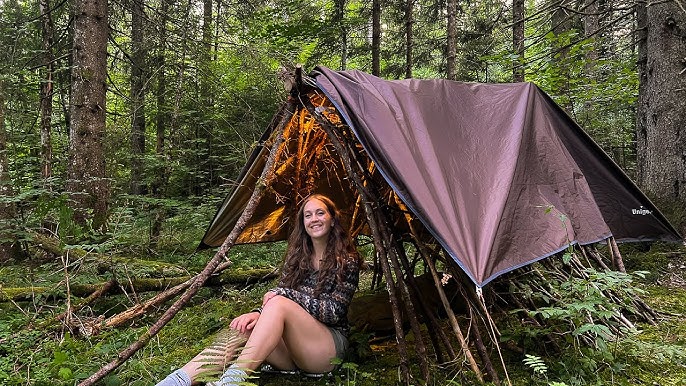
Selecting Shelter Types
Choosing the right shelter type depends on available materials and weather conditions. Simple designs like lean-tos and debris huts offer quick protection and warmth in the forest. Consider ease of building and how well the shelter blocks wind and rain.
Selecting the right type of shelter is crucial in a survival situation. The forest offers various natural materials, making certain shelter types more feasible. Each type has its benefits and best-use scenarios. Let’s explore three popular shelter types.Debris Hut
The debris hut is ideal for cold conditions. It provides excellent insulation using leaves and branches. Start by creating a ridge pole between two trees. Lean sticks against the pole to form a triangular shape. Cover the structure with leaves, grass, and moss. This keeps the warmth in. It’s a snug choice for solo survivalists.Lean-to Shelter
The lean-to shelter is simple and quick to build. It’s perfect for shielding against wind and rain. Begin by placing a long stick horizontally between two trees. Lean smaller sticks against it at an angle. Cover these with leaves and branches. This creates a slanted roof. It works best with a fire at the opening to reflect heat.A-frame Shelter
The A-frame shelter is sturdy and offers good rain protection. Set a long pole between two forked sticks. Lean sticks on both sides to form an A-shape. Cover the structure with leaves and branches. This design provides more space than a debris hut. It suits two people comfortably.Building The Shelter Frame
Building the shelter frame is the backbone of your survival shelter. It transforms raw materials into a protective structure that can shield you from the elements. Getting the frame right ensures your shelter lasts and keeps you safe throughout your time in the forest.
Constructing Support Structures
Start by selecting strong, straight branches or poles for your main supports. Look for trees or fallen limbs that can bear weight without snapping. Placing two sturdy vertical supports first creates the foundation for your frame.
Think about the shape of your shelter. A-frame designs are simple and effective, using two leaning poles tied at the top. Alternatively, a lean-to shelter relies on one horizontal pole supported by vertical stakes.
Securing Framework
Once your supports are in place, secure them tightly using natural cordage like vines or strips of bark. If you have rope, use it to lash poles together with square or diagonal knots.
Don’t rush this step; loose bindings can cause your frame to collapse. Test the strength by applying gentle pressure and adjusting knots until everything feels firm.
Ensuring Stability
Stability comes from proper anchoring and balanced weight distribution. Drive stakes into the ground around your frame and tie the structure to these anchors to prevent shifting.
Check the ground beneath your shelter for uneven spots that could tilt your frame. Adding cross braces between poles boosts rigidity and stops wobbling, especially in windy conditions.
Have you noticed how a shaky frame makes you uneasy? Solid stability not only protects you physically but also calms your mind during stressful survival situations.
Adding Insulation And Weatherproofing
Adding insulation and weatherproofing is key to building a strong survival shelter. Insulation keeps you warm by trapping body heat. Weatherproofing protects from rain, wind, and cold. Both make your shelter safer and more comfortable.
Natural materials around you work well for insulation and weatherproofing. Use them wisely to create layers that block cold air and moisture. A good shelter resists harsh weather and stays dry inside.
Layering Leaves And Branches
Leaves and branches form a natural insulation layer. Dry leaves trap warm air close to your body. Thick branches add structure and block wind.
- Collect plenty of dry leaves or pine needles.
- Pile them thickly on the floor inside the shelter.
- Add leaves or smaller branches on the shelter walls and roof.
- Make the layer at least 6 inches thick for better warmth.
Waterproofing Techniques
Keep rain and moisture out to stay dry and warm. Use large leaves or bark as a natural roof covering. Overlap them to let water run off.
- Use broad leaves like palm or large tree leaves.
- Add bark strips to cover gaps in the roof.
- Use mud or clay to seal small holes and cracks.
- Build the roof with a steep angle to shed water.
Wind Protection Methods
Wind can chill you quickly inside the shelter. Block wind with thick walls made from branches and leaves. Position the shelter with a solid barrier on the wind side.
- Build walls from tightly packed branches or logs.
- Add leaves and moss between branches to close gaps.
- Face the shelter entrance away from the prevailing wind.
- Use natural windbreaks like rocks or bushes nearby.

Credit: www.youtube.com
Creating Shelter Entrance And Ventilation
Creating a proper entrance and ensuring good ventilation in your forest survival shelter are crucial for comfort and safety. A well-designed entryway controls the flow of air, keeps out unwanted visitors, and protects you from the elements. Meanwhile, ventilation prevents moisture buildup and helps regulate temperature, making your shelter livable over extended periods.
Designing An Entryway
Your shelter’s entrance should be just large enough for easy access but small enough to retain warmth inside. Position the entryway away from prevailing winds to reduce cold drafts. Adding a simple flap made from leaves, bark, or a tarp helps shield against rain and wind without blocking airflow.
Think about how you’ll move in and out quickly, especially in emergencies. A low, narrow doorway keeps heat trapped but still allows you to crawl through comfortably. If you’ve ever been caught in a sudden storm, you know how valuable a dry, protected entrance can be.
Maintaining Airflow
Proper airflow stops your shelter from becoming a damp, suffocating trap. Leave small gaps near the top or sides of the shelter for fresh air to enter and stale air to exit. Avoid sealing your shelter completely—it needs to breathe to keep moisture and carbon dioxide levels down.
Try to position ventilation openings opposite each other to create a natural cross breeze. You can cover these with fine mesh or loosely woven natural materials to maintain airflow while keeping debris out. Have you noticed how stuffy a tent feels without fresh air? The same principle applies here.
Keeping Out Insects And Animals
Entrances are prime spots for bugs and small animals to sneak in. Use natural barriers like tightly packed leaves, pine needles, or moss around the doorway to deter insects. You can also hang a piece of cloth or bark as a door that moves but blocks entry.
Don’t forget to check the ground near your entrance for burrows or nests. Clearing these areas makes your shelter less inviting to unwanted critters. Have you ever woken up to find a spider or mouse nearby? Taking these steps helps you avoid that unpleasant surprise.
Maintaining And Improving Shelter
Keeping a survival shelter strong and safe is vital in the forest. A well-maintained shelter protects against weather and animals. Small fixes now stop big problems later. Regular care makes the shelter last longer and stay comfortable.
Regular Inspection
Check the shelter daily for damage or wear. Look for broken branches, loose bindings, or holes in the roof. Watch for signs of water leaks or falling debris. Early detection helps fix problems quickly. Use a flashlight at night to spot hidden issues.
Reinforcing Weak Spots
Strengthen areas showing weakness. Add extra branches or leaves to the roof for better cover. Tie loose parts securely with vines or cord. Replace rotten wood with fresh materials. Reinforcement keeps the shelter sturdy during storms and wind.
Adapting To Changing Conditions
Adjust the shelter as the weather changes. Add insulation for cold nights using moss or dry leaves. Create more ventilation during hot days by opening walls slightly. Clear snow or rain buildup regularly. Adaptation keeps the shelter comfortable in all seasons.

Credit: www.youtube.com
Frequently Asked Questions
What Materials Are Best For A Forest Survival Shelter?
Use natural materials like branches, leaves, and bark. Dry wood and large leaves provide insulation. Avoid wet or rotting materials to stay warm and dry.
How Do I Choose The Best Location For A Shelter?
Pick a flat, dry spot away from hazards like falling branches. Look for natural windbreaks and nearby water sources. Avoid low areas prone to flooding.
How Long Does It Take To Build A Basic Shelter?
A simple lean-to or debris hut can take 1-3 hours. Time depends on available materials and your skill level. Prioritize quick shelter to stay protected from elements.
How Can I Keep Warm Inside A Survival Shelter?
Use dry leaves or pine needles as insulation on the floor. Build a small fire outside but close enough for warmth. Wear layers to retain body heat.
Conclusion
Building a shelter in the forest can save your life. Use natural materials you find nearby. Keep your shelter simple but strong. Always choose a safe spot to build. Practice these skills before you need them. Stay calm and think clearly while working.
Remember, preparation helps you stay safe outdoors. Learning shelter building boosts your confidence in nature. Try building one during your next hike. Survival skills like this are useful for everyone.