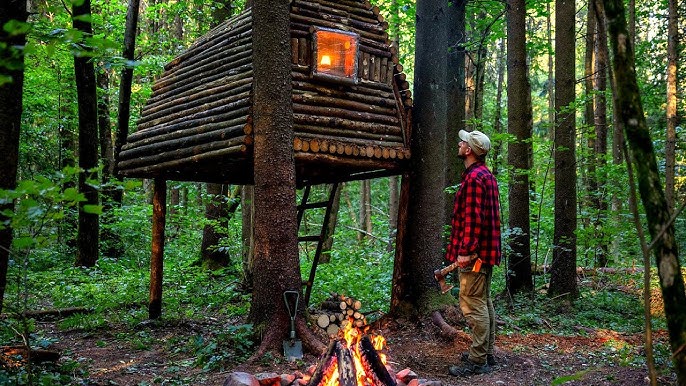
Imagine you’re deep in the wilds of Alaska, facing freezing temperatures and unpredictable weather. Knowing how to build a survival shelter can mean the difference between staying safe and struggling to survive.
This guide will show you simple, practical steps to create a strong shelter using materials around you. Whether you’re a beginner or just want to sharpen your skills, learning these techniques will give you confidence and keep you prepared for the unexpected.
Keep reading to discover how you can protect yourself and stay warm in one of the most challenging environments on Earth.

Credit: www.youtube.com
Choosing The Right Location
Choosing the right location for a survival shelter in Alaska is crucial. It affects your safety, comfort, and chances of survival. The harsh environment demands careful thought before setting up camp. Focus on terrain, natural dangers, and nearby resources. These factors help create a secure and sustainable shelter.
Assessing Terrain And Safety
Pick ground that is flat and stable. Avoid steep slopes or rocky areas that may cause slips or falls. Check for signs of animal activity. Stay clear of places where bears or wolves might roam. Look for natural windbreaks like trees or hills. These protect your shelter from strong winds and cold. Soft ground can make digging easier for shelter foundations or fire pits.
Avoiding Natural Hazards
Stay away from flood zones near rivers or lakes. Rising waters can destroy your shelter quickly. Avoid areas under dead trees or loose rocks. These can fall and cause injury during storms or heavy winds. Be cautious of avalanche-prone slopes during winter. Heavy snow can bury your shelter and block escape routes. Check the weather forecast and local signs to understand hazards better.
Proximity To Resources
Choose a location close to water sources like streams or lakes. Water is essential for drinking, cooking, and cleaning. Find areas with plenty of wood for fire and shelter building. Nearby plants and wildlife can provide food. Stay within a reasonable distance from resources to save energy. Avoid places too close to water to reduce insects and flooding risk.

Credit: www.youtube.com
Types Of Survival Shelters
Choosing the right type of survival shelter can make a huge difference in your comfort and safety in Alaska’s harsh environment. Each shelter style offers unique benefits depending on the materials available, weather conditions, and your skill level. Understanding these options helps you pick the best shelter to protect yourself from wind, cold, and moisture.
Lean-to Shelters
Lean-to shelters are simple and quick to build. They use a sturdy frame leaned against a tree or a rock face, covered with branches, leaves, or a tarp. This design blocks wind effectively but leaves one side open, so positioning it away from prevailing winds is crucial.
In my experience, a lean-to worked well during early fall when snow was light and dry wood was easy to find. It’s perfect if you want to stay off the ground and still get fresh air. What natural structures can you use nearby to anchor your lean-to?
Snow Caves
Snow caves are surprisingly warm shelters made by digging into deep snowdrifts. The snow acts as an insulator, keeping the inside temperature close to freezing even when it’s much colder outside. You’ll need compact snow and enough depth to carve out a chamber big enough to sit or lie down comfortably.
Carefully ventilate your snow cave to avoid carbon dioxide buildup. One time, I underestimated ventilation and felt lightheaded inside. Always poke a small hole near the roof for fresh air. Could this be the shelter that gives you warmth without fire?
Debris Huts
Debris huts rely on layers of leaves, grass, and branches to trap body heat. Start by creating a frame with sticks, then pile debris thickly to cover every gap. The thicker the layer, the better the insulation from cold and wind.
In dense forest areas, debris huts offer quick shelter using what’s on the ground. I once built one in a rush during an unexpected rainstorm, and it kept me surprisingly dry and warm. How much debris can you gather without exhausting yourself?
Quinzhee Shelters
Quinzhees are similar to snow caves but built by piling loose snow into a mound and then hollowing it out after it settles and hardens. This technique takes longer but allows you to use softer, less compact snow. The thick walls reflect body heat back inside.
I remember spending hours shaping a quinzhee during a blizzard. The effort paid off with a quiet, warm refuge that shielded me from the storm. Are you ready to invest the time needed for this solid shelter?
Gathering Building Materials
Collect wood, branches, and leaves from nearby areas to create a sturdy shelter frame. Use natural materials that are dry and strong for better protection. Gather enough supplies to build walls and insulation against cold Alaskan weather.
Gathering building materials is a crucial step in building a survival shelter in Alaska. The environment offers a variety of resources, but knowing how to gather them is essential. With the right materials, your shelter can withstand harsh conditions and keep you safe.Using Natural Resources
Nature provides many materials for shelter construction. Look for strong branches and logs for the structure. They are sturdy and readily available. Use leaves and moss to cover gaps. These materials offer natural insulation. Rocks can also be useful for building the foundation. They add stability to your shelter.Tools For Construction
Having the right tools makes building easier. A hatchet or axe is vital for cutting wood. A handsaw can help create precise cuts. Rope or cordage will secure materials together. A knife is useful for shaping and trimming. Carrying these tools ensures you can build efficiently.Insulating Materials
Insulation keeps your shelter warm. Gather pine needles and dry grass for this purpose. They trap heat and provide comfort. Use them to line the inside walls. Snow can also act as an insulator. It adds an extra layer of protection.Step-by-step Shelter Construction
Building a survival shelter in Alaska requires careful planning and precise actions. Each stage of construction plays a vital role in ensuring safety and comfort. Follow clear steps to create a strong, warm shelter that stands against harsh weather.
Foundation Preparation
Start by choosing a dry, flat area for your shelter. Clear away snow, rocks, and debris. Dig shallow trenches to drain water away from the base. Use logs or flat stones to create a stable floor. This prevents moisture from seeping inside and keeps your shelter dry.
Frame Building
Select sturdy wood or branches for the frame. Arrange them in a triangular or A-shape for strength. Lash joints tightly with rope or vines to hold the frame steady. Make sure the frame is tall enough to sit or lie down comfortably. A solid frame supports the shelter against strong winds.
Weatherproofing Techniques
Cover the frame with bark, large leaves, or spruce boughs. Layer materials thickly to block wind and rain. Add snow on top to act as insulation, trapping heat inside. Use mud or clay to seal gaps and prevent drafts. This keeps the shelter warm and dry even in freezing temperatures.
Ventilation Considerations
Leave small gaps near the top for fresh air to enter. Proper airflow stops moisture buildup and reduces carbon monoxide risk. Avoid large openings that let cold air in. A small vent or smoke hole allows smoke to escape if you build a fire inside. Balance warmth and air quality for a safe shelter.
Maintaining Warmth And Safety
Keeping warm and safe in the harsh Alaskan wilderness is not just about comfort—it can be a matter of life and death. Your shelter must shield you from biting cold while avoiding hidden dangers. Balancing heat and air quality requires careful planning and constant awareness.
Fire Building Near Shelter
Building a fire near your shelter provides essential warmth and a way to cook food. Place your fire downwind and at least 10 feet away from your shelter to avoid sparks that could ignite it. Clear the ground around the fire spot of any flammable debris like dry leaves or needles.
Use rocks to create a fire ring. This helps contain the flames and prevents the fire from spreading unexpectedly. Remember to keep a bucket of water or snow nearby to extinguish the fire quickly if needed.
Preventing Heat Loss
Heat escapes easily through poor insulation, so focus on sealing gaps in your shelter. Use natural materials like moss, pine boughs, or dry leaves to fill cracks between logs or branches. These act as barriers against cold wind and moisture.
Elevate your sleeping area off the ground to avoid cold seeping up. Laying a bed of dry branches or foam pads can make a big difference. Also, use a sleeping bag rated for sub-zero temperatures or multiple layers of blankets.
Avoiding Carbon Monoxide Risks
Fires and stoves inside shelters can create dangerous carbon monoxide (CO) buildup. Always ensure your shelter has proper ventilation—cut a small hole near the top to allow smoke and gases to escape. Never seal your shelter airtight after lighting a fire inside.
Pay attention to signs of CO poisoning: headache, dizziness, nausea, or sudden fatigue. If you or your group experience these symptoms, get fresh air immediately. Safety depends on balancing warmth with airflow; don’t sacrifice one for the other.

Credit: www.youtube.com
Additional Survival Tips
Building a survival shelter in Alaska is just one part of staying safe in the wilderness. You also need to think about other crucial survival tips that can make a big difference in your chances of rescue and staying alive. These tips focus on how you signal for help, store your water and food, and keep your mind sharp under pressure.
Signaling For Help
Once your shelter is set, attracting attention becomes your priority. You want rescuers to find you quickly, so use bright materials like emergency blankets or clothing to create visible signals. Arrange rocks or logs in large shapes such as an “SOS” or a big arrow pointing to your shelter.
Fire is another powerful signal. Keep a smoky fire going during the day; the smoke can be seen from far away. At night, bright flames or flashing a light can catch the eye of search parties. Have you thought about what items in your pack could help you signal effectively?
Water And Food Storage
Water is your lifeline in the wild, especially in freezing Alaska. Melt snow carefully to avoid contaminants, and always boil it if possible. Store your water in insulated containers to prevent freezing overnight.
Food should be kept safe from wildlife. Use hanging methods with your supplies tied high in a tree, away from bears and other animals. Pack lightweight, high-energy foods that don’t spoil easily, such as nuts, dried fruits, and energy bars. What’s the best way you’ve found to keep your food secure in the wild?
Staying Calm And Focused
Fear and panic can cloud your judgment and drain your energy fast. Take deep breaths and focus on one task at a time, whether it’s building your shelter or preparing food. Keeping a clear mind helps you make better decisions and conserve energy.
Remember, your mental strength can be as crucial as your physical skills. Talk to yourself positively and set small goals to maintain motivation. How do you stay calm when everything feels overwhelming?
Frequently Asked Questions
What Materials Are Best For An Alaska Survival Shelter?
Use natural materials like spruce branches, snow, and bark. These insulate well and are readily available. Bring a tarp or emergency blanket for added protection. Avoid flammable materials and ensure the shelter is sturdy against strong winds.
How Do I Keep Warm Inside An Alaska Shelter?
Insulate the floor with branches or leaves to prevent heat loss. Use body heat and a small, safe fire outside the shelter. Wear insulated clothing and keep dry to maintain warmth. Ventilate slightly to avoid carbon monoxide buildup.
Where Should I Build A Survival Shelter In Alaska?
Choose a location shielded from wind, near natural resources like water and wood. Avoid low areas prone to flooding or avalanche paths. Look for natural windbreaks such as trees or rocks to improve shelter stability and warmth.
How Long Does It Take To Build An Alaska Shelter?
Basic shelters can take 1-3 hours depending on materials and weather. More complex shelters may require additional time. Prioritize speed for immediate protection, then improve insulation and structure as time allows.
Conclusion
Building a survival shelter in Alaska takes careful planning and effort. Choose a safe spot away from dangers like falling trees or water. Use natural materials such as branches, leaves, and snow for insulation. Make sure your shelter blocks wind and keeps you dry and warm.
Practice these skills before you need them in real life. Staying calm and prepared can save your life in the wild. Remember, simple steps make a big difference when surviving Alaska’s harsh conditions. Stay safe, stay warm, and trust your skills.