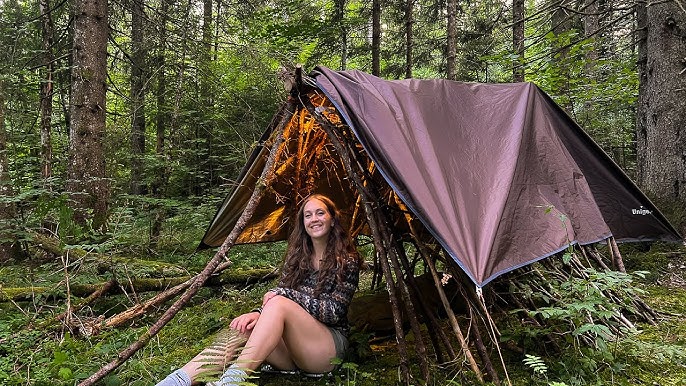
Imagine having a safe place where you can protect yourself and your loved ones from any unexpected disaster. Building an underground survival shelter might sound complicated, but with the right steps, you can create a secure space all by yourself.
This guide will show you exactly how to plan, build, and prepare your shelter, so you feel ready no matter what happens. Keep reading, because what you learn here could make all the difference when it matters most.
Choosing The Right Location
Choosing the right location is the first and most important step in building an underground survival shelter. The safety and durability of the shelter depend on this decision. A good location ensures stability, access to resources, and protection from dangers.
Assessing Soil And Terrain
Soil type affects how easy it is to dig and how strong the shelter will be. Sandy or loose soil may collapse easily. Clay or rocky soil provides better support but can be hard to dig. Look for firm, stable ground that drains water well. Avoid low areas where water collects. Flat or gently sloping land is easier to work with and safer for shelter construction.
Considering Water Sources
Access to clean water is vital for survival. Choose a site near a fresh water source like a stream, river, or spring. Avoid locations too close to water to prevent flooding risks. Ensure the water source remains reliable year-round. Collecting rainwater can be a good backup option. Keep in mind water quality and potential contamination.
Avoiding Hazards
Safety comes first. Stay away from flood zones, unstable cliffs, or areas prone to landslides. Avoid places near industrial sites or chemical storage. Check for underground utilities and roots that may block digging. Stay clear of animal habitats to reduce encounters with wildlife. A safe, hazard-free site protects you and your shelter’s integrity.

Credit: www.youtube.com
Designing Your Shelter
Designing your underground survival shelter takes careful thought. It is the foundation of your shelter’s safety and comfort. Every choice affects how well it protects and serves you. Focus on size, ventilation, and entrance type to build a reliable shelter.
Determining Size And Layout
Decide how many people will use the shelter. Plan space for sleeping, storage, and movement. Avoid cramped areas to reduce stress and improve safety. Use a simple layout with clear zones for each purpose. Think about future needs like extra supplies or equipment.
Planning Ventilation
Fresh air is vital underground. Plan vents that bring in clean air and remove stale air. Place vents away from potential hazards. Use pipes or tubes with covers to keep dirt and water out. Consider natural airflow by placing vents at different heights. Good ventilation prevents carbon dioxide buildup and moisture problems.
Selecting Entrance Type
Choose an entrance that is easy to access but secure. Common types include hatch doors, tunnel entrances, or camouflaged openings. The entrance should protect against weather and unwanted visitors. Make sure it seals tightly to keep out water and pests. Test the entrance design to ensure quick exit in emergencies.
Gathering Materials And Tools
Selecting the right materials and tools is essential for building an underground survival shelter. Gather durable materials like concrete, steel, and wood. Essential tools include shovels, drills, and saws. Proper preparation ensures a safe and sturdy shelter.
Building an underground survival shelter is a practical step for anyone looking to ensure safety and preparedness. Before you start digging, gathering the right materials and tools is crucial. This phase can make or break your project, so careful planning and selection are key.Essential Building Materials
Choosing the right materials is the foundation of your shelter’s durability and safety. You’ll need sturdy materials like concrete, steel, and treated wood to ensure structural integrity. Concrete is excellent for creating solid walls and floors, while steel can be used for reinforcement and support beams. Waterproofing materials are also essential to protect against underground moisture. Consider using plastic sheeting or specialized waterproof membranes. Insulation, such as foam boards, can help regulate the temperature inside your shelter, making it comfortable during extreme weather conditions.Tools Needed
Having the right tools at hand can make the construction process more efficient and less strenuous. Start with basic tools like shovels and pickaxes for digging. A concrete mixer can save you time and effort if you’re working with cement. Power tools like drills, saws, and angle grinders are invaluable for cutting and shaping materials. If you’re planning a more extensive build, renting heavy machinery like an excavator might be necessary.Safety Gear
Safety should always be a priority when undertaking such a project. Equip yourself with sturdy work gloves to protect your hands while handling rough materials. A hard hat is a must to guard against falling debris, especially during the initial excavation. Dust masks or respirators will shield you from inhaling harmful particles, particularly when cutting materials. Steel-toed boots provide essential foot protection, ensuring you can work confidently and safely. Are you ready to roll up your sleeves and get started? Remember, preparation is the key to a successful build. With the right materials, tools, and safety gear, you’re well on your way to creating a secure underground haven.Excavation Process
Excavating the ground for your underground survival shelter is a critical part of the build. It sets the foundation for everything else and requires careful planning and physical effort. If you rush this step or underestimate the work, you might face structural problems or unnecessary risks later.
Marking The Site
Start by selecting a flat, stable area with good drainage. Use stakes and string to outline the exact shape and size of your shelter.
Double-check your measurements to avoid digging too small or too big. Imagine the final space and how you’ll move inside it—does the layout fit your needs?
Marking clearly also helps avoid digging in the wrong place, saving time and effort. Don’t forget to check for underground utilities before you start.
Digging Techniques
Choose digging tools based on the soil type—shovels for loose soil, pickaxes for rocky ground. Dig in layers to maintain control and safety.
Keep the walls as vertical as possible to reduce collapse risk. If you notice soil falling in, pause and reinforce the edges before continuing.
Take breaks often; digging is tough work, especially if you’re doing it alone. Think about how deep you need to go—too shallow won’t protect, too deep will be exhausting and expensive.
Managing Excavated Soil
Where you put the dirt matters. Keep the soil at least a few feet away from the edges of your hole to prevent it from sliding back in.
Consider building temporary berms or using tarps to control erosion and keep your site clean. If you want, you can use some of the soil later for camouflage or landscaping.
Have you thought about how much soil you’ll have to move? Planning where it goes saves you from a cluttered worksite and extra labor moving it again later.
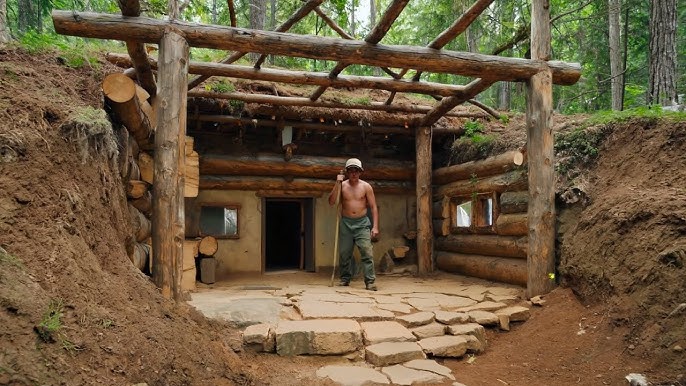
Building The Structure
Building the structure of an underground survival shelter requires careful planning and strong materials. The shelter must be sturdy enough to hold back soil and protect against weather. Each part of the structure plays a vital role in safety and comfort. Focus on building solid walls and a reliable roof. Waterproof the shelter to keep moisture out. Add support beams to hold everything in place and prevent collapse.
Constructing Walls And Roof
Start with thick walls made from concrete or reinforced blocks. These materials resist pressure from the earth. Dig a trench to create a foundation. Place the walls securely inside the trench. Use steel bars to strengthen the concrete. The roof should be flat or slightly angled. Use heavy-duty concrete slabs or metal sheets. Make sure the roof fits tightly on the walls. This stops dirt and water from entering.
Waterproofing Methods
Waterproofing keeps the shelter dry and safe. Apply a waterproof membrane to the walls and roof. This layer blocks water from seeping through cracks. Use tar or bitumen coatings on the outside. Seal all joints and edges with waterproof tape. Add drainage pipes around the shelter to divert water. Cover the roof with gravel or soil to protect the waterproof layer. Check for leaks before finishing the shelter.
Installing Support Beams
Support beams hold up the roof and prevent collapse. Use strong wood or steel beams inside the shelter. Place beams vertically and horizontally for extra strength. Space beams evenly along walls and roof. Secure beams with bolts or brackets for stability. Inspect beams for damage regularly. Replace any weak or broken beams immediately. Proper support ensures the shelter stays safe under pressure.
Creating Ventilation And Drainage
Creating proper ventilation and drainage is vital for any underground survival shelter. Good airflow helps keep the air fresh and prevents buildup of harmful gases. Proper drainage stops water from collecting inside, which can cause damage and make the shelter unsafe.
Both ventilation and drainage systems work together to maintain a safe, dry, and healthy environment underground. Careful planning and installation ensure long-term comfort and protection.
Setting Up Airflow Systems
Start by installing air vents at different levels of the shelter. Place one vent near the floor for fresh air intake. Place another vent near the ceiling to let out stale air.
Use pipes or ducts that are strong and rust-resistant. Ensure vents have covers to keep out debris and pests.
- Install a manual or battery-powered fan to improve air movement.
- Check vents regularly for blockages or damage.
- Position vents away from possible water entry points.
Preventing Water Accumulation
Drainage is crucial to keep the shelter dry. Dig a drainage trench around the shelter perimeter to divert water away. Use gravel or crushed stone to improve water flow.
Inside the shelter, create a slight slope on the floor to direct water toward a drain or sump pump.
- Seal all joints and cracks to prevent leaks.
- Install a sump pump if the area has high water tables.
- Regularly inspect the drainage system and clear blockages.
Furnishing The Shelter
Furnishing your underground survival shelter properly can make a huge difference in comfort and efficiency. You want to create a space that feels secure and organized, without wasting precious room. Thoughtful furnishing helps you stay calm and focused during stressful times.
Storage Solutions
Efficient storage keeps your shelter clutter-free and accessible. Use stackable plastic bins with clear labels to quickly find essentials like food, tools, and medical supplies.
Consider wall-mounted shelves to save floor space. Hooks and pegboards are great for hanging gear such as flashlights, ropes, and utensils.
Have you thought about waterproof containers? They protect your supplies from moisture and pests, which is critical underground.
Sleeping Arrangements
Choose sleeping setups that maximize comfort without taking up too much space. A simple foam mattress or camping pad can provide insulation from the cold ground.
If space allows, a compact cot lifts you off the floor, reducing dampness and improving air circulation. Don’t forget warm blankets or sleeping bags rated for low temperatures.
Personal experience taught me the value of layering bedding in an underground shelter—it helped maintain warmth even when the power was out.
Lighting Options
Good lighting is crucial in a windowless shelter. Battery-powered LED lanterns offer long-lasting, bright light and are easy to move around.
Solar-charged lights can be handy if you have access to sunlight outside, reducing reliance on batteries. Keep extra batteries stored safely for emergencies.
Have you considered low-heat, energy-efficient bulbs? They ensure safety by minimizing fire risks and conserving power.

Credit: www.youtube.com
Maintaining Safety And Comfort
Maintaining safety and comfort in your underground survival shelter is essential for long-term living and peace of mind. It’s not just about having a sturdy structure, but also about making sure the environment inside supports your health and well-being. Paying attention to crucial factors like supplies, temperature, and regular upkeep can make all the difference when you need your shelter the most.
Emergency Supplies
Stocking your shelter with the right emergency supplies ensures you’re prepared for unexpected situations. Keep a variety of non-perishable foods, clean water, and first aid kits within easy reach.
- Water purification tablets or filters
- Battery-powered or hand-crank flashlights
- Extra batteries and a reliable radio for updates
- Essential medications and hygiene products
Think about what you would need if you were stuck underground for several days or weeks. Do you have enough supplies to last until help arrives, or until you can safely exit?
Temperature Control
Controlling the temperature inside your shelter is key to staying comfortable and avoiding health risks. Underground shelters naturally maintain cooler temperatures, but this can drop too low in winter or rise in summer.
Adding insulation to walls and floors helps stabilize the temperature. You might also consider portable heaters or ventilation systems that bring in fresh air without letting cold or heat in.
Have you checked how your shelter’s temperature changes throughout the day? Installing a simple thermometer can help you monitor conditions and adjust accordingly.
Regular Inspections
Regularly inspecting your shelter helps spot issues before they become serious problems. Look for cracks in the walls, water leaks, and signs of mold or pests.
Testing your ventilation and emergency equipment ensures everything works when needed. Set a schedule for inspections and stick to it, just like you would with your car or home.
What could happen if you ignore small problems? Catching them early keeps your shelter safe and your mind at ease.
Camouflaging The Shelter
Camouflaging your underground survival shelter is crucial to keep it hidden from unwanted eyes. The goal is to blend the entrance and surrounding area seamlessly with the environment. Without proper camouflage, your shelter could easily draw attention, defeating its purpose of safety and secrecy.
Natural Cover Techniques
Use materials found around your shelter site to cover the entrance and ventilation points. Leaves, branches, and grass work well to mimic the natural ground cover. Layer these materials thickly enough to break up shapes and shadows that might reveal a hidden door.
Adding a thin layer of soil or moss on top of the natural cover can help it blend even better. Avoid using anything that looks out of place, like bright green leaves in the fall or freshly cut branches. The key is to keep the cover consistent with the season and environment.
Have you noticed how animals create dens? They don’t just dig holes; they cover them with what’s around them. This simple trick can be very effective for your shelter too.
Using Terrain Features
Take advantage of natural terrain features such as rocks, hills, and dense bushes to hide your shelter’s entrance. Position your shelter near a boulder or under a fallen tree to reduce its visibility. These features act as natural barriers and distractions.
Digging your entrance on the side of a hill or slope can also limit exposure from common paths or open spaces. This way, the shelter is shielded by the land itself, making it less likely someone will stumble upon it. Think about how terrain shapes the line of sight around your shelter.
Consider the direction of sunlight and shadows throughout the day. Placing your shelter entrance in a shadowed area can decrease the chance of it catching someone’s eye. How can you use the land’s natural contours to your advantage?

Credit: www.youtube.com
Frequently Asked Questions
What Materials Are Best For An Underground Survival Shelter?
Use concrete, treated wood, and steel for strong walls. Waterproofing materials like plastic sheeting prevent moisture. Proper insulation is crucial to maintain temperature. These materials ensure durability and safety during emergencies.
How Deep Should An Underground Survival Shelter Be?
A depth of 6 to 8 feet is ideal. This depth offers protection from weather and radiation. It also maintains stable temperatures year-round. Depth depends on soil type and local climate conditions.
How Do You Ventilate An Underground Survival Shelter?
Install air vents with intake and exhaust pipes. Use hand-operated or battery-powered fans for airflow. Proper ventilation prevents carbon dioxide buildup and moisture. Ensure vents are covered to keep out pests and debris.
What Essential Supplies Are Needed Inside The Shelter?
Stock food, water, first aid kits, and tools. Include batteries, flashlights, and communication devices. Store warm clothing and blankets for comfort. These supplies ensure survival during extended stays underground.
Conclusion
Building an underground survival shelter takes careful planning and effort. Choose a safe location and gather strong materials. Make sure to include ventilation and waterproofing for safety. Keep the space clean and organized for comfort. Regularly check the shelter to fix any problems.
Staying prepared helps protect you and your family. Start with small steps and learn as you go. Your safety depends on the shelter’s quality and your readiness. A well-built shelter can offer peace and protection during emergencies.