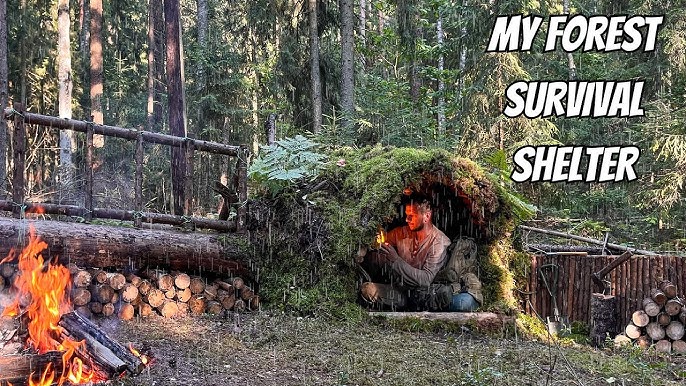
Imagine finding yourself alone in the wild with no shelter to protect you from the elements. Your safety, warmth, and even survival depend on the shelter you build.
Knowing how to create a strong, reliable survival shelter can make all the difference between feeling helpless and staying safe. In this guide, you will discover simple, practical steps to build a shelter using what’s around you. By the end, you’ll have the confidence to take control of your situation and protect yourself no matter where you are.
Keep reading—your survival skills start here.

Credit: www.youtube.com
Choosing The Right Location
Choosing the right location for your survival shelter is one of the most important decisions you will make in the wild. It affects your safety, comfort, and ability to sustain yourself. Picking the best spot means balancing several factors, from the landscape to available resources and potential dangers.
Assessing Terrain And Environment
Look for flat, elevated ground that stays dry during rain. Avoid low areas where water can pool and cause flooding inside your shelter.
Consider the local climate. If it’s cold, a spot shielded from wind by trees or rocks can keep you warmer. In hot climates, shade and airflow become more important to prevent overheating.
Think about what kind of terrain surrounds you. Rocky areas can provide materials for your shelter but may be hard to work with. Open fields offer visibility but little protection.
Avoiding Hazards
Never build your shelter under dead or unstable trees. Branches can fall unexpectedly and cause injury.
Steer clear of animal trails or nesting sites. You don’t want to disturb wildlife or find yourself face-to-face with a curious predator.
Check for signs of flooding or landslides, especially after heavy rain. Even a gentle slope can become dangerous if water rushes through it.
Finding Natural Resources
Water is essential. Position your shelter within a reasonable distance of a clean water source, but not too close to avoid flooding or insects.
Look around for materials like fallen branches, leaves, and rocks that can be used for building and insulation. Gathering these nearby saves energy and time.
Think about fuel sources. Deadwood for fires should be easy to collect but not so close that sparks threaten your shelter’s structure.
Have you ever found yourself stuck in the wild and realized your shelter spot lacked nearby resources? Choosing wisely can prevent that frustration and keep you safer and more comfortable.
Selecting Shelter Types
Choosing the right type of shelter is crucial when you’re building one in the wild. Your selection should depend on the environment, the materials you have, and how much time you can spend constructing it. Each shelter type offers different benefits and challenges, so understanding these will help you make the best decision for your situation.
Lean-to Shelters
Lean-to shelters are simple and quick to build. They use a sturdy branch leaned against a tree or a frame, with smaller branches or leaves layered on top for protection. I once built a lean-to during a sudden rainstorm, and its open side allowed me to keep watch while staying dry.
This shelter works well in mild weather and when you need to stay alert. However, it doesn’t provide full protection from wind or cold, so consider your surroundings carefully.
Debris Huts
Debris huts offer excellent insulation by using natural materials like leaves, grass, and twigs. You create a frame with branches and then pile debris thickly to trap heat. When I used one overnight in a chilly forest, the warmth inside surprised me.
Building a debris hut takes more time but pays off if you’re facing cold conditions. It’s ideal when you have plenty of natural debris around and need a cozy, hidden shelter.
A-frame Shelters
A-frame shelters are sturdy and shed rain well thanks to their steep sides. You build two slanting sides leaning together to form an ‘A’ shape, covering them with leaves or a tarp. I found this design useful during windy conditions, as it stood firm without much effort.
This type suits areas with rainfall and moderate wind. It’s also versatile—you can adjust its size and materials based on what’s available.
Tarp Shelters
Tarp shelters are lightweight and quick to set up if you carry a tarp in your gear. You can tie it between trees or use sticks to create different shapes like an A-frame or lean-to. On a recent hike, setting up a tarp shelter saved me hours compared to building from scratch.
This option is perfect when you want portability and speed. Remember to secure it well to withstand wind, and add insulation underneath if the ground is cold.
Gathering Materials
Building a survival shelter begins with gathering the right materials. Materials provide the structure and protection needed in the wild. Knowing what to collect can save time and effort.
Using Natural Resources
Natural resources are abundant in the wilderness. Use fallen branches as the framework for your shelter. Leaves and grasses can create a waterproof roof. Bark and moss offer insulation against the cold. Look for stones to stabilize your structure’s foundation.
Incorporating Man-made Items
Man-made items can enhance your shelter’s durability. Carry a tarp for quick rain protection. Use rope or cordage to tie branches securely. Plastic sheeting can serve as a windbreaker. Even a simple trash bag can help keep you dry.

Credit: www.youtube.com
Building The Shelter Frame
Building the shelter frame is the backbone of creating a reliable survival shelter. It provides the essential support that will hold your walls and roof in place against wind, rain, and other elements. Without a strong frame, even the best materials will fail to protect you.
Constructing Stable Supports
Start by selecting sturdy branches or poles that can bear weight without bending or breaking. Look for wood that is thick and straight—ideally around 2 to 3 inches in diameter. Test each piece by applying pressure to ensure it won’t snap under stress.
Place two vertical supports firmly into the ground, spaced to match the size of your shelter. Drive them at least one foot deep to prevent wobbling. If the soil is loose, pile rocks or soil around the base for added stability.
Next, add a horizontal crossbeam connecting the tops of your vertical supports. This beam will act as the main ridge to support your roof. Secure it tightly to prevent any movement that could compromise the structure.
Securing Structural Elements
Tying the frame components together is crucial. Use natural fibers like vines or strips of bark if you don’t have rope. Wrap the binding material several times around the joints and pull it tight.
If you have cordage or paracord, use a square knot or clove hitch for a secure hold. Avoid simple knots that can slip under tension. Consider adding diagonal braces to reinforce the frame and resist side-to-side movement.
Ask yourself: how will your shelter hold up if strong wind hits? Testing the frame’s rigidity before adding walls can save you from a collapse later. A well-secured frame feels solid and doesn’t sway when pushed hard.
Insulating And Weatherproofing
Building a shelter in the wild is only half the battle. To truly survive, you need to make it comfortable and safe from the elements. Insulating and weatherproofing your shelter keeps you warm and dry, preventing hypothermia and other dangers linked to exposure.
Adding Leaf And Branch Insulation
Start by gathering dry leaves, pine needles, or grass to create a thick layer of insulation inside your shelter. This natural padding traps warm air close to your body and keeps the cold ground from sapping your heat.
Use branches or smaller sticks to form a frame, then pile the leaves or needles on top and inside the shelter walls. The thicker the layer, the better the insulation.
I once survived a chilly night just by layering two feet of dry leaves inside my lean-to. It made a huge difference—without that, the cold would have been unbearable.
Waterproofing Techniques
Waterproofing is crucial. A wet shelter equals a cold shelter, and that’s dangerous in the wild.
Use large leaves, bark, or even a tarp if you have one, layering them from the top down like shingles on a roof. This setup helps water run off instead of soaking in.
Additionally, packing mud or clay into gaps in your shelter walls seals out rain and wind. If you’re near a source of resin or pitch from trees, applying a thin layer can add extra waterproofing.
Ask yourself: how will your shelter handle a sudden downpour? Preparing for rain before it hits makes all the difference between a miserable night and a safe one.
Maximizing Shelter Comfort
Comfort in a survival shelter isn’t just about staying dry or out of the wind. It also means making the space livable enough to rest well and keep your energy up. Small adjustments can make a big difference in how you feel while sheltering in the wild.
Creating Ventilation
Ventilation is crucial to avoid moisture buildup inside your shelter. Without fresh air, condensation can soak your bedding and clothes, making you cold and uncomfortable.
Try to leave small gaps near the top of your shelter for air to flow through. If you’re using a tarp or natural materials like leaves and branches, don’t pack them too tightly.
Ask yourself: can you feel fresh air circulating without letting cold drafts in? Adjust openings based on wind direction and weather conditions to keep the air moving but the chill out.
Elevating The Sleeping Area
Sleeping directly on the ground sucks heat from your body fast. Raising your sleeping spot even a few inches can protect you from cold and dampness.
Use logs, branches, or a thick layer of leaves to build a platform. This not only adds comfort but also creates a barrier against insects and small critters.
Consider how you can create a simple frame or bed that stays stable. When I built a raised bed during a camping trip, the difference in warmth and dryness was clear by morning—something you want in a survival scenario.
Safety And Maintenance
Building a survival shelter is only the first step. Keeping it safe and well-maintained is vital for your protection. A strong shelter withstands weather changes and keeps you secure. Regular checks help find weak spots before problems grow. Staying alert ensures the shelter stays reliable during your time in the wild.
Inspecting For Structural Integrity
Check all supports and joints every day. Look for cracks, loose branches, or shifts in the frame. Test the shelter’s stability by gently pushing on walls. Replace broken parts immediately to avoid collapse. Clear away debris or snow that adds weight. Keep the roof sealed to prevent leaks. Small fixes now save big troubles later.
Protecting Against Wildlife
Wild animals can damage or enter your shelter. Store food away from your shelter to avoid attracting animals. Use natural barriers like thorny branches around the base. Seal gaps or holes where animals might sneak in. Avoid strong scents that attract wildlife. Stay calm and quiet to reduce attention. A well-protected shelter keeps you safe and undisturbed.

Credit: www.youtube.com
Frequently Asked Questions
What Materials Are Best For Building A Survival Shelter?
Natural materials like branches, leaves, bark, and grass work best. They provide insulation and camouflage. Avoid synthetic materials that may not blend well or offer warmth.
How Do I Choose The Safest Location For Shelter?
Pick a flat, dry area away from hazards like water runoff, dead trees, or animal paths. Look for natural windbreaks such as rocks or dense bushes to protect from elements.
How Long Does It Take To Build A Basic Survival Shelter?
A simple shelter can take 1 to 3 hours to build, depending on skill and materials. Prioritize speed and sturdiness to ensure quick protection from weather and wildlife.
What Are Key Shelter Designs For Different Climates?
In cold climates, build insulated shelters like debris huts. In hot areas, focus on shade and ventilation using lean-tos. Adapt your design to local weather for optimal comfort and survival.
Conclusion
Building a survival shelter takes patience and care. Choose a safe spot with natural protection. Use materials around you like branches, leaves, and grass. Keep your shelter small to stay warm. Make sure it keeps out wind and rain. Practice these steps before you need them.
Staying dry and warm improves your chances a lot. Remember, a good shelter is your first defense. Stay calm, work steadily, and trust your skills. You can handle the wild with simple shelter knowledge.