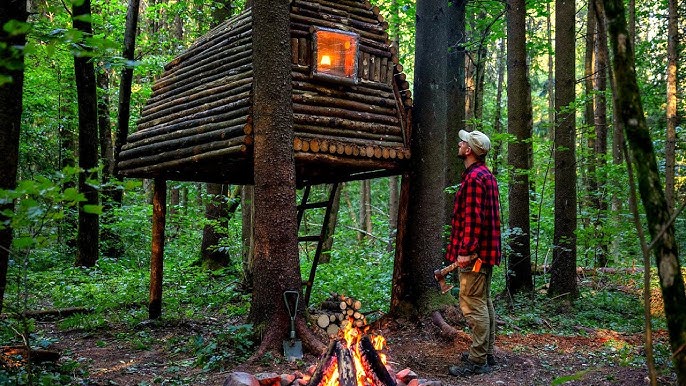
Imagine finding yourself in the wild, with no shelter to protect you from the elements. What would you do?
Knowing how to build a survival shelter can be the difference between staying safe and facing danger. You will discover simple, step-by-step instructions, paired with an easy-to-follow video, that will teach you how to create a strong shelter using materials around you.
Whether you are an outdoor enthusiast or preparing for emergencies, this guide will give you the confidence and skills to protect yourself when it matters most. Keep reading, and you’ll be ready to build your own survival shelter quickly and effectively.

Credit: www.youtube.com
Choosing The Right Location
Choosing the right location for your survival shelter is critical. It affects your safety, comfort, and ability to sustain yourself. Picking the perfect spot requires careful thought and observation of your surroundings.
Assessing Terrain And Environment
Look for flat or gently sloping ground. Uneven or steep terrain can make building your shelter difficult and uncomfortable to sleep on.
Consider the environment around you. Dense forests offer protection from wind but may limit sunlight, while open areas provide warmth but expose you to elements.
Think about drainage. Avoid low spots where water collects during rain. A dry area keeps you safer and helps preserve your supplies.
Avoiding Hazards
Steer clear of places prone to flooding or landslides. Even if a spot looks perfect, sudden weather changes can turn it dangerous fast.
Beware of dead trees or branches overhead that could fall. I once ignored this and had to move my shelter after a branch crashed nearby during a storm.
Keep away from animal trails or nests. You don’t want unexpected visitors disrupting your rest or threatening your safety.
Finding Natural Resources
Locate your shelter near fresh water sources like streams or springs. Easy access to water is vital for drinking, cooking, and cleaning.
Look around for materials to build and insulate your shelter. Fallen branches, leaves, and rocks can make your shelter sturdy and warm.
Also, consider nearby food sources such as berry bushes or fishing spots. This helps you gather nutrition without traveling far.
Gathering Essential Materials
Gathering the right materials is key to building a strong survival shelter. Without proper supplies, your shelter won’t protect you from the elements. Focus on finding materials that are durable and easy to work with. Collecting the right items saves time and effort during construction. It also ensures your shelter can last through harsh weather.
Types Of Shelter Materials
Choose materials based on your environment and shelter style. Wood is sturdy and common in forests. Leaves and grass work well for insulation and roofing. Rocks can form a solid base or walls. Tarps or plastic sheets provide waterproof protection. Use what nature offers around you to build a reliable shelter.
Tools Needed
Some basic tools make gathering materials easier and faster. A knife helps cut branches and shape wood. An axe or hatchet can chop larger logs. Rope or paracord binds materials together securely. Gloves protect your hands during collection. Carry a small saw for precise cuts. Prepare simple tools before heading into the wild.
Collecting Natural Resources
Look for dry wood and branches first. Avoid wet or rotten pieces that break easily. Gather large leaves or pine needles for insulation. Collect stones for a stable foundation if on rocky ground. Use vines or flexible branches to tie parts of the shelter. Gather enough material to build and repair your shelter.
Selecting Shelter Types
Choosing the right type of shelter is crucial for your survival in the wild. The best shelter depends on the environment, materials available, and how long you plan to stay. Understanding different shelter types helps you adapt quickly and stay protected from the elements.
Lean-to Shelter
The lean-to shelter is simple and fast to build. It uses a sturdy branch or pole as a backbone, leaned against a tree or rock. You then add smaller branches or foliage to create a slanted roof that blocks wind and rain.
This shelter works well in mild weather and areas with plenty of trees. It offers good ventilation but may need extra insulation in colder climates. Have you considered how much time you can spend building shelter versus other survival tasks?
Debris Hut
A debris hut provides excellent insulation by trapping body heat. You build a frame using branches, then cover it with leaves, grass, and other natural debris. This thick layer keeps cold air out and warmth in.
It takes longer to construct but pays off in colder environments. I once survived a chilly night using a debris hut and felt the difference in warmth instantly. Could a little extra effort in building your shelter save you from hypothermia?
Tarp Shelter
Tarp shelters are lightweight and versatile, perfect if you carry gear. You can tie a tarp between trees or poles to create various shapes like A-frames or flat roofs. It provides quick protection from rain and wind.
Tarp shelters need additional insulation in cold weather but excel in wet conditions. Think about how a compact tarp can lighten your pack and speed up shelter setup. What’s your go-to solution when time is short and rain is coming?
Step-by-step Shelter Construction
Building a survival shelter requires careful planning and clear steps. Follow this guide to create a strong, safe shelter using simple materials. Each stage focuses on key actions to protect you from wind, rain, and cold. A well-built shelter can greatly increase your chances of staying safe outdoors.
Setting Up The Framework
Start by choosing a flat, dry area for your shelter. Use sturdy branches or poles to form the main frame. Lean the poles against a central support like a tree or a horizontal beam. Arrange them evenly to create a stable structure. Make sure the frame is strong and balanced to hold the covering materials.
Adding Insulation And Covering
Use leaves, grass, or moss to add insulation inside the shelter. Pack the material tightly to trap heat. Cover the frame with a waterproof layer such as a tarp, large leaves, or bark. Overlap the covering materials to prevent water from leaking in. Ensure the shelter is fully covered to keep out rain and wind.
Securing The Shelter
Secure the shelter by tying knots with rope or vines at key points. Use rocks or heavy logs to hold down the edges of the covering. Check for gaps or weak spots and reinforce them. Test the shelter’s stability by gently shaking it. A secure shelter stays intact during storms or strong winds.
Improving Shelter Comfort
Building a survival shelter video shows easy ways to make a warm, dry place. Simple tips help keep out wind and rain. Comfort improves with good shelter design and materials.
Improving the comfort of a survival shelter is crucial for enduring harsh conditions. A well-designed shelter not only offers protection but enhances the quality of your stay. Here, we explore techniques to make your shelter more livable.Ground Insulation Techniques
Cold ground can sap body heat quickly. Insulating the ground is essential. Use natural materials for insulation. Gather leaves, pine needles, or grass. Spread them evenly on the shelter floor. This layer traps air, providing warmth. A thicker layer increases insulation effectiveness.Weatherproofing Tips
A weatherproof shelter protects against rain, wind, and snow. Start with a solid roof. Use leaves, bark, or tarps. Ensure an overlap to prevent leaks. Secure the sides with logs or rocks. This adds stability and protection. Check for gaps and seal with mud or moss. These natural materials help keep out drafts.Ventilation Methods
Proper ventilation prevents condensation and smoke buildup. An open shelter entrance aids airflow. For enclosed shelters, create a small vent hole. Place it near the top. This allows smoke to escape and fresh air to enter. Use sticks or reeds to maintain the vent’s shape. Fresh air improves comfort and safety inside.Safety And Maintenance
Ensuring your survival shelter remains safe and functional over time is just as important as building it. Regular attention to safety and upkeep can prevent accidents and extend the life of your shelter. Neglecting these aspects might leave you vulnerable when you need your shelter most.
Checking Structural Integrity
Regularly inspect your shelter’s frame, walls, and roof for signs of damage or wear. Look for cracks, loose joints, or sagging areas that could compromise stability. A quick safety check every few weeks can help you catch small problems before they grow.
Pay special attention after storms or heavy winds. Have you noticed any leaning walls or unusual noises inside? These could indicate weakened supports that need immediate repair to keep you safe.
Fire Safety Near Shelter
Fire is a major hazard around survival shelters, especially those made with natural materials. Keep a safe distance between your shelter and any fire sources like campfires or cooking stoves. Use non-flammable barriers, such as rocks or cleared soil, to create a protective zone.
Always have a fire extinguisher, water bucket, or sand nearby. Practicing safe fire management can prevent disasters. Ask yourself: Are flammable materials stored away from heat? Keeping this habit can save your shelter and your life.
Regular Upkeep
Maintenance is about more than repairs—it’s about prevention. Clear debris, leaves, and snow from around and on top of your shelter to avoid moisture buildup and rot. Check for pests that might damage the structure or create health risks.
Simple tasks like tightening fasteners, replacing worn-out coverings, and treating wood with protective oils make a big difference. When was the last time you gave your shelter a thorough check? Staying proactive keeps your shelter ready for anything.
Survival Shelter Tips And Tricks
Building a survival shelter requires smart planning and practical skills. Knowing useful tips and tricks helps create a safe space fast. A good shelter protects from weather and keeps you comfortable. It also saves energy and helps you stay calm. Learn key advice to improve your shelter-building efforts.
Maximizing Limited Resources
Use what nature offers around you. Collect branches, leaves, and rocks for walls and insulation. Look for fallen wood instead of cutting live trees. Use your clothing or spare fabric as extra padding. Small tools can help shape materials better. Keep materials dry to avoid mold and rot. Think about reusing parts from broken gear or trash.
Adapting To Different Climates
In cold places, build shelters with thick walls and low entrances to keep heat in. Use snow or mud to seal gaps. In hot areas, create shade and allow airflow to stay cool. Elevate the shelter floor to avoid dampness. Rainy climates need sloped roofs to let water run off. Adjust your shelter style to match the weather you face.
Common Mistakes To Avoid
- Building too large a shelter wastes time and energy.
- Ignoring waterproofing leads to wet and uncomfortable conditions.
- Placing shelters in low spots invites flooding and cold air.
- Not securing the shelter can cause collapse in wind.
- Using green wood causes faster decay and weaker structure.
- Overlooking ventilation results in poor air and moisture buildup.

Credit: www.youtube.com

Credit: www.youtube.com
Frequently Asked Questions
What Materials Are Best For Building A Survival Shelter?
Natural materials like branches, leaves, and bark work well. Use waterproof tarps if available. Choose materials that provide insulation and protection from wind and rain.
How Long Does It Take To Build A Basic Survival Shelter?
It usually takes 1 to 3 hours to build a simple shelter. Time depends on available materials, weather, and your skill level. Practice helps speed up the process.
Where Should I Build My Survival Shelter?
Build your shelter on high, dry ground away from hazards. Avoid low spots prone to flooding. Look for natural windbreaks and access to water.
How Can I Keep Warm Inside A Survival Shelter?
Insulate the floor with leaves, pine needles, or grass. Use a small fire outside the shelter for warmth. Wear dry clothes and stay dry to retain heat.
Conclusion
Building a survival shelter is a skill anyone can learn. Start with basic materials and simple steps. Focus on safety, warmth, and protection from weather. Practice these techniques to feel more confident outdoors. Remember, preparation can save your life in emergencies.
Keep your shelter strong and dry. With patience and care, you can create a safe space anywhere. Stay calm and use what you have around you. Survival shelters help you stay alive until help arrives. Keep practicing and stay ready for the unexpected.