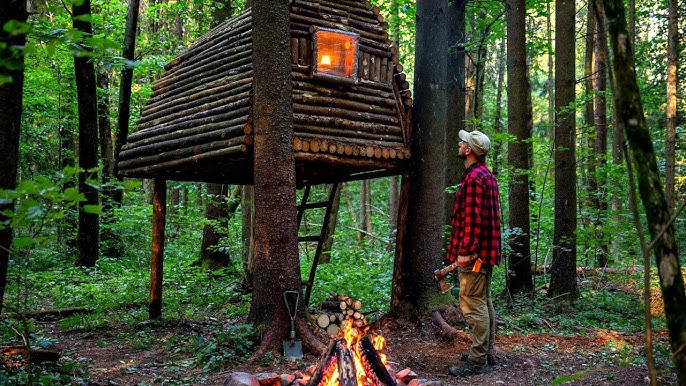
Imagine you’re deep in the woods, miles from help, and night is falling fast. Your safety depends on one thing: having a reliable shelter.
Knowing how to build a survival shelter in the woods isn’t just a skill—it could be the difference between staying warm and dry or facing the elements unprotected. In this guide, you’ll learn simple, step-by-step methods to create a shelter using what’s around you.
Whether you’re an outdoor enthusiast or preparing for the unexpected, mastering this skill will boost your confidence and keep you safe. Ready to take control of your survival? Let’s get started.
Choosing The Right Location
Choosing the right location is the first key to building a strong survival shelter. The place affects your safety, comfort, and how well the shelter protects you. Spend time to pick a spot that fits your needs. The right location helps you stay dry, warm, and safe from dangers in the woods.
Finding Safe Ground
Look for flat, dry land to build your shelter. Avoid low spots where water collects after rain. Soft, wet ground makes your shelter cold and damp. Clear away sticks, rocks, and sharp objects before starting. A stable, even surface keeps your shelter sturdy and comfortable.
Avoiding Hazards
Check for dangers around the site. Stay away from dead trees or branches that could fall. Avoid areas near animal trails or insect nests. Do not build near cliffs or steep slopes. Watch out for flood zones and avoid riverbanks that can rise quickly. Safety comes first.
Considering Weather Conditions
Think about the wind direction. Place your shelter where it blocks strong winds. Use natural barriers like bushes or rocks for extra protection. Avoid open spaces that offer no cover from rain or snow. Plan for sun exposure to keep warm during the day and cool at night.

Credit: www.youtube.com
Selecting Shelter Types
Choosing the right shelter type is key for survival in the woods. The shelter protects from wind, rain, and cold. Different shelters suit different environments and materials. Some shelters are quick to build. Others offer more warmth or space. Understanding each shelter type helps you pick the best one for your situation.
Lean-to Shelters
Lean-to shelters are simple and fast to build. They use one angled wall made from branches or a tarp. The open side faces away from the wind. You can add leaves or pine needles for insulation. This shelter offers good ventilation and some protection.
Debris Huts
Debris huts provide excellent insulation. Build a frame with sticks in a triangular shape. Cover it thickly with leaves, grass, and pine boughs. This traps heat inside and keeps moisture out. Debris huts work well in cold weather but need time to build.
A-frame Shelters
A-frame shelters form a strong, stable structure. Two angled walls meet at the top, creating a peak. Use sturdy branches for the frame and cover with bark, leaves, or a tarp. This design sheds rain well and holds heat. It is versatile for many conditions.
Tarp Shelters
Tarp shelters use lightweight plastic or fabric sheets. They are quick to set up and easy to carry. Tie the tarp between trees in different shapes like a tent or lean-to. Add rocks or logs to secure edges. Tarps protect from rain and wind but offer less warmth.
Gathering Materials
Collect branches, leaves, and bark to build a sturdy shelter frame. Choose dry materials to keep warm and stay safe from rain. Collecting plenty of natural items helps create a strong, comfortable shelter.
Gathering materials is a crucial step in building a survival shelter in the woods. The right materials ensure your shelter is sturdy and weather-resistant. You need to explore your surroundings and gather items wisely. This section will guide you on what to look for and how to use different resources effectively.Natural Resources
The forest provides many useful materials. Look for fallen branches; they make great frame supports. Use leaves and pine needles for insulation. Large rocks can serve as windbreaks. Bark from dead trees can be used for roofing. Find vines or flexible branches to tie structures together.Using Tools Efficiently
A few tools can make gathering easier. A hatchet is great for cutting branches. A knife helps in stripping bark. Use a saw to cut larger logs. Always keep tools sharp for better efficiency. Carry a small rope for bundling gathered materials.Improvised Materials
Sometimes, you may not find everything you need. Be creative. Use clothes as a temporary roof. Plastic bags can be used for waterproofing. Paracord bracelets unravel to provide strong ties. Look for trash like tarps or old cans. They can be repurposed for shelter building.
Credit: www.youtube.com
Building The Framework
Building the framework is the backbone of your survival shelter. It sets the stage for everything else, so getting it right is crucial. A strong framework will protect you from the elements and keep your shelter stable, even in tough weather.
Laying The Foundation
Start by choosing a flat, dry area for your shelter. Clear away leaves, rocks, and debris to create a clean surface. This prevents moisture from seeping in and keeps your shelter dry.
Use sturdy logs or large branches to create a base. Lay them side by side to form a stable platform. This foundation supports the weight of the entire structure and helps keep it off the cold ground.
Constructing Support Structures
Once your foundation is set, build the vertical supports. Look for straight, strong branches about 2 to 3 inches thick. These will hold up the roof and walls.
Secure the supports by leaning them against each other or tying them with natural cordage like vines or bark strips. This creates a framework that won’t collapse under pressure.
Think about the size of your shelter. Will you sit or lie down inside? Make sure the supports are tall and wide enough to fit your needs comfortably.
Securing The Shelter
Tie everything together tightly. Loose joints can cause your shelter to wobble or fall apart in the wind. Use a square lash or clove hitch knot for a strong hold.
Add cross beams to reinforce the structure. Place them horizontally across the vertical supports to give extra stability. This keeps the shelter rigid and safe.
Ask yourself: Have you tested the framework by gently shaking it? If it feels shaky, reinforce weak points before moving on. A solid frame means safety and peace of mind in the woods.
Insulating And Weatherproofing
Insulating and weatherproofing your survival shelter is crucial to stay warm and dry. Proper insulation keeps body heat inside. Weatherproofing blocks rain, snow, and wind. Both protect against harsh elements and improve comfort. Use natural materials and simple techniques to create a strong barrier. Small efforts make a big difference in survival situations.
Adding Leaf And Branch Insulation
Leaves and branches are great natural insulators. Gather dry leaves, pine needles, or grass. Place a thick layer on the floor to stop cold from the ground. Pile leaves and small branches around walls to trap warm air. Avoid wet materials that cause cold and mold. Layering increases insulation and makes the shelter cozy.
Waterproofing Techniques
Keep water out to stay dry and warm. Use large leaves or bark to cover the roof. Overlap materials like shingles to prevent leaks. Tie a tarp or plastic sheet if available. Seal gaps with mud or clay to block water. Ensure the shelter has a slight roof slope for water runoff.
Wind Protection Strategies
Wind can quickly lower body temperature. Build walls tightly using branches and leaves. Fill cracks with mud or moss to seal air gaps. Position the shelter behind natural windbreaks like hills or trees. Create a low entrance to reduce wind flow inside. Strong wind protection keeps warmth inside longer.
Maintaining Shelter Safety
Maintaining shelter safety is crucial for survival in the woods. A secure shelter protects you from harsh weather, animals, and other dangers. Taking simple safety steps ensures your shelter remains a safe place to rest and recover. Regular attention to fire safety, animal deterrents, and shelter upkeep can prevent accidents and keep threats away.
Fire Safety Tips
- Keep the fire at least 10 feet away from the shelter.
- Clear dry leaves and twigs around the fire area.
- Build a small pit or use rocks to contain the fire.
- Always have water or soil nearby to put out the fire quickly.
- Never leave the fire unattended, especially at night.
- Extinguish the fire completely before sleeping or leaving.
Animal Deterrents
- Store food away from the shelter, preferably in sealed containers.
- Hang food bags from tree branches, out of animal reach.
- Keep the shelter clean and free of food scraps.
- Use natural repellents like strong-smelling herbs around the shelter.
- Make noise occasionally to warn animals of your presence.
- Avoid bright lights or loud sounds that might attract curious animals.
Regular Maintenance
Check your shelter daily for damage or weak spots. Fix broken branches or supports quickly. Remove debris that may cause leaks or block ventilation. Clear away fallen leaves or snow from the roof. Keep the floor dry by adding fresh leaves or pine needles. Regular care keeps the shelter strong and safe throughout your stay.
Additional Comfort Features
Adding comfort features to a survival shelter makes your stay safer and more pleasant. Small touches can help you rest better and stay organized. These features protect from cold, damp ground and improve air flow. They also keep your gear dry and easy to reach.
Creating A Sleeping Platform
A raised sleeping platform keeps you off cold, wet soil. Use sturdy branches or logs to build a frame. Cover the frame with smaller sticks or flat wood pieces. Add leaves, pine needles, or a sleeping pad on top for softness. This platform helps keep your body warm and dry through the night.
Ventilation Solutions
Good airflow prevents moisture buildup and keeps the shelter fresh. Leave small gaps between walls or roof materials for air to pass. Position the shelter near natural wind paths but shield from strong gusts. Use a simple vent near the top to let hot air escape. Proper ventilation reduces fogging and improves breathing comfort.
Storage Ideas
Keep your supplies safe and easy to find with smart storage. Hang bags or containers from tree branches to stay off the ground. Use shelves made from branches inside the shelter for small items. Create a dry box with a waterproof container to protect food and matches. Organized storage saves time and protects your gear from animals and weather.

Credit: m.youtube.com
Frequently Asked Questions
What Materials Are Best For Building A Survival Shelter?
Natural materials like branches, leaves, and bark work best. Use sturdy wood for the frame and leaves for insulation. Avoid wet or rotten materials to stay dry and warm.
How Do I Find A Safe Location For My Shelter?
Choose flat, dry ground away from hazards like falling branches or flooding. Look near natural windbreaks such as rocks or dense trees for protection.
How Long Does It Take To Build A Basic Shelter?
A simple shelter can take 1-3 hours depending on skills and available materials. Prioritize structure and insulation to ensure safety and comfort quickly.
How Do I Keep My Shelter Warm In Cold Weather?
Use thick layers of leaves or pine needles for insulation. Build a windbreak and keep the shelter small to retain body heat effectively.
Conclusion
Building a shelter in the woods can save your life. Use simple tools and natural materials around you. Choose a safe spot and protect yourself from wind and rain. Keep your shelter small and sturdy for warmth. Practice these steps before you need them.
Stay calm and think clearly in emergencies. Shelter gives you safety and comfort outdoors. Prepare well, and you will feel more confident. Survival skills grow with practice and patience. Your safety depends on what you build today.