Imagine being in a situation where your devices run out of power, and you have no way to recharge them. How would you stay connected, navigate, or call for help?
That’s where a Power Cells Survival Kit becomes your best friend. This kit can keep your essential gadgets alive when you need them most. You’ll learn exactly how to make your own Power Cells Survival Kit with simple, affordable materials.
By the end, you’ll feel confident and ready to power up anytime, anywhere. Keep reading to discover the step-by-step guide that could save your life or someone else’s.

Credit: www.jackery.com
Essential Components
Building a power cells survival kit requires gathering the right parts. Each component plays a key role in making the kit effective and reliable. Knowing these components helps you prepare well and ensures your kit functions when needed.
Types Of Power Cells
Power cells come in different forms. Choose based on your needs and device compatibility. Common types include:
- Alkaline batteries – easy to find and cheap
- Lithium-ion cells – rechargeable and long-lasting
- Nickel-metal hydride (NiMH) – good for repeated use
- Solar rechargeable cells – eco-friendly and useful outdoors
Select cells that suit your survival gear and expected conditions.
Necessary Tools And Materials
Besides power cells, some tools help you assemble and maintain the kit. Gather these essentials:
- Battery holders or cases to keep cells secure
- Multimeter to check voltage and current
- Soldering iron and solder for strong connections
- Insulating tape or heat shrink tubing for safety
- Wire cutters and strippers for preparing cables
- Small screwdriver set for assembling parts
Having these tools ready makes building and fixing easier.
Safety Precautions
Handling power cells needs care. Follow safety rules to avoid accidents:
- Wear safety goggles and gloves during assembly
- Keep batteries away from heat and direct sunlight
- Do not short-circuit battery terminals
- Handle soldering tools carefully to prevent burns
- Store cells in a dry and cool place
- Dispose of damaged or expired batteries properly
Safe practices protect you and prolong battery life.
Preparing The Workspace
Preparing your workspace is the first key step to build a power cells survival kit. A clean, organized area helps keep parts safe and makes the process smooth. Safety matters, so setting the right environment is important before starting assembly.
Selecting A Suitable Area
Choose a quiet, flat surface with enough space to spread out tools and parts. Avoid crowded or cluttered places to reduce mistakes. A table or workbench near a power outlet works best. Good lighting helps you see small components clearly.
Organizing Tools And Materials
Gather all tools and parts before you begin. Arrange them neatly in small containers or trays. Keep wires, batteries, and connectors separate to avoid confusion. Place frequently used tools within easy reach. This setup saves time and keeps your workspace tidy.
Ensuring Proper Ventilation
Work in a well-ventilated room to avoid harmful fumes from batteries or soldering. Open windows or use a fan to keep air moving. Avoid working in closed spaces to reduce health risks. Proper airflow keeps the environment safe and comfortable.
Building The Power Cell
Building the power cell is the heart of creating a reliable survival kit. This process requires careful attention to detail and a steady hand. You’ll be combining materials that work together to store and release energy effectively when needed most.
Assembling The Cell Housing
The cell housing acts as the protective shell for your power cell. Choose a sturdy, non-conductive container like a small plastic or glass jar. It should be sealed tightly to prevent leaks and contamination.
Make sure the housing size fits your intended power output. A compact design makes carrying easier, but a larger container can hold more electrolyte and electrodes, boosting capacity. Have you considered how portability versus power capacity will affect your survival needs?
Installing Electrodes
Electrodes are crucial for the chemical reactions that generate electricity. Use two different metals, such as zinc and copper, to create a voltage difference. Cut the metals into similar sizes to ensure consistent contact with the electrolyte.
Secure the electrodes inside the housing without them touching each other directly. You can use small clips or insulators to keep them separated. Think about how electrode placement impacts the efficiency of your power cell — sometimes small adjustments can make a big difference.
Adding Electrolyte Solutions
The electrolyte allows ions to move between electrodes, enabling the flow of electric current. Common choices include saltwater, vinegar, or lemon juice, depending on availability and desired voltage. Pour the solution carefully to cover the electrodes fully but avoid overfilling.
Test the power cell once filled to check its voltage output. If the voltage is lower than expected, you might need to adjust the concentration of the electrolyte or the distance between electrodes. Have you tried experimenting with different electrolytes to see which one gives you the best performance?
Testing And Calibration
Testing and calibration are crucial steps in making a power cells survival kit. They ensure the kit works safely and efficiently. Proper checks help avoid failures during use. Small adjustments can improve performance and extend battery life.
Measuring Voltage Output
Use a digital multimeter to measure voltage output accurately. Connect the meter probes to the power cell terminals. Check the reading against the expected voltage value. Measure under different loads to see real performance. Record all values for comparison during calibration.
Adjusting For Optimal Performance
Adjust the output by tweaking the circuit components. Change resistor values to control current flow. Use a variable regulator to set stable voltage levels. Fine-tune connections to reduce power loss. Test after each adjustment to confirm improvements.
Troubleshooting Common Issues
Low voltage might mean poor connections or drained cells. Check wiring for loose or corroded contacts. Replace damaged batteries or faulty parts promptly. Overheating signals excessive current or short circuits. Use insulation and proper fuses to prevent damage. Keep testing regularly to spot problems early.
Integrating Into Survival Kit
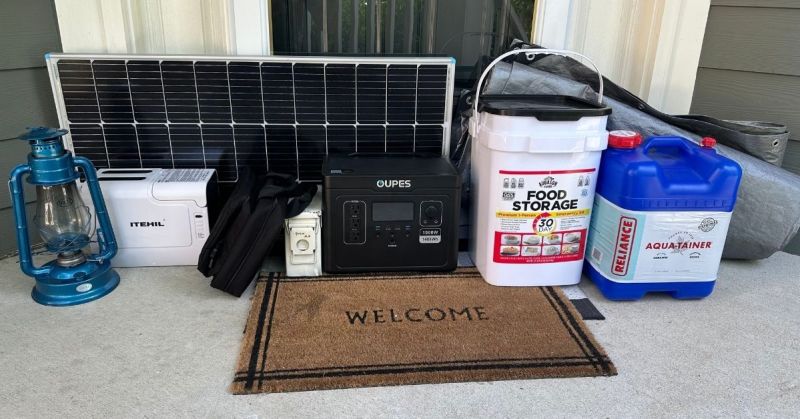
Integrating power cells into your survival kit ensures reliable energy on the go. Proper integration helps keep your devices powered when you need them most. It also saves space and maintains kit organization. Focus on packaging, device connection, and maintenance for best results.
Compact Packaging Ideas
Use small, sturdy containers to hold power cells safely. Consider plastic or metal cases with foam inserts. Wrap each cell in protective material to prevent damage. Store cells in labeled sections for quick access.
- Use resealable plastic bags to keep moisture out.
- Group cells by size or type for easy identification.
- Include a small pouch for cables and connectors.
Connecting To Devices
Choose connectors compatible with your devices. Carry adapters for different charging ports. Use short, durable cables to reduce tangling. Test connections before packing to ensure they work properly.
- Keep a universal USB adapter for flexibility.
- Label cables for quick device matching.
- Include a small power bank for additional backup.
Maintenance Tips
Check power cells regularly for damage or leaks. Replace any cells showing signs of wear immediately. Store cells in a cool, dry place to extend life. Recharge rechargeable cells fully before packing.
- Clean terminals with a dry cloth to ensure good contact.
- Rotate cells periodically to keep all ready for use.
- Keep spare cells in your kit for emergencies.
Credit: www.nbcnews.com
Advanced Tips
Advanced tips help you improve your power cells survival kit. These ideas boost performance and make your kit last longer. Small changes can save energy and increase power capacity. Understanding these tips makes your survival kit more reliable.
Extending Battery Life
Keep batteries cool and dry to prevent damage. Avoid leaving batteries in devices for long times. Use power only when necessary to save energy. Store batteries in a safe place with low humidity. Turn off devices when not in use to save power.
Using Alternative Materials
Try using common household items to replace parts. Copper wire can work for connections instead of special cables. Aluminum foil helps improve contact points in the circuit. Use activated charcoal to absorb moisture inside the kit. Small magnets can help secure components tightly.
Upgrading Power Capacity
Combine multiple cells to increase total power output. Use higher capacity batteries for longer survival times. Add a simple voltage regulator to protect devices. Connect cells in parallel for longer use, or series for higher voltage. Check connections often to keep power stable.
Credit: 4patriots.com
Frequently Asked Questions
What Is A Power Cells Survival Kit?
A power cells survival kit is a compact set of essentials. It includes power cells, chargers, and tools. This kit ensures you have energy sources during emergencies. It’s vital for outdoor adventures and power outages. Having one can help keep your devices charged and operational.
Why Do You Need A Power Cells Survival Kit?
A power cells survival kit is essential for emergencies. It ensures you have power during outages. It keeps your devices charged in critical times. This kit is crucial for outdoor adventures and camping. It enhances safety by keeping communication devices functional.
How To Choose The Right Power Cells?
Choose power cells based on your device requirements. Consider the capacity and compatibility with your devices. Look for reliable and durable options. Check for water resistance and shockproof features. High-quality power cells ensure reliable performance in emergencies and outdoor activities.
How To Store A Power Cells Survival Kit?
Store your power cells survival kit in a cool, dry place. Ensure it’s easily accessible during emergencies. Regularly check the kit for any damage or expired items. Keep it organized for quick access. Proper storage maintains the kit’s effectiveness and prolongs its lifespan.
Conclusion
Making a power cells survival kit takes some simple steps. Gather the right tools and materials carefully. Follow safety tips to avoid any problems. Keep your kit ready for emergencies or outdoor trips. Practice using your kit to feel confident.
This small preparation can help in tough situations. Stay safe and be ready at all times. A good survival kit can make a big difference. Try building your own power cells kit today.