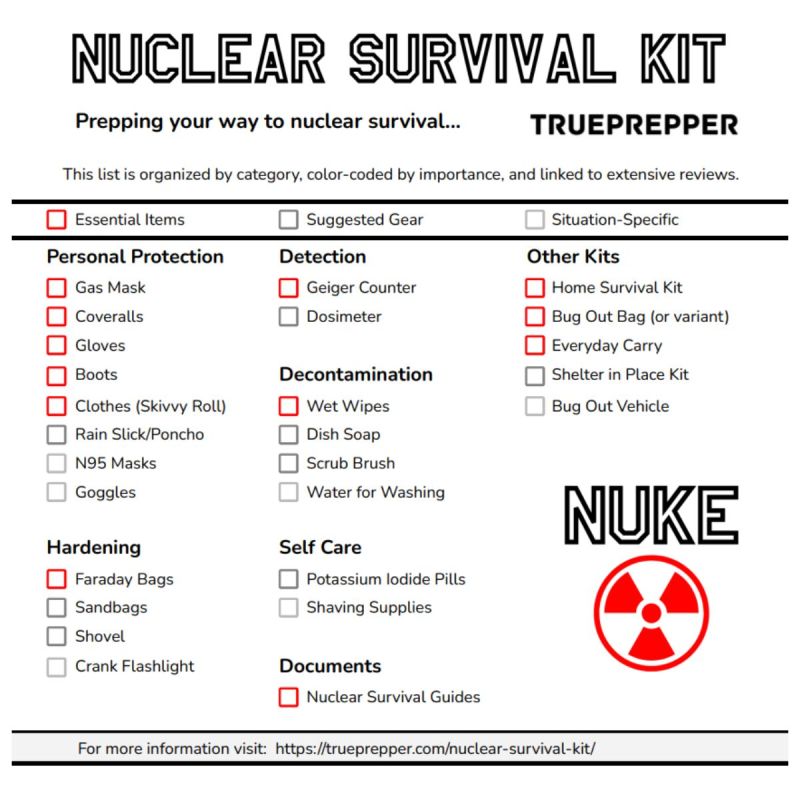
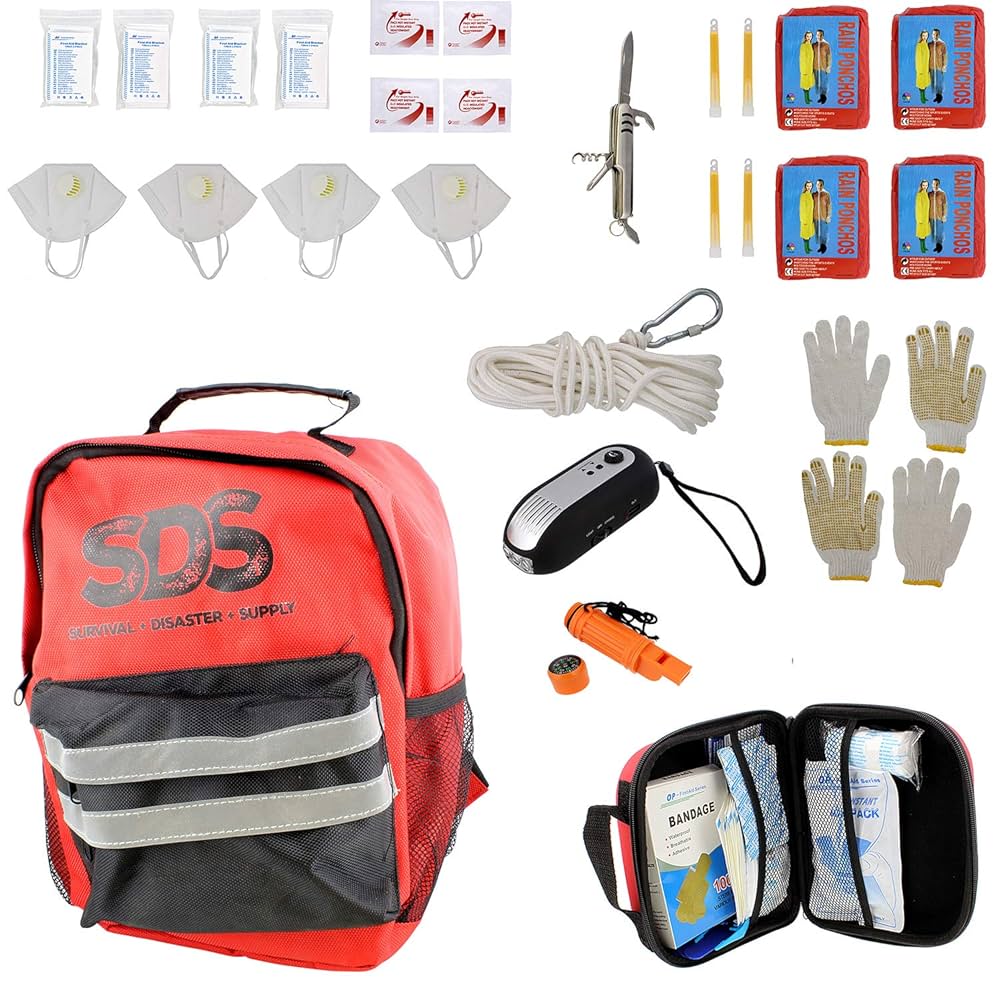
Are you ready to take control of your safety and be prepared for anything? Making your own survival kit might seem tricky, but it’s easier than you think.
With the right steps, you can build a kit that keeps you safe in emergencies, whether you’re hiking, camping, or facing unexpected situations. This guide will show you exactly how to make a survival kit, step by step, so you’ll feel confident and ready no matter what comes your way.
Keep reading, and you’ll discover simple tips that can make a big difference when it matters most.

Credit: www.reddit.com
Choosing The Right Container
Choosing the right container for your survival kit is crucial. It keeps your supplies safe and easy to carry. The container must protect your items from damage and bad weather. It also needs to be small enough to carry without trouble. Picking the right container helps you stay prepared and organized.
Durability And Portability
The container should resist impact and rough handling. Look for tough materials like hard plastic or metal. These last longer and shield your gear well. The container must be light enough to carry anywhere. Size matters. It should fit in a backpack or glove box. Handles or straps make carrying easier. Avoid bulky containers that slow you down.
Waterproof Options
Water can ruin many survival items fast. Choose a container with a good seal to keep water out. Waterproof containers protect matches, electronics, and first aid supplies. Some containers have rubber gaskets or snap-lock lids. Dry bags or waterproof cases are good choices too. Make sure the container stays dry inside, even in rain or floods.
Gathering Essential Supplies
Gathering essential supplies is the foundation of building a survival kit that you can truly rely on. The right items will keep you safe, healthy, and comfortable in unexpected situations. Think carefully about what you might need to survive for at least 72 hours without outside help.
Food And Water
Your survival kit must include non-perishable food and a reliable water source. Choose lightweight, high-energy foods like granola bars, nuts, and dried fruits. Freeze-dried meals are a great option if you want something more filling and easy to prepare.
Water is your top priority. Pack at least one liter of water per person per day, and add water purification tablets or a portable filter. Have you ever tried drinking water straight from a natural source? It’s risky without proper treatment.
First Aid Items
A well-stocked first aid kit can handle common injuries and prevent infections. Include adhesive bandages, antiseptic wipes, gauze pads, and medical tape. Don’t forget pain relievers, allergy medication, and any personal prescriptions.
Adding a small pair of tweezers and scissors can help with removing splinters or cutting bandages. I once had to use a survival kit’s tweezers to remove a thorn during a hiking trip—it made a big difference in preventing infection.
Tools And Equipment
Tools increase your ability to solve problems in survival scenarios. A sturdy knife is a must-have for cutting, preparing food, or building shelter. Include a multi-tool for versatility, and a reliable flashlight with extra batteries.
Consider packing a whistle for signaling and waterproof matches or a lighter for starting fires. How would you signal for help if you were lost in the wilderness? These small tools can save your life.
Clothing And Shelter
Protecting yourself from the elements is critical. Pack a compact emergency blanket or a lightweight tarp to create shelter quickly. Include extra socks and a hat to maintain body warmth.
Choose clothing that is durable, moisture-wicking, and suitable for your climate. Layering is key—you want to stay warm without overheating. Have you tested your emergency clothing in different weather conditions to ensure comfort?
Organizing Your Kit
Organizing your survival kit well can make a huge difference in an emergency. It’s not just about what you pack, but how you arrange everything for quick access and ease of carrying. A well-organized kit saves time, reduces stress, and increases your chances of staying safe.
Packing Tips
Start by grouping similar items together. Keep first aid supplies in one pouch, food and water in another, and tools separately. This way, you won’t have to dig through everything when you need something fast.
Use clear plastic bags or small containers to prevent things from spilling or getting lost. Labeling these bags can help you find items even in low light. Think about the order of use—items you’ll need first should be easiest to reach.
Accessibility And Weight Distribution
Ask yourself: how quickly can you get to what you need? Place frequently used items near the top or outside pockets. Less critical stuff can go deeper or at the bottom.
Balance your kit so it doesn’t pull you to one side. Heavy items like water bottles or tools should be centered or evenly spread. This makes carrying your kit more comfortable and prevents fatigue during long treks.
Remember, a well-packed kit feels lighter than it actually is because the weight is balanced and easy to carry. Have you tested how your kit feels after packing? Adjust it until it feels just right on your back or shoulder.

Credit: www.wikihow.com
Customizing For Your Environment
Customizing your survival kit to match your environment is key to staying safe and comfortable. A one-size-fits-all kit often falls short when faced with specific challenges posed by your surroundings. Tailoring your supplies based on where you live or plan to go makes your kit truly reliable.
Climate Considerations
Think about the weather you usually face. In cold climates, add extra warm clothing, insulated blankets, and hand warmers to your kit. You might also want to include fire-starting tools that work well in wet conditions.
If you live in a hot or dry area, prioritize hydration tools like water purification tablets and lightweight, breathable clothing. Sunscreen and insect repellent become essential items, too.
Have you ever been caught off guard by sudden weather changes? Including a compact rain poncho or emergency shelter can make a huge difference, no matter the season.
Local Hazards
Consider natural risks common to your area. If you’re in a flood-prone zone, waterproof containers and a whistle for signaling might save your life. In earthquake regions, a sturdy helmet and dust mask are practical additions.
Think about the wildlife around you. Carry bear spray or snake bite kits if you’re in areas where encounters with animals are possible. Knowing local dangers helps you select tools that match real threats.
What hazards have you encountered or worried about? Adjusting your kit to those specific threats can turn it from basic to lifesaving.
Maintaining And Updating Your Kit
Maintaining and updating your survival kit keeps it ready for any emergency. Regular care ensures items work well when needed. It also helps avoid surprises during a crisis. A survival kit that is checked often and refreshed stays reliable and effective.
Regular Checks
Check your survival kit every three to six months. Look for damaged or missing items. Make sure everything is clean and dry. Test tools like flashlights and radios to confirm they work. Keep the kit organized for quick access. Note any items that need replacing or fixing.
Replacing Expired Items
Food and medicine often have expiration dates. Remove expired items immediately. Replace them with fresh supplies. Check batteries for corrosion and change if weak. Swap out water bottles every six months. Keep track of dates with a checklist. This keeps your kit safe and useful.
Preparing For Different Emergencies
Preparing for different emergencies means thinking beyond just one scenario. Each type of emergency demands specific items and plans to keep you safe and comfortable. Tailoring your survival kit to the challenges you might face ensures you’re ready no matter what happens.
Natural Disasters
Natural disasters like earthquakes, floods, or hurricanes can strike without warning. Your kit should include essentials like a first aid kit, bottled water, non-perishable food, and a flashlight with extra batteries. Don’t forget important documents stored in waterproof bags and a whistle to signal for help.
Think about your local risks. If you live in a flood zone, waterproof gear is crucial. If earthquakes are common, a sturdy helmet and dust mask could save your life. What unique challenges does your area present, and how can your kit address them?
Power Outages
Power outages disrupt daily life and can last hours or even days. Stock your kit with items that keep you comfortable and safe in the dark, such as candles, a reliable flashlight, and a portable phone charger. Consider including a manual can opener and some cash, since electronic payments might not work.
Have you experienced a blackout where you felt unprepared? A small solar-powered radio can keep you informed when other communication fails. Think through how you will cook food or keep warm without electricity.
Outdoor Survival
If you spend time hiking or camping, your survival kit needs to support you in the wilderness. Pack water purification tablets, a multi-tool, fire starters, and an emergency blanket. Navigation aids like a compass or map are vital when trails aren’t clear.
Remember the last time you got lost or caught in bad weather outdoors. What would have made that experience safer or easier? Your kit should help you stay calm and find your way back to safety.
Credit: appadvice.com
Frequently Asked Questions
What Items Are Essential For A Survival Kit?
A basic survival kit should include first-aid supplies, a flashlight, water purification tablets, a multi-tool, and emergency food. Additionally, consider a whistle, a space blanket, and a fire starter. Tailor your kit to your environment and personal needs for maximum effectiveness.
How Can I Make A Portable Survival Kit?
To create a portable survival kit, use a compact, waterproof container. Include essentials like a whistle, multi-tool, and compact first-aid supplies. Add water purification tablets and non-perishable snacks. Keep the kit lightweight for easy transport. Adjust the contents based on the environment and duration of your needs.
Why Is Water Purification Important In A Survival Kit?
Water purification is crucial to ensure safe drinking water in emergencies. Contaminated water can lead to illness, compromising survival. Use purification tablets or a portable filter to eliminate pathogens. A reliable purification method ensures you stay hydrated without risking health, making it a vital component of any survival kit.
How Often Should I Update My Survival Kit?
Review and update your survival kit every six months. Check expiration dates on food and first-aid supplies. Ensure all items are in good condition and replace any used or damaged components. Regular updates ensure your kit remains effective and ready for emergencies at any time.
Conclusion
Building a survival kit takes some time and thought. Choose items that suit your needs and environment. Keep it small, light, and easy to carry. Check and update your kit regularly. Practice using the tools inside. Being ready can make a big difference in emergencies.
Start with basics, then add what feels right. Stay safe and prepared every day.