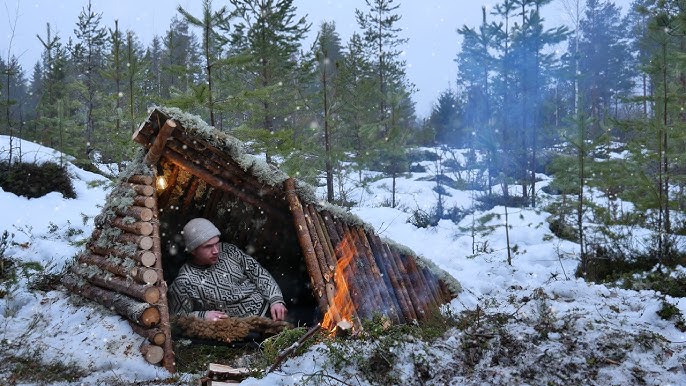
Imagine being caught in a snowy wilderness with no shelter to protect you from biting cold and harsh winds. You need a safe, warm place fast — and that’s where building a survival snow shelter becomes your most valuable skill.
You’ll learn simple, step-by-step techniques to create a shelter using just the snow around you. Whether you’re an outdoor enthusiast or preparing for emergencies, mastering this skill could save your life. Keep reading, because your safety and comfort in extreme conditions depend on what you do next.
Credit: www.bullmoosepatrol.com
Choosing The Right Location
Choosing the right location is key to building a strong snow shelter. The right spot makes your shelter safer and warmer. This section helps you pick the best place for your shelter. Focus on snow conditions, wind protection, and safety hazards.
Assessing Snow Conditions
Check the snow depth. You need enough snow to build a shelter. Soft, powdery snow is easier to shape. Hard or icy snow is tough to work with.
Look for stable snow. Avoid places with loose snow that can collapse. Pack the snow down to test firmness. Good snow holds its shape well.
Finding Natural Windbreaks
Find spots protected from strong wind. Trees, bushes, or large rocks can block wind. Position your shelter on the leeward side (the side away from the wind).
A natural windbreak reduces heat loss. It helps keep your shelter warm inside. Avoid open areas exposed to wind from all sides.
Avoiding Hazards
Stay away from avalanche zones. Avoid steep slopes and cornices. Look for signs of recent avalanches.
Do not build near unstable trees or branches. Snow can fall and cause injury. Avoid areas near frozen lakes or rivers with thin ice.
Gathering Essential Tools And Materials
Before you start building your snow shelter, gathering the right tools and materials is crucial. Without proper equipment, the process becomes much harder and less safe. You want to prepare efficiently so that your shelter stands strong and keeps you warm.
Basic Tools For Snow Shelter
At the very least, you need a sturdy snow shovel. This tool helps you dig out the snow quickly and shape your shelter. A compact snow saw or a strong knife can make cutting blocks of snow easier and more precise.
Having a reliable insulated mat or tarp is also essential. It keeps you off the cold ground and adds a layer of protection. Don’t forget a good headlamp or flashlight to work safely when light is low.
Additional Useful Items
Think about items that can make your shelter-building faster and more comfortable. A small folding saw or an ice axe can come in handy if the snow is hard-packed. Carry some cord or paracord to tie snow blocks or secure your shelter’s roof.
Warm gloves with good grip help you handle tools and snow blocks without losing dexterity. A thermos with hot water can keep you energized and focused during the work. Have you ever tried building without gloves? You’ll realize how much your hands freeze and slow you down.
Selecting The Shelter Type
Choosing the right shelter type is crucial for survival. Consider snow conditions and available resources. Different shelters offer varying levels of protection and warmth.
Selecting the right type of snow shelter is crucial for survival. Each type offers unique benefits and challenges. Understanding these can make a life-saving difference. Your choice depends on snow conditions, available time, and your skill level. Let’s explore three popular shelter types you can consider.Quinzhee
A quinzhee is a simple, dome-shaped shelter. It is made by piling snow and hollowing it out. This shelter is great for deep snow conditions. It provides good insulation from the cold. Building a quinzhee requires time and effort. Start by shoveling a large mound of loose snow. Let it settle for several hours. Then, dig out the interior carefully. Ensure the walls are thick for safety.Snow Cave
A snow cave offers excellent warmth and protection. It’s ideal in deep snow and hilly areas. Begin by digging into a snowbank or drift. Carve out a tunnel leading to a small chamber. Keep the entrance lower than the sleeping area. This helps trap warm air inside. Snow caves are quick to build but need stable snow. Check for weak spots to prevent collapse.Igloo
An igloo is a traditional snow shelter. It’s best in areas with compacted snow. Building an igloo takes skill and patience. Cut blocks of snow using a saw or knife. Arrange them in a circular pattern, spiraling upward. The structure’s dome shape distributes weight evenly. An igloo can last for weeks with proper construction. It offers superb insulation and can house several people.Preparing The Snow
Preparing the snow is a key part of building a strong survival shelter. It creates a safe and stable base. The snow must be firm enough to hold weight. Soft or loose snow can collapse easily. Taking time to prepare the snow improves shelter safety and comfort.
Snow Compaction Techniques
Compact the snow to make it dense and stable. Use your boots or hands to press the snow down. Step firmly and evenly over the area. Repeat this several times to remove air pockets. Dense snow holds heat better and supports the shelter walls. Avoid compacting too quickly, or the snow may crack.
- Clear loose snow on the surface.
- Stamp down snow with strong, steady pressure.
- Use a flat shovel to press snow tight.
- Build several layers of compacted snow.
Testing Snow Stability
Test the snow’s firmness before building. Push a stick or ski pole vertically into the snow. If it sinks easily, the snow is too soft. Try compacting more until the pole stays firm. Walk around the area and listen for cracking sounds. Avoid areas with thin snow or ice layers below.
- Check for even firmness across the site.
- Look for signs of snow shifting or sliding.
- Ensure the snow supports your weight without sinking.
- Choose a spot free from hazards like avalanches.
Building The Shelter Structure
Building the shelter structure is the most important part of creating a survival snow shelter. It provides protection from cold winds and keeps you warm. Proper construction ensures the shelter is strong and safe. Focus on clear steps to make the process easier and more efficient.
Marking The Shelter Outline
Start by choosing a flat, stable area with deep snow. Use a stick or shovel to draw a clear outline on the snow. The shape should be round or oval to resist wind pressure. Make the outline about 6 feet wide and 7 feet long for enough space.
Constructing Walls And Roof
Cut snow blocks carefully using a saw or sharp tool. The blocks should be dense and firm to hold weight. Stack the blocks in a circular pattern, leaning inward for a dome shape. Leave a small hole at the top for ventilation. Smooth the inside walls with snow to close gaps.
Creating An Entrance
Dig a small tunnel entrance facing away from the wind. Make the entrance lower than the shelter floor to trap warm air inside. Build a snow block door or cover it with a tarp. Keep the entrance narrow to reduce cold air entering the shelter.

Credit: www.youtube.com
Improving Shelter Comfort
Improving the comfort of your snow shelter can make a big difference in how well you rest and stay warm. Small adjustments inside your shelter can reduce moisture, keep cold air out, and create a cozy space to recover your energy. Let’s look at practical ways to boost your shelter’s comfort so you can survive longer and feel better.
Ventilation Methods
Ventilation is key to preventing carbon dioxide buildup and reducing condensation inside your shelter. You need to allow fresh air to enter without letting cold wind blow directly on you.
- Drill a small hole near the top of the shelter to let stale air escape.
- Leave a slight gap at the entrance covered by a snow block or tarp to block wind but allow airflow.
- Use a ski pole or stick to prop open a small vent space if the snow walls are thick.
Have you noticed how stuffy it feels in a tent without vents? Your snow shelter is no different. Proper airflow keeps breathing comfortable and reduces moisture buildup that can freeze on your gear.
Insulating The Interior
Adding insulation inside the shelter prevents body heat from escaping into the cold snow walls. This step can raise the temperature inside by several degrees, making a huge difference.
- Use pine boughs, dry leaves, or a sleeping pad to line the floor and walls.
- Place extra clothing or gear along the walls to add another barrier against cold.
- Bring a reflective emergency blanket to line the interior for added warmth.
On one trip, I used pine branches to cover the floor and it felt noticeably warmer. It’s simple but effective. What natural materials can you find around you to boost insulation?
Adding A Sleeping Platform
Sleeping directly on snow drains your body heat quickly. Building a raised platform keeps you off the cold ground and improves comfort.
- Stack snow blocks or use available branches to create a flat bed frame inside.
- Cover the platform with insulating materials like pine boughs or foam pads.
- Make sure the platform is stable and large enough to stretch out comfortably.
During a winter hike, I built a simple platform using nearby branches and snow blocks. It kept me much warmer and helped me rest better. How can you use the materials around you to lift your sleeping area off the cold snow?
Safety Tips During Construction
Building a survival snow shelter demands not only skill but also a sharp focus on safety. Mistakes during construction can lead to dangerous situations that put your well-being at risk. Here’s how you can protect yourself while creating a reliable shelter in the snow.
Avoiding Collapse Risks
Snow shelters rely on packed snow blocks or compacted snow to hold their shape. If the walls or roof are too thin or uneven, they may collapse under pressure. Always build walls at least 12 to 18 inches thick to support the roof’s weight safely.
Use a snow saw or shovel to shape blocks carefully, ensuring they fit snugly together without gaps. Test the strength by gently pressing on the walls before entering. If you hear cracking sounds or see movement, reinforce the structure immediately.
Maintaining Airflow
It’s easy to overlook ventilation when focusing on warmth. However, a sealed snow shelter can trap carbon dioxide and reduce oxygen levels dangerously. Create a small ventilation hole near the roof to allow fresh air in and stale air out.
Check the airflow regularly, especially if you’re using a stove or candle inside. You can feel for fresh air movement or use a lightweight piece of fabric to spot drafts. Keeping airflow steady prevents suffocation risks and keeps the shelter comfortable.
Monitoring Weather Changes
Weather conditions can shift quickly in snowy environments, affecting your shelter’s safety. Rising temperatures might soften snow walls, increasing collapse risk. Sudden storms can pile new snow on top, adding extra weight.
Stay alert by checking weather updates if possible, or by observing the sky and wind changes. Adjust your shelter accordingly—dig out excess snow from the roof or reinforce weakened areas. Being proactive can mean the difference between safety and danger.

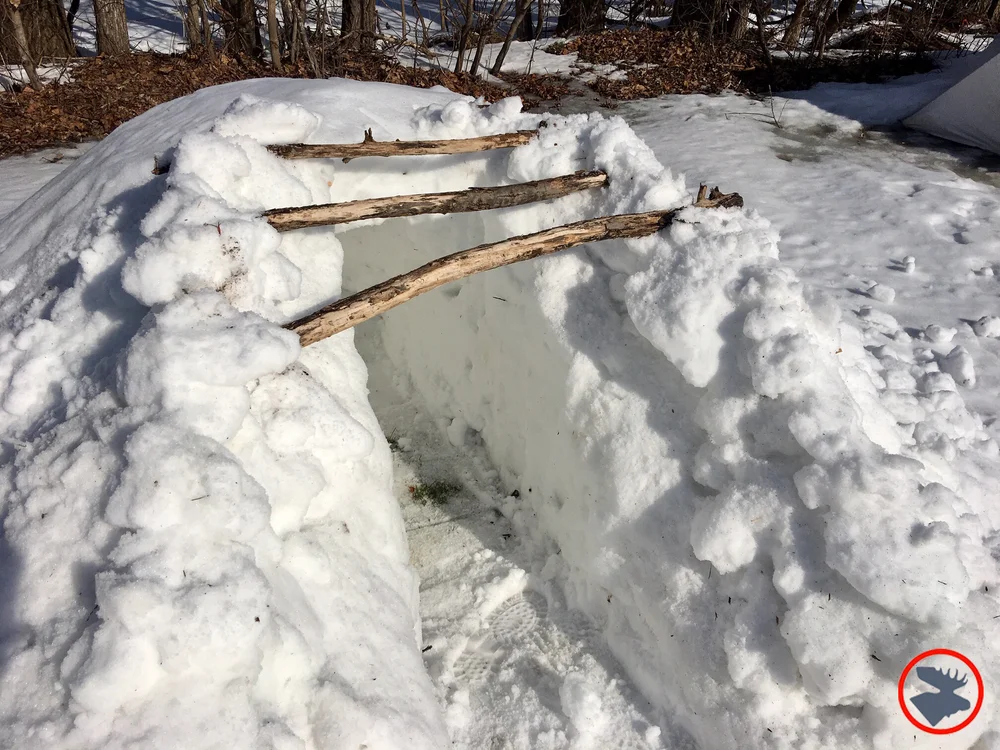
Credit: www.bullmoosepatrol.com
Maintaining The Shelter
Maintaining your survival snow shelter is just as important as building it. A well-kept shelter can be the difference between staying warm or facing harsh conditions. Paying attention to small details helps keep the structure safe and comfortable throughout your stay.
Repairing Damage
Snow shelters can develop cracks or holes as temperatures change or wind blows. Check your shelter regularly for any damage, especially around the entrance and roof. Patch small cracks by packing fresh snow firmly into the gaps to restore insulation quickly.
If you find larger holes, use blocks of snow or ice to fill them. Press these blocks tightly against the damaged area and smooth the edges to prevent drafts. Have a small shovel or snow saw handy to reshape or cut replacement blocks as needed.
Have you noticed how a tiny hole can cause a big chill? Fixing these early keeps cold air out and warmth in. Don’t wait until the damage grows or the cold penetrates your shelter.
Managing Snow Accumulation
Snow buildup on your shelter can be heavy and cause collapse if ignored. Periodically remove excess snow from the roof using a broom or your hands. Be gentle to avoid damaging the structure beneath.
Clear snow around the entrance too, so it doesn’t block airflow or make getting in and out difficult. Creating a small trench or tunnel at the entrance helps direct melting snow away and prevents water from seeping inside.
Think about the last time snow piled up on your shelter—did you feel safer or worried? Staying proactive with snow removal keeps your shelter strong and your mind at ease. It also prevents water damage when the snow starts melting.
Survival Tips Inside The Shelter
Surviving in a snow shelter requires more than just building it. Knowing how to stay safe and healthy inside is vital. These survival tips help keep your body strong and your mind clear during harsh winter conditions.
Keeping Warm
Heat retention inside the shelter is essential. Use layers of clothing to trap body heat. Avoid sweating, which causes chill when wet.
- Insulate the floor with pine boughs or a sleeping pad.
- Seal gaps in the shelter walls to block cold air.
- Keep your head covered to reduce heat loss.
- Avoid direct contact with snow surfaces.
Staying Hydrated
Water is critical even in cold environments. Melt snow for drinking but never eat it directly; it lowers body temperature.
- Use a container to melt snow near a heat source.
- Drink small amounts frequently to stay hydrated.
- Keep water containers inside the shelter to prevent freezing.
Emergency Signals
Signaling for help increases rescue chances. Make visible signs outside the shelter using bright materials or patterns in the snow.
- Create large SOS letters with rocks or branches.
- Use a whistle or mirror to attract attention.
- Light a small fire or use a flashlight at night if safe.
Frequently Asked Questions
What Materials Are Needed To Build A Snow Shelter?
You need a snow shovel, sturdy snow blocks, and a small saw or knife. Use compact snow for stability. Carry an insulated sleeping pad for ground insulation. Always have proper winter clothing and emergency supplies.
How Do I Choose The Best Location For A Snow Shelter?
Pick a flat area sheltered from wind, ideally near trees. Avoid avalanche-prone slopes and open ridges. Check snow depth and consistency. Ensure easy access and a safe exit route. Location affects warmth and safety.
How Long Does It Take To Build A Snow Shelter?
Building a basic snow shelter takes about 1 to 3 hours. Time varies by shelter type, snow quality, and your experience. Plan extra time for insulation and ventilation. Practice beforehand to improve speed and efficiency.
Can I Stay Warm Inside A Snow Shelter?
Yes, snow shelters trap body heat and block wind. Use an insulated sleeping pad and warm clothing. Ventilate slightly to avoid moisture buildup. Body heat and snow insulation can keep temperatures just below freezing.
Conclusion
Building a snow shelter can save your life in cold conditions. Choose a safe spot with stable snow. Use simple tools and follow clear steps to make the shelter strong. Keep the entrance small to hold warmth inside. Practice this skill before you need it.
Staying warm and protected helps prevent frostbite and hypothermia. Remember, safety depends on good preparation and careful work. Snow shelters are useful for hikers, campers, and anyone in winter wilderness. Try building one in a controlled setting first. You will gain confidence and stay safer outdoors.