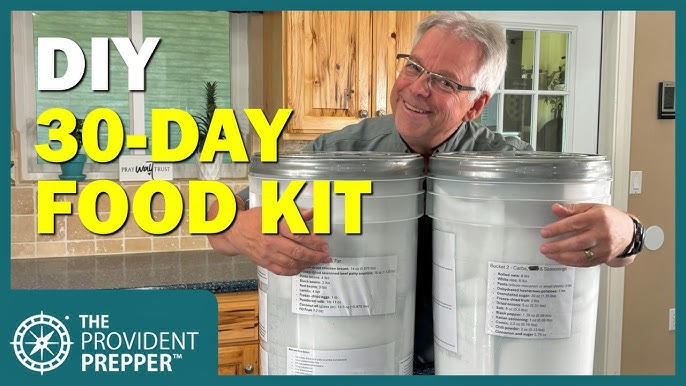
Imagine being prepared for any emergency, knowing you have enough food to keep you going. Making your own food survival kit is easier than you think, and it can give you peace of mind when the unexpected happens.
In this guide, you’ll discover simple steps to create a kit tailored to your needs, using items you can trust. By the end, you’ll feel confident and ready to face any situation. Ready to take control of your safety? Let’s get started.
Choosing The Right Container
Choosing the right container for your food survival kit is a crucial step that can affect the longevity and safety of your supplies. The container must protect your food from moisture, pests, and physical damage while being easy to carry and store. Think about where you will keep your kit and how often you might need to access it.
Durability And Material
Pick a container made from strong materials like heavy-duty plastic, metal, or thick silicone. These materials resist cracking and breaking, especially when exposed to rough handling or harsh environments.
Metal containers, like stainless steel, are excellent for keeping out light and pests, but they might be heavier to carry. Plastic containers should be BPA-free and airtight to keep moisture and contaminants out.
Size And Portability
Consider how much food you want to store and how portable your kit needs to be. A container that is too large might be hard to carry during an emergency, while one that is too small won’t hold enough supplies.
Think about your daily routine and how you might transport the kit. Could you comfortably carry it in a backpack? Would a compact, stackable container work better for your storage space?
Airtight And Waterproof Features
Keeping your food dry and fresh is key. Look for containers with airtight seals or gasket lids that prevent air and water from getting in.
Waterproof containers protect against rain and spills. You don’t want your food spoiled by unexpected moisture, so test the seal by adding water and shaking the container before you pack it.
Ease Of Access And Organization
Your container should allow quick and easy access to food items without creating a mess. Containers with compartments or stackable trays can help you keep different foods organized and easy to find.
Would you prefer a container with a wide opening to grab items quickly? Or do you need multiple smaller containers to separate dry goods from canned foods?

Credit: backpackerspantry.com
Essential Non-perishable Foods
Essential non-perishable foods form the backbone of any food survival kit. These foods last long without refrigeration. They provide necessary energy and nutrients during emergencies. Choosing the right items ensures you stay nourished and healthy. Focus on foods that store well and offer variety.
Canned Goods
Canned goods are a top choice for survival kits. They have a long shelf life and come in many varieties. Canned vegetables, beans, and meats supply vital vitamins and protein. Look for cans with easy-open lids. Store them in a cool, dry place to prevent rust and spoilage.
Dried Foods
Dried foods remove moisture to extend shelf life. Common dried foods include pasta, rice, and lentils. They are lightweight and easy to store. Dehydrated fruits and nuts provide quick energy and essential fats. Keep dried foods in airtight containers to avoid pests and moisture.
Freeze-dried Options
Freeze-dried foods retain nutrients and flavor very well. These foods rehydrate quickly with water. Popular freeze-dried choices include fruits, vegetables, and full meals. They are lightweight and compact, ideal for small spaces. Freeze-dried foods often last 20 years or more if sealed properly.
Water Storage And Purification
Water is the most essential item in any survival kit. Without clean and safe water, your chances of staying healthy and alert drop significantly. Storing water correctly and knowing how to purify it can make a huge difference when you’re in a pinch.
Bottled Water
Keeping a supply of bottled water is the simplest way to ensure you have safe drinking water. Choose bottles made from BPA-free plastic or glass to avoid harmful chemicals leaching into the water over time.
Store your bottles in a cool, dark place to prevent bacterial growth and preserve freshness. Always check expiration dates and rotate your stock every six months to keep the water drinkable.
Water Filters
A good water filter can remove bacteria, protozoa, and even some viruses from natural water sources. Portable filters like straw or pump types are compact and easy to use on the go.
Look for filters with a pore size of 0.1 to 0.3 microns for effective filtration. Remember, not all filters remove viruses, so you might need an additional purification step.
Purification Tablets
Water purification tablets are a lightweight backup that you can carry anywhere. They kill bacteria and viruses quickly, making water safe to drink in minutes.
Follow the instructions carefully regarding dosage and wait times. Tablets can leave a slight taste, but adding a small amount of lemon juice or flavor drops can improve the flavor.
Nutritional Considerations
Planning a food survival kit requires careful thought about nutrition. Your body needs energy and nutrients to stay strong. Choosing the right foods helps maintain health in tough times. Focus on calorie content, vitamins, and minerals. Also, consider any special dietary needs to avoid problems.
Caloric Needs
Calories provide energy to keep your body working. Survival situations demand enough calories to support activity and stress. Include foods that offer high calories in small packages. Examples:
- Nuts and seeds
- Dried fruits
- Energy bars
- Peanut butter
Aim for a balance of carbohydrates, proteins, and fats. This mix helps maintain energy levels longer.
Vitamins And Minerals
Vitamins and minerals keep the immune system strong. They help heal wounds and prevent illness. Pack foods rich in:
- Vitamin C: dried citrus, powdered supplements
- Vitamin A: dried carrots, sweet potatoes
- Iron: canned beans, fortified cereals
- Calcium: powdered milk, nuts
Consider adding a multivitamin to cover any gaps.
Special Dietary Requirements
Some people need specific diets. Allergies or health conditions affect food choices. Common needs include:
- Gluten-free options for celiac disease
- Low-sodium foods for blood pressure
- Vegetarian or vegan items
- Diabetic-friendly snacks
Label all foods clearly. This prevents accidental eating of harmful ingredients.
Incorporating Comfort Foods
Incorporating comfort foods into your food survival kit makes tough times easier. These familiar tastes bring emotional relief and boost morale. Comfort foods provide not just nutrition but also a sense of normalcy.
Choosing the right comfort foods helps maintain mental strength during emergencies. Pack foods that are easy to prepare and store long-term. Think about your favorite snacks and meals that lift your spirits.
Choosing Long-lasting Comfort Foods
Opt for foods with a long shelf life to avoid spoilage. Examples include:
- Instant oatmeal packets
- Canned soups and stews
- Peanut butter jars
- Dried fruits and nuts
- Hard candies or chocolate
These items stay fresh and offer a familiar taste during stressful times.
Balancing Nutrition With Comfort
Comfort foods should also provide essential nutrients. Combine energy-dense snacks with vitamins and minerals. For example, pair peanut butter with dried fruit for protein and fiber.
Choose options low in sugar and salt to maintain health. This balance keeps your body strong and your mind calm.
Packaging And Storage Tips
Use airtight containers to keep comfort foods fresh. Vacuum-sealed bags and mason jars work well. Label each item with the packing date for easy rotation.
Store foods in a cool, dry place away from sunlight. Proper storage extends shelf life and preserves taste.
Personalizing Your Comfort Food Kit
Include foods that remind you of home or happy moments. Small treats can boost morale during isolation. Consider family favorites or cultural snacks.
Ask family members about their favorite comfort foods. Personal touches make your survival kit feel more supportive.

Credit: trueprepper.com
Tools And Utensils
Having the right tools and utensils in your food survival kit is crucial. They help you prepare, cook, and eat food safely. Choosing compact, durable, and multi-purpose items saves space. This makes your kit efficient and reliable during emergencies.
Can Openers
Many survival foods come in cans. A good can opener is essential. Manual ones are best because they don’t need batteries. Look for a compact, lightweight model. Some multi-tools include a can opener feature. This adds convenience and saves space.
Cooking Gear
Cooking gear helps turn raw or canned food into meals. Include a small camping stove or portable burner. Lightweight pots and pans made of aluminum or stainless steel work well. A heat-resistant glove protects your hand from burns. Collapsible or nesting cookware saves room in your kit.
Eating Utensils
Eating utensils are often overlooked but vital. Pack a sturdy spoon, fork, and knife. Choose utensils made from durable materials like stainless steel or BPA-free plastic. A spork combines spoon and fork in one tool, reducing bulk. Don’t forget a small cutting board if space allows.
Storage Tips And Shelf Life
Proper storage plays a crucial role in extending the shelf life of your food survival kit. Without the right conditions, even the best-prepared supplies can spoil or lose their nutritional value. Paying close attention to how you store your food ensures that it remains safe and ready when you need it most.
Temperature Control
Keep your food survival kit in a cool, dry place away from direct sunlight. High temperatures can speed up spoilage and degrade nutrients quickly.
Ideally, maintain storage temperatures between 50°F and 70°F (10°C to 21°C). Avoid areas prone to temperature fluctuations, like garages or near heating vents.
Think about your own kitchen: have you noticed how bread goes stale faster when left near a warm stove? That’s the same principle affecting your survival food.
Rotation And Inventory
Regularly rotate your food supplies to use older items first. This prevents waste and keeps your kit fresh.
Keep an inventory list outside your storage container. Update it whenever you add or remove items to stay organized.
- Place newly purchased items at the back.
- Move older items to the front for easy access.
- Check your stock every 3-6 months to adjust as needed.
Have you ever thrown away food because it was forgotten at the bottom of a shelf? Rotation solves that problem completely.
Expiration Date Monitoring
Track expiration dates closely to avoid surprises during an emergency. Some canned goods last years, but others have shorter shelf lives.
| Food Type | Typical Shelf Life |
|---|---|
| Canned vegetables and fruits | 1-2 years |
| Dried beans and lentils | 2-3 years |
| Freeze-dried meals | 10-25 years |
| Rice (white) | 4-5 years |
Mark expiration dates clearly with a permanent marker if they are hard to read. Set reminders on your phone or calendar to check dates regularly.
Ask yourself: If you needed to use your kit tomorrow, would every item still be safe to eat?
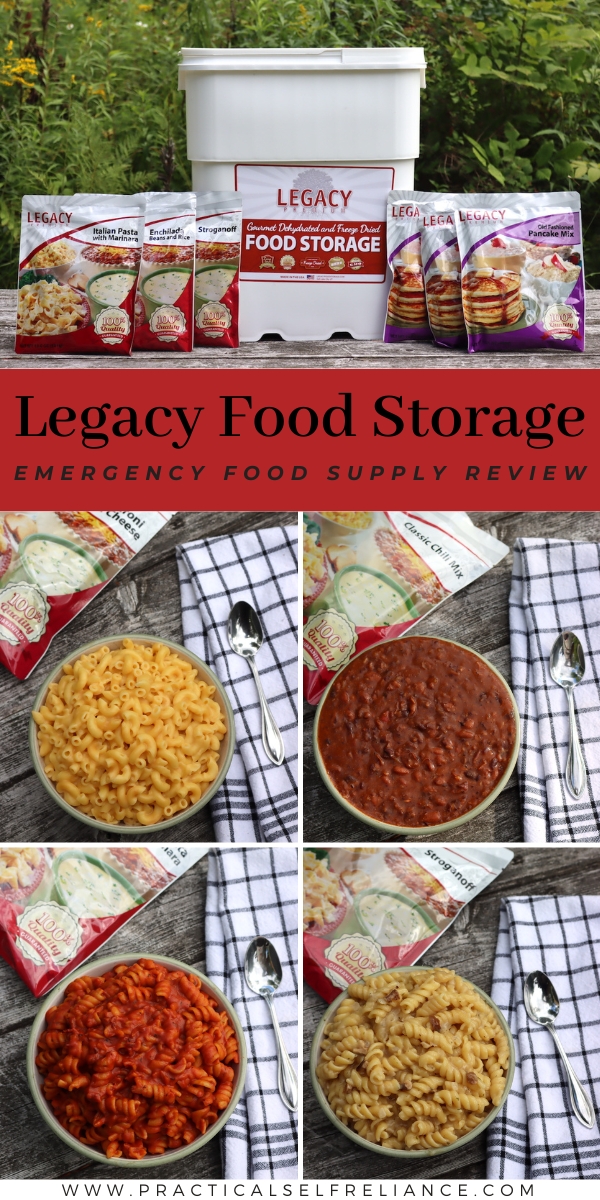
Credit: practicalselfreliance.com
Personalizing Your Kit
Personalizing your food survival kit ensures it meets your specific needs, making it more effective and easier to use in an emergency. It’s not just about packing food; it’s about packing the right food that everyone in your group will actually eat and tolerate. Think about what makes your family unique and how you can prepare your kit to reflect those differences.
Family Preferences
Everyone has different tastes and energy needs. Some family members might prefer snacks over full meals, while others may need high-protein options to stay energized. Take time to list out favorite foods and snacks that are easy to store and have a long shelf life.
For example, my kids love granola bars and dried fruit, so I always include a variety of those in our kit. My partner prefers savory items like canned beans or jerky. By catering to these preferences, you make sure everyone will actually eat the food during stressful times.
- Ask family members what they would want in a survival situation.
- Choose foods that require minimal preparation.
- Include familiar comfort foods to boost morale.
Allergy Considerations
Ignoring allergies can turn your survival kit into a hazard. If someone in your group has food allergies, it’s critical to keep those foods out of the kit completely. Cross-contamination can be dangerous, so store allergy-safe foods separately and clearly label them.
I once prepared a kit without considering my nephew’s nut allergy. It was a tough lesson when he had a reaction because some snacks were stored together. Now, I keep allergy-friendly foods in a separate, sealed container and always double-check ingredient lists before buying.
- Identify all allergies and intolerances in your group.
- Label foods clearly to avoid confusion.
- Include alternative nutrient sources to replace allergenic foods.
What small steps can you take today to make your survival kit safer and more personalized? This attention to detail could be the difference between a stressful or manageable emergency.
Maintaining Your Kit
Maintaining your food survival kit keeps it reliable and ready for emergencies. Regular care prevents spoilage and ensures all items work well. Set a routine to review your kit’s condition and update it as needed.
Regular Check-ups
Check your food kit every three to six months. Look for damaged packaging, moisture, or pests. Confirm that containers are sealed tight. Inspect water bottles for leaks or cloudiness. Test any tools or equipment inside to ensure they function properly.
Replacing Expired Items
Expired food can lose nutrition and taste. Remove all items past their expiration dates. Replace them with fresh supplies. Choose foods with long shelf lives for easy rotation. Label new items with the date added. This habit keeps your kit fresh and nutritious.
Emergency Kit Checklist
Creating a food survival kit means being ready for unexpected situations where access to food might be limited. An emergency kit checklist helps you gather the right items without missing anything essential. It ensures your kit is practical, balanced, and tailored to your needs.
Non-perishable Food Items
Choose foods that last long without refrigeration. Canned beans, dried fruits, nuts, and rice are reliable options. You’ll want a mix of protein, carbohydrates, and fats to keep your energy up.
- Canned tuna or chicken
- Peanut butter or nut butters
- Instant oatmeal packets
- Energy bars or granola bars
- Dried fruits like apricots or raisins
Water And Hydration Supplies
Water is more important than food in an emergency. Pack enough bottled water for at least three days. Consider adding water purification tablets or a portable filter to your kit.
- Bottled water (1 gallon per person per day)
- Water purification tablets
- Portable water filter (like a LifeStraw)
- Collapsible water containers
Having the right tools makes it easier to prepare and eat your emergency food. A can opener, lightweight utensils, and a portable stove can make a big difference. Think about what you’d need to cook or reheat food without electricity.
- Manual can opener
- Reusable utensils and plates
- Portable camping stove or small burner
- Fuel for the stove
- Firestarter or waterproof matches
Special Dietary Needs
If you or your family members have allergies or dietary restrictions, include suitable food options. Gluten-free snacks, low-sodium items, or baby food can be essential. Don’t forget any medications or supplements related to diet.
- Allergy-friendly snacks
- Specialty diet meal packets
- Baby formula or baby food
- Necessary vitamins or supplements
Packaging And Storage
Use airtight containers or vacuum-sealed bags to keep food fresh and safe. Label items with expiration dates and rotate your stock every six months. A sturdy backpack or container will protect your kit and make it easy to grab in a hurry.
- Vacuum-sealed bags
- Airtight plastic containers
- Waterproof labels and marker
- Durable storage container or backpack
Frequently Asked Questions
What Essential Items Should Be In A Food Survival Kit?
A food survival kit must include non-perishable food, water, a manual can opener, and basic utensils. Include energy bars, dried fruits, and canned goods. These items ensure nutrition and hydration during emergencies, providing long shelf life and easy preparation.
How Long Can Homemade Food Kits Last?
Properly stored food kits can last 6 months to several years. Use airtight containers and store in cool, dark places. Regularly check expiration dates and rotate supplies to maintain freshness and safety.
How Do I Choose The Best Food For Survival Kits?
Select high-calorie, nutrient-dense, non-perishable foods. Prioritize items like canned beans, nuts, dried fruits, and freeze-dried meals. Consider dietary restrictions and ease of preparation to ensure suitability in emergencies.
Can I Include Fresh Food In A Survival Kit?
Fresh food is not recommended due to short shelf life. Focus on dried, canned, or freeze-dried options for long-term storage. Fresh food can spoil quickly, making it unreliable for survival situations.
Conclusion
Creating your own food survival kit takes time and care. Choose foods that last long and give good energy. Pack items that are easy to prepare and store. Check your kit often to keep it fresh and ready. Being prepared helps you stay safe in emergencies.
Start building your kit today for peace of mind. Small steps now can make a big difference later. Stay safe, stay ready.