When disaster strikes or you find yourself in the wild, knowing where to build a survival shelter can make all the difference between safety and danger. You need a spot that protects you from harsh weather, keeps you hidden from threats, and offers easy access to resources.
But how do you choose the perfect location when every second counts? You’ll discover simple, practical tips to find the best place for your shelter—so you can stay safe, comfortable, and ready for whatever comes next. Keep reading, because your survival could depend on it.
Key Factors For Shelter Location
Choosing the right location for a survival shelter is critical for safety and comfort. The site affects your ability to find water, stay warm, and avoid dangers. Several key factors help select a spot that supports survival needs. Consider these elements carefully to improve your chances in the wild.
Access To Water
Water is essential for drinking, cooking, and hygiene. Select a site near a fresh water source like a stream, river, or lake. Ensure the water is clean and easy to reach. Avoid places where water collects and becomes stagnant. Always plan a way to purify water before use.
Natural Protection
Natural barriers shield your shelter from weather and threats. Look for dense trees, rocks, or hills that block wind and rain. These features reduce exposure and help maintain warmth. They also provide camouflage from animals or other people. Use nature’s defenses to boost your shelter’s security.
Terrain And Elevation
Flat, stable ground is best for building a shelter. Avoid low areas prone to flooding after rain. Higher ground offers better drainage and fewer insects. Check for solid soil or rock to support your shelter structure. Steep slopes can be dangerous and hard to build on.
Sunlight And Wind Exposure
Sunlight warms your shelter and helps dry clothes or gear. Choose a spot that receives morning sun to heat the shelter early. Avoid areas exposed to strong, cold winds. Use natural windbreaks or build walls to block prevailing winds. Balance sunlight and wind for comfort and energy savings.

Credit: www.youtube.com
Ideal Natural Settings
Choosing the right natural setting for a survival shelter is vital. The environment impacts safety, comfort, and resource availability. Natural features can protect from weather and provide materials. Picking a location with these benefits improves your chances of staying safe and dry.
Forested Areas
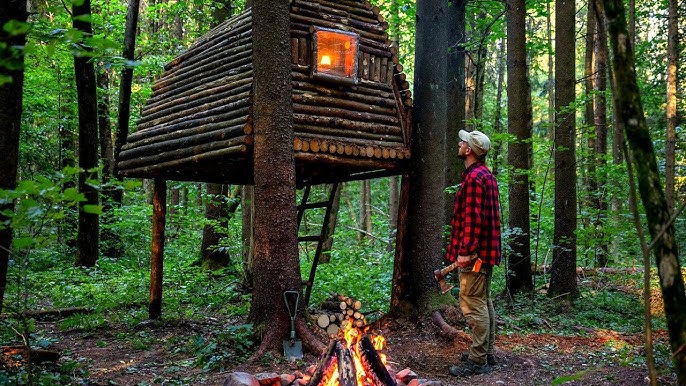
Forests offer abundant shelter materials like branches and leaves. Trees provide shade and wind protection. The dense canopy helps keep rain off your shelter. Forest floors are softer, making sleeping easier. Watch for dead trees that could fall. Find a spot away from animal trails and insect nests.
Near Water Bodies
Water is essential for drinking, cooking, and cleaning. Rivers, lakes, and streams supply fresh water nearby. Choose a spot slightly above the waterline to avoid flooding. Water attracts animals, so stay alert. Avoid setting up too close to prevent insects and moisture problems. Good drainage and safe access are key.
Rocky Outcrops
Rocks create natural windbreaks and shield from rain. They also offer stable ground for building a shelter. Use rocks to build walls or support roofs. The terrain may be uneven, so find a flat area nearby. Rocky sites often have fewer insects. Beware of loose stones that can fall or shift.
Caves And Overhangs
Caves and rock overhangs provide ready-made shelters. They protect well against wind, rain, and sun. These spots stay warmer in cold weather. Check for signs of animals before settling. Ensure the entrance is safe and not prone to flooding. Use natural features to block wind and create privacy.
Avoiding Dangerous Spots
Choosing the right spot for a survival shelter is vital. Avoiding dangerous locations keeps you safe and increases your chances of staying comfortable. Some areas pose hidden threats that can cause trouble or harm. Knowing which spots to avoid helps you pick a secure place.
Flood Zones
Flood zones are risky areas near rivers, lakes, or low ground. Rain or melting snow can cause sudden floods. Water can ruin your shelter and gear. Avoid valleys and places that collect water fast. Look for higher ground to stay dry and safe.
Animal Trails
Animal trails are paths wild animals use often. Building on these trails invites unwanted visitors. Dangerous animals may come close at night. Avoid spots with fresh tracks or droppings. Choose quiet places away from animal routes to reduce risks.
Unstable Ground
Unstable ground includes loose soil, steep slopes, or rocky areas. It can shift or collapse under weight. This puts your shelter and safety at risk. Check for firm, flat ground to build on. Avoid areas with cracks, loose rocks, or soft mud.
Exposed Ridges
Exposed ridges are high places with little cover. They face strong winds and storms directly. Building here can make your shelter cold and shaky. Lightning strikes happen more on ridges. Find shelter behind trees or hills for protection.
Urban And Suburban Shelter Sites
Urban and suburban areas offer unique spots for building survival shelters. Space is limited, but many places provide protection and cover. Choosing the right spot is key to staying safe and hidden.
Abandoned Buildings
Old, empty buildings can be good shelter options. They often have walls and roofs intact. These structures protect from weather and provide privacy. Check for stability before entering. Avoid places with broken glass or weak floors. Look for buildings with locked doors or windows you can secure. Watch for signs of other people or animals living inside.
Basements And Underground
Basements offer natural protection from storms and temperature changes. Underground spaces keep you hidden from view. They can be warm in winter and cool in summer. Make sure there is proper ventilation to avoid bad air. Keep an eye out for flooding risks. A dry basement is safer and more comfortable. Stock basic supplies and create an exit plan.
Parks And Green Spaces
Parks and green spaces provide natural cover and open areas. Trees and bushes help you stay hidden. Choose spots away from main paths and playgrounds. Look for dense vegetation to block sight lines. Stay near water sources if possible. Be careful of park security or patrols. Use natural materials to build camouflage shelters. These areas offer fresh air and a quiet environment.
Seasonal Considerations
Choosing the right spot for your survival shelter means thinking about the season you’re facing. Each season brings unique challenges that affect shelter design, location, and materials. Understanding these seasonal considerations can keep you safe and comfortable no matter the weather.
Cold Weather Shelters
In freezing temperatures, your shelter must block wind and retain heat. Look for natural windbreaks like dense evergreen trees or rocky outcrops. Avoid low spots where cold air sinks and gathers overnight.
Insulating your shelter is crucial. Use layers of leaves, pine needles, or snow for insulation. A small, compact shelter helps trap body heat better—think of a tight dome shape rather than a wide, open structure.
Have you ever felt the sting of biting wind after a long day? Building your shelter with the wind direction in mind can prevent that discomfort. Position the entrance away from prevailing winds to keep the cold blast outside.
Hot Climate Shelters
In hot environments, your shelter’s priority shifts to ventilation and shade. Seek out natural shade under large trees or rock formations to reduce direct sun exposure. Avoid open areas where the sun beats down relentlessly.
Elevate your shelter floor if possible. This allows air to circulate underneath, helping to cool the space. Use breathable materials like tarps or light fabrics instead of heavy, heat-trapping walls.
Think about how you can maximize airflow. Leaving openings or mesh windows can prevent heat buildup. Have you noticed how a gentle breeze can make a big difference on a hot day? Your shelter should capture that breeze, not block it.
Rainy Season Adjustments
Water management is key when rain is constant. Choose higher ground to avoid flooding or pooling water around your shelter. Check the slope of the land to ensure rainwater naturally flows away.
Use waterproof materials or add a tarp roof with a steep pitch to shed water quickly. Creating a small trench around your shelter can divert water away, preventing soggy floors and damp gear.
Ever been caught in a downpour and wished for a dry spot? Your shelter’s entrance should face away from the wind-driven rain. Adding an extended porch or vestibule gives you a dry area to store gear and take off wet clothes without soaking the inside.

Credit: www.youtube.com
Tools And Techniques For Site Selection
Choosing the right spot for a survival shelter is crucial. It affects safety, comfort, and how well the shelter holds up. Using the correct tools and techniques helps find the best location quickly and with less effort.
These tools guide navigation and help assess the terrain. Techniques like scouting and marking sites keep the process organized. They ensure you select a place that offers protection from weather and other dangers.
Using A Compass And Map
A compass and map are essential for precise site selection. The compass shows direction, helping to avoid risky areas like steep slopes or flood zones. The map reveals landmarks such as rivers, hills, and trails.
Combine both tools to pinpoint safe, flat, and dry locations. Check the sun’s path and wind direction to position your shelter wisely. This preparation minimizes surprises and maximizes shelter effectiveness.
Scouting And Reconnaissance
Walk through the area to gather firsthand information. Look for natural features that provide shelter from wind and rain. Notice ground quality—avoid low spots where water collects.
Scan for resources like firewood, water, and building materials. Observe animal activity and insect presence to avoid hazards. Take notes or photos to compare potential sites later.
Marking And Revisiting Sites
Mark promising locations with visible signs like stones or sticks. This prevents losing good spots during exploration. Revisit these marks to check conditions at different times of day.
Testing the ground and surroundings again helps confirm the best choice. Use a GPS device or write down coordinates to find sites easily. This method ensures a well-informed decision for your shelter’s site.

Credit: www.youtube.com
Frequently Asked Questions
Where Is The Best Location To Build A Survival Shelter?
Choose a dry, elevated area with natural wind protection. Avoid flood zones and dense vegetation. Proximity to water and resources is key for survival and convenience.
How Far Should A Survival Shelter Be From Water Sources?
Build your shelter 200 to 300 feet away from water. This distance reduces flooding risk and insect problems while keeping water access manageable for daily use.
What Natural Features Help In Choosing Shelter Sites?
Look for natural windbreaks like trees or rocks. Sun exposure for warmth and flat ground for stability also improve shelter comfort and safety.
Can Survival Shelters Be Built In Snowy Environments?
Yes, but choose sites with natural wind protection and stable snow layers. Insulating snow walls and elevated floors help maintain warmth in cold conditions.
Conclusion
Choosing the right place to build a survival shelter is key. Find a spot safe from floods and wind. Look for natural cover like trees or rocks. Make sure the ground is flat and dry. Avoid areas with too many insects or animals.
Keep water sources nearby but not too close. A good shelter helps you stay warm and safe. Remember, planning your shelter well can save your life. Stay calm and think about your environment. Your safety depends on smart choices.


