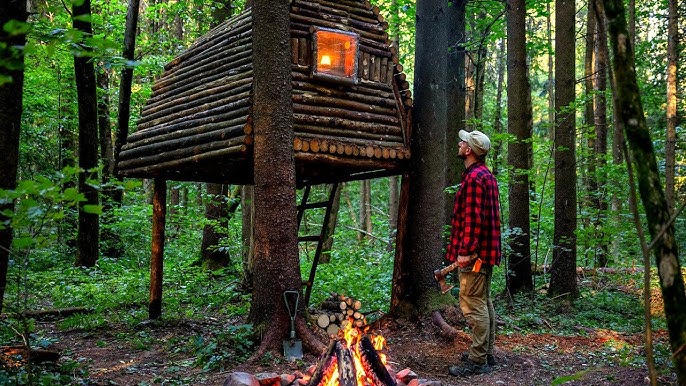
Imagine finding yourself in the wild with no shelter to protect you from rain, wind, or cold. What would you do?
Knowing how to build a survival shelter can be the difference between staying safe and facing serious danger. In this guide, you’ll learn simple, step-by-step methods to create a strong shelter using materials around you. Whether you’re a beginner or just want to be prepared, this knowledge could save your life.
Keep reading, and discover how easy it is to protect yourself when it matters most.

Credit: www.youtube.com
Choosing The Right Location
Choosing the right location for your survival shelter can make all the difference between comfort and struggle. The spot you pick affects your shelter’s stability, safety, and your chances of finding essential resources. Paying close attention to the surroundings helps you avoid risks and stay prepared for changing conditions.
Assessing Terrain And Environment
Look for flat or gently sloping ground to build your shelter. Steep slopes can cause water runoff to flood your shelter or make it unstable. If the ground is too soft, your shelter may sink or collapse, so test the soil firmness by pressing with your foot.
Think about the local weather patterns. Is the area exposed to strong winds, or does it offer natural windbreaks like trees or rock formations? I once set up a shelter in a low valley, only to find cold air pooling there at night. Next time, I chose higher ground and stayed warmer.
Avoiding Hazards
Stay clear of places prone to natural dangers. Avoid riverbanks that may flood suddenly, areas under dead trees or unstable cliffs, and spots with signs of animal activity. You don’t want your shelter to be at risk of falling branches or flash floods.
Also, steer away from dense insect zones or places with poisonous plants. Take a moment to scan the area for nests or warning signs. Your safety depends on the environment you trust.
Proximity To Resources
Being close to water is a huge advantage but don’t build too close to avoid insects and flooding. A distance of about 100 feet often works well. Also, check for nearby firewood, food sources like edible plants, and materials for shelter construction.
Think about your energy. Would you rather carry heavy supplies far, or have them within easy reach? I once underestimated how far I’d need to go for water, which drained my energy quickly. Choose a location that balances safety with access to what you need.

Credit: www.youtube.com
Selecting Shelter Types
Choosing the right type of shelter is key for survival. The shelter must protect from weather and keep you warm. Different environments need different shelters. Some are quick to build, others offer more protection.
Knowing various shelter types helps you adapt to your surroundings. Each type uses materials and techniques suited for specific needs.
Natural Shelters
Natural shelters use existing features like caves or large trees. They need no building skills or extra materials. These shelters offer quick protection from wind and rain. Watch for hazards like falling rocks or animals. Natural shelters work well if you find safe and dry spots.
Debris Huts
Debris huts use leaves, branches, and other natural debris for insulation. They trap body heat and keep you warm. Build a strong frame with sticks, then cover it thickly with leaves. Good for cold weather and forest areas. They take more time but provide solid warmth and protection.
Lean-tos
Lean-tos are simple shelters made by leaning branches against a support. One side is open for easy access and ventilation. Cover the frame with leaves or tarps to block wind and rain. Lean-tos work well near trees or rocks for support. They are fast to build and good for mild weather.
Tarp Shelters
Tarp shelters use a tarp or plastic sheet for quick cover. Tie the tarp between trees or poles to create a roof. You can make shapes like A-frames or lean-tos with tarps. Lightweight and easy to carry in a survival kit. Tarps protect well from rain but need secure ties in strong wind.
Gathering Materials
Collect dry branches, leaves, and sturdy sticks for a strong shelter frame. Choose materials that are easy to gather and weather-resistant. Focus on items nearby to save time and effort.
Building a survival shelter is an essential skill that can make all the difference in a challenging outdoor situation. The first crucial step is gathering the right materials. Without the proper resources, even the best-designed shelter can fail. Let’s explore how to use what’s around you effectively to create a sturdy, reliable refuge.Using Natural Resources
Look around your environment. What’s available that can aid in your shelter-building? Fallen branches, leaves, and rocks are often abundant in wooded areas. These can serve as the backbone of your structure. Rocks can anchor corners or serve as a base, while leaves and branches can form walls and roofing. Use what’s naturally provided to minimize your workload and maximize your shelter’s integrity.Tools And Equipment
While nature provides a lot, having the right tools can significantly ease the process. A simple pocket knife or multi-tool can be invaluable. It helps in cutting branches or carving notches to fit pieces together. If you have a tarp or rope, these can add extra stability and protection. Think of your tools as extensions of your hands, making difficult tasks simpler and faster.Insulation Options
Staying warm is crucial, especially in colder climates. Insulation is your best friend here. Consider using layers of leaves or moss to trap heat inside your shelter. Don’t overlook your clothing as well. If you have extra garments, they can double as insulation layers. Always prioritize staying dry, as wet conditions can lead to a rapid loss of body heat. By focusing on these key areas, you’ll ensure that your shelter is not just a temporary fix but a robust haven against the elements. What materials will you prioritize next time you’re out there?Building The Framework
Building a strong framework is the first key to a reliable survival shelter. The framework holds the entire structure, so it must be sturdy and well-planned. Choose solid materials like branches or poles that can support weight and resist wind. A good framework shapes the shelter and keeps it safe from harsh weather.
Constructing Support Structures
Start by selecting strong, straight branches. Place two long poles upright to form the main support. Connect these poles at the top with a horizontal beam. This creates a basic A-frame or lean-to shape. Use ropes, vines, or strips of cloth to tie the joints tightly. Check the stability by gently shaking the frame. Add more support poles if needed to prevent wobbling.
Securing The Shelter
Secure the frame by anchoring the poles into the ground. Dig small holes and bury the ends deeply for extra grip. Use rocks or heavy objects to hold the base in place. Wrap extra bindings around weak spots to strengthen the frame. This prevents the shelter from collapsing in wind or rain. Make sure all connections are firm and tight.
Creating Entrances
Plan the entrance based on wind direction and space. Leave a gap large enough for easy access but small enough to keep warmth inside. Use branches or cloth to cover the entrance at night. Create a flap that can open and close smoothly. Keep the entrance low to reduce heat loss, but high enough to enter comfortably. A well-made entrance adds comfort and protection.
Insulating And Waterproofing
Insulating and waterproofing your survival shelter keeps you warm and dry. These steps protect against cold air and moisture. Proper insulation traps body heat inside the shelter. Waterproofing blocks rain and wind from entering. Both are crucial for comfort and safety outdoors.
Layering Techniques
Use multiple layers to build insulation. Start with a base layer close to the shelter frame. Add thick layers of natural materials on top. Each layer traps air, creating warmth. Avoid compressing layers to keep air pockets intact. Layer thickness depends on weather and available materials.
Using Leaves And Branches
Leaves and branches are excellent natural insulators. Gather dry leaves to create thick mats. Use branches to support and hold leaves in place. Arrange leaves loosely to trap air effectively. Pine needles and grass work well too. Avoid wet materials; they reduce insulation and increase cold.
Protecting From Rain And Wind
Cover the shelter with waterproof materials like bark or large leaves. Overlap layers to channel water away. Use tarps or plastic sheets if available. Secure coverings tightly against wind. Seal gaps and openings to block drafts. Build a windbreak with logs or rocks around the shelter.

Credit: www.youtube.com
Maintaining Safety And Comfort
Building a survival shelter is more than just stacking branches and leaves. Your safety and comfort depend on how well you manage the environment inside and around your shelter. Paying attention to airflow, fire safety, and keeping wildlife at bay can make your time outdoors much more secure and comfortable.
Ventilation Strategies
Proper ventilation keeps the air inside your shelter fresh and prevents moisture buildup, which can lead to discomfort and health issues. Create small vents near the top of your shelter to allow warm air and smoke to escape. Avoid blocking these vents with debris, and make sure air can flow freely without letting in rain or cold drafts.
If you’re using a fire inside your shelter, ventilation becomes even more critical. Insufficient airflow can cause dangerous smoke buildup. Think about how you can position openings to draw fresh air in and push smoke out safely.
Fire Safety Measures
Fire is essential for warmth and cooking, but it can quickly turn dangerous if you’re not careful. Always build your fire on bare soil or a cleared area to prevent accidental spread. Keep a bucket of water or dirt nearby to put out the fire quickly if needed.
Never leave your fire unattended, and avoid placing it too close to your shelter walls. Sparks can ignite dry materials, turning your safe haven into a hazard. Have a clear exit path from your shelter in case you need to evacuate fast.
Keeping Wildlife Away
Wildlife encounters can be unsettling and sometimes dangerous. Store food away from your sleeping area, ideally hung from a tree or inside a sealed container. This reduces the chance of attracting animals to your shelter.
Use natural deterrents like strong-smelling herbs or smoke to discourage curious animals. Be mindful of your surroundings and avoid leaving waste near your shelter. Have you thought about how your daily habits might invite or repel wildlife?
Emergency Shelter Tips
Emergency shelter is vital for survival in harsh conditions. It protects from weather and keeps you safe. Building a shelter quickly can save your life. Use these tips to create a shelter with what you have. Stay warm and dry.
Quick Shelter Solutions
Find a natural shelter like a cave or fallen tree. Use a tarp or poncho to make a simple lean-to. Lean one side against a tree or rock. Cover the frame with branches or leaves for insulation. Keep the shelter small to retain body heat. Position the entrance away from wind.
Improvising With Limited Resources
Use what is around you: branches, leaves, or clothing. Create a frame by tying sticks or using rocks for support. Pile leaves, grass, or moss to insulate walls and roof. Avoid gaps that let wind or rain inside. Use your backpack or jacket to block cold air. Build a fire near the shelter for warmth but keep it safe.
Signaling For Help
Make your shelter visible from the air or distance. Use bright colors like a jacket or tarp on top. Arrange rocks or logs in large SOS or HELP letters nearby. Use a whistle or mirror to catch attention. Keep a fire ready to create smoke signals during the day. Stay near your shelter to be found quickly.
Frequently Asked Questions
What Materials Are Best For Building A Survival Shelter?
Natural materials like branches, leaves, and bark are ideal. Use waterproof items such as tarps if available. Always prioritize insulation and protection from wind, rain, and cold to ensure safety and comfort.
How Do I Choose The Best Location For A Shelter?
Look for dry, flat ground away from hazards like floods or falling branches. Choose spots near resources like water and firewood, but avoid animal trails for safety.
How Long Does It Take To Build A Basic Survival Shelter?
A simple shelter can take 1 to 3 hours depending on skill and materials. Preparation and site selection speed up the process significantly.
What Are Common Shelter Types For Survival Situations?
Lean-to, debris hut, and A-frame shelters are popular. Each offers different protection levels, so choose based on environment and available materials.
Conclusion
Building a survival shelter takes careful planning and simple steps. Choose a safe spot, gather materials, and work steadily. A good shelter protects you from wind, rain, and cold. Stay calm and use what nature offers. Practice these skills before an emergency happens.
Shelter can keep you safe and comfortable outdoors. Keep learning and stay prepared for any situation. Your safety depends on your actions and choices. Small efforts make a big difference in survival. Remember, staying warm and dry is key to living.