
Have you ever wanted to change the look of your clothes while playing Survival Craft? Imagine turning your dull outfit into something bright and unique.
Dyeing clothes in the game isn’t just about style—it can boost your confidence and make your character stand out. You’ll learn simple, step-by-step ways to dye your clothes quickly and easily. Keep reading, and you’ll discover tips that will make your crafting experience more exciting and fun.
Your next colorful adventure starts here!
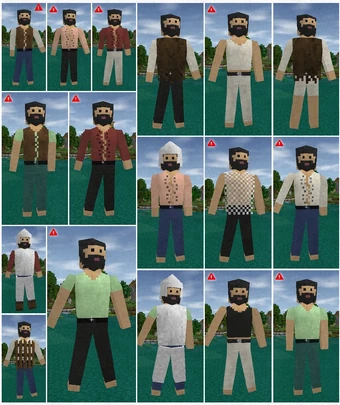
Credit: survivalcraftgame.fandom.com
Essential Tools And Materials
To successfully dye clothes in Survival Craft, you need to gather specific tools and materials. These are the foundation for creating vibrant, lasting colors on your fabrics. Knowing what to use makes the process smoother and the results more satisfying.
Natural Dyes From Plants
Plants offer a wide range of colors you can use for dyeing. Leaves, roots, flowers, and bark all contain pigments that transfer well to fabric. For instance, red cabbage can produce shades of purple, while onion skins give a rich yellow-orange tone.
Collect fresh or dried plant material and crush or chop it to release the color. You’ll boil the plant parts in water to create a dye bath. Have you ever tried turning common garden plants into colorful fabric? It’s easier and more rewarding than you might think.
Animal-based Dye Sources
Some animals provide dyes too, such as cochineal insects that create a deep red pigment. While less common, these natural dyes are powerful and can add unique shades to your clothes. If you find yourself near a water source, you might discover natural dyes from shellfish or other creatures.
Extracting animal-based dyes requires careful preparation to avoid damaging the material. Do you have the patience to experiment with these rare sources? They can add a special touch to your survival gear.
Tools For Dyeing
- Heat Source:A fire or stove to boil the dye materials and fabric.
- Containers:Pots or bowls that can hold boiling liquids safely.
- Stirring Utensils:Wooden spoons or sticks to mix the dye bath evenly.
- Protective Gear:Gloves to keep your hands safe from stains and heat.
- Fabric Prep Tools:Mild detergent or soap to clean clothes before dyeing.
Having these tools ready prevents frustration and lets you focus on creativity. What tools do you already have that could double as dyeing equipment? Sometimes, survival is about making the most of what’s on hand.
Preparing Fabrics For Dyeing
Preparing fabrics for dyeing is key to getting vibrant and lasting colors. Proper preparation ensures the dye sticks well and the fabric stays strong. Clean fabrics absorb dye better and show true color shades.
Start by choosing the right fabric type. Then, treat the fabric to remove dirt, oils, or chemicals. This step creates a smooth surface for the dye to bind.
Selecting Suitable Fabrics
Natural fabrics like cotton, wool, silk, and linen absorb dye easily. These fibers take in color deeply, resulting in bright and even tones.
Synthetic fabrics such as polyester or nylon do not absorb dye well. They need special dyes or treatments to change color effectively.
Look for fabrics without finishes or coatings. These can block dye from penetrating the fibers. Plain, untreated fabric works best.
Pre-treatment Techniques
Wash the fabric thoroughly to remove dirt and oils. Use warm water and a mild detergent. Avoid fabric softeners that leave residues.
Rinse the fabric several times to clear away soap. Any leftover detergent can affect dye absorption.
Soaking the fabric in a mordant solution helps fix the dye. Common mordants include alum or vinegar. Follow safety instructions when using chemicals.
Dry the fabric lightly before dyeing. Damp fabric helps dye spread evenly but avoid soaking wet material.
Extracting Natural Dyes
Extracting natural dyes is a crucial skill in Survival Craft that lets you personalize your clothing with colors sourced straight from the environment. These dyes come from plants and animals around you, offering a sustainable and creative way to brighten your gear. Understanding how to gather and process these materials can change the way you approach crafting in the game.
Harvesting Plant Materials
Look for vibrant plants like berries, roots, leaves, and bark, as these often contain the pigments you need. For instance, red and purple dyes come from berries, while yellow and green shades often come from leaves or roots.
After gathering, chop or crush the plant parts to release their color. Simmer them in water to create a dye bath. The longer you boil, the stronger the color will be.
Have you tried mixing different plant dyes to create unique hues? Experimenting can yield surprising and personal results that stand out in your survival world.
Processing Animal Dyes
Animal-based dyes come from sources like insects, shells, or even certain secretions. A famous example is cochineal insects, which produce a strong red dye. These require careful collection and processing to extract the pigment.
Once collected, grind the insects or shells into a fine powder. Then, mix the powder with a small amount of water to make the dye. Heat gently to help release the color before applying it to your clothes.
Working with animal dyes can be messy but rewarding. Do you feel prepared to handle these materials safely and effectively in your survival adventures?
Dyeing Techniques
Dyeing clothes in Survival Craft adds a fun and creative layer to your gameplay. Understanding different dyeing techniques lets you customize your gear and express your style. Each method changes how the color adheres and looks on your fabric, so knowing which one to use can make a big difference.
Immersion Dyeing
Immersion dyeing is the simplest way to color clothes. You just soak your item in a dye solution until it reaches the shade you want. The longer you leave it, the deeper the color becomes.
This technique works best with lighter fabrics, as they absorb the dye more evenly. Have you tried adjusting the soak time to create gradient effects? It’s a straightforward way to get consistent color across your clothes.
Tie-dye Methods
Tie-dye is perfect if you want bold, interesting patterns. You twist or fold your fabric and secure it with rubber bands before dyeing. The areas bound tightly resist the dye, creating unique designs when you remove the ties.
Experiment with different folding styles to see how patterns change. You might discover unexpected shapes and color blends that make your clothes stand out. Are you ready to add a splash of personality to your Survival Craft wardrobe?
Batik And Wax Resist
Batik involves applying wax to parts of your fabric before dyeing. The wax prevents dye from coloring those sections, letting you create detailed patterns. After dyeing, you remove the wax to reveal the design.
This method takes more time but offers precise control over your patterns. Using a simple tool like a brush or a stick to apply the wax can help you craft intricate shapes. Have you thought about mixing batik with other dyeing methods for even more creativity?
Setting The Dye
Setting the dye is a key step in coloring clothes in Survival Craft. It helps the color stick to the fabric and last longer. Without setting the dye properly, colors may fade quickly or wash out. Different techniques can improve how well the dye bonds with your clothes. Using natural materials and simple heat methods can make a big difference in dye quality.
Using Natural Fixatives
Natural fixatives help colors stay on fabric. They work by creating a stronger bond between dye and cloth fibers. Common natural fixatives include:
- Salt: Enhances color absorption in cotton and wool.
- Vinegar: Helps brighten colors and fix dye on silk and wool.
- Tannin-rich plants: Oak bark or tea can improve dye hold.
Mix fixatives with water before soaking your fabric. Soak clothes in this solution after dyeing. This process strengthens the color and reduces fading.
Boiling And Steaming Techniques
Heat helps set dye by opening fabric fibers. Boiling or steaming clothes after dyeing locks colors in deeply. Use these methods carefully:
- Boiling: Submerge dyed clothes in boiling water for 30 minutes.
- Steaming: Hang clothes over boiling water and cover with a lid or cloth.
Both methods improve color fastness. They make the dye stay strong through washing and sunlight exposure. Always handle hot water safely to avoid burns.
Color Mixing And Experimentation
Color mixing and experimentation add a creative edge to dyeing clothes in Survival Craft. It allows players to personalize their fabric with unique colors. Trying different blends offers fun and surprises. It also helps players learn how colors react together in the game environment. This section covers how to create custom shades and blend colors effectively.
Creating Custom Shades
Start by selecting two or more base colors. Mix small amounts of dye to test new shades. Keep track of the amounts used for each color. Use a neutral fabric to see true color results. Adjust the ratio to make the color lighter or darker. Experiment with adding white or black dyes to change brightness or tone. Save your favorite mixes for future projects.
Blending Techniques
Use layering to combine colors on the fabric. Apply one color first and let it dry slightly. Add another color on top for a gradient effect. Try mixing dyes directly in a container before applying. Stir gently for a smooth blend or mix less for streaks. Use different tools like brushes or sponges to create texture. Testing different methods gives unique results every time.
Care And Maintenance Of Dyed Fabrics
Taking care of dyed fabrics in Survival Craft is just as important as the dyeing process itself. Proper maintenance keeps your clothes vibrant and extends their usability in tough environments. Knowing how to handle these fabrics can save you resources and ensure your gear stays reliable.
Washing Tips
Wash dyed clothes gently to avoid fading. Use cold water because hot water can strip away color quickly.
Choose mild soap or detergent without bleach. Harsh chemicals damage the fabric and dull the dye.
Hand washing is best if you want to protect your clothes. If you use a machine, select a delicate cycle.
Do you notice how some dyes bleed during the first wash? Rinse your clothes separately the first few times to prevent color transfer.
Long-term Preservation
Store your dyed fabrics in a cool, dark place to prevent sunlight from fading the colors.
Avoid damp areas that encourage mold and mildew growth. Use breathable bags or containers instead of plastic ones.
Consider folding your clothes loosely rather than hanging them. Hanging can stretch the fabric and distort the dye pattern.
Ever left dyed clothes in a backpack for weeks and noticed a musty smell? Regular airing out helps keep them fresh and extends their life.

Credit: www.youtube.com
Troubleshooting Common Issues
Dyeing clothes in Survival Craft can sometimes lead to unexpected results. Common issues may appear during the process. Knowing how to fix these problems helps achieve better colors. Troubleshooting ensures your clothes look just right. Here are solutions for common dyeing challenges.
Uneven Color Distribution
Uneven color happens when dye doesn’t spread well. This causes patches or streaks on fabric. To avoid this, stir clothes often while dyeing. Make sure the fabric is fully soaked in dye. Rinse clothes gently to keep color even. Avoid dyeing thick or folded fabric. Thin layers absorb dye more uniformly. Using warm water helps dye spread better.
Fading And Bleeding Solutions
Fading makes colors look dull after some time. Bleeding causes dye to run onto other clothes. Fix fading by soaking dyed clothes in cold water. Use salt or vinegar in rinse water to lock colors. Wash dyed clothes separately at first to prevent bleeding. Air dry clothes away from direct sunlight. Sun can weaken colors quickly. Store dyed clothes in a cool, dark place.

Credit: survivalcraftgame.fandom.com
Frequently Asked Questions
How Do You Start Dyeing Clothes In Survival Craft?
To dye clothes, gather natural materials like berries, plants, or clay. Boil them to create dye. Apply the dye to your clothes for color change.
What Materials Are Needed For Dyeing Clothes?
You need natural color sources, water, a container for boiling, and clothes. These items help extract dye and apply it effectively.
Can All Clothes Be Dyed In Survival Craft?
Most clothes can be dyed, but some materials absorb color better. Experiment with different clothes to see which take the dye best.
How Long Does The Dyeing Process Take?
The process typically takes 10 to 15 minutes of boiling. Applying and drying the dye may take additional time.
Conclusion
Dyeing clothes in Survival Craft adds fun and color to your game. It helps you personalize your character and stand out. Using natural dyes is easy and saves resources. Experiment with different plants to find new colors. Remember to gather enough materials before starting.
Practice makes perfect, so don’t be afraid to try again. Enjoy the process and bring life to your clothes. Simple steps lead to great results in Survival Craft. Keep crafting and stay creative!


