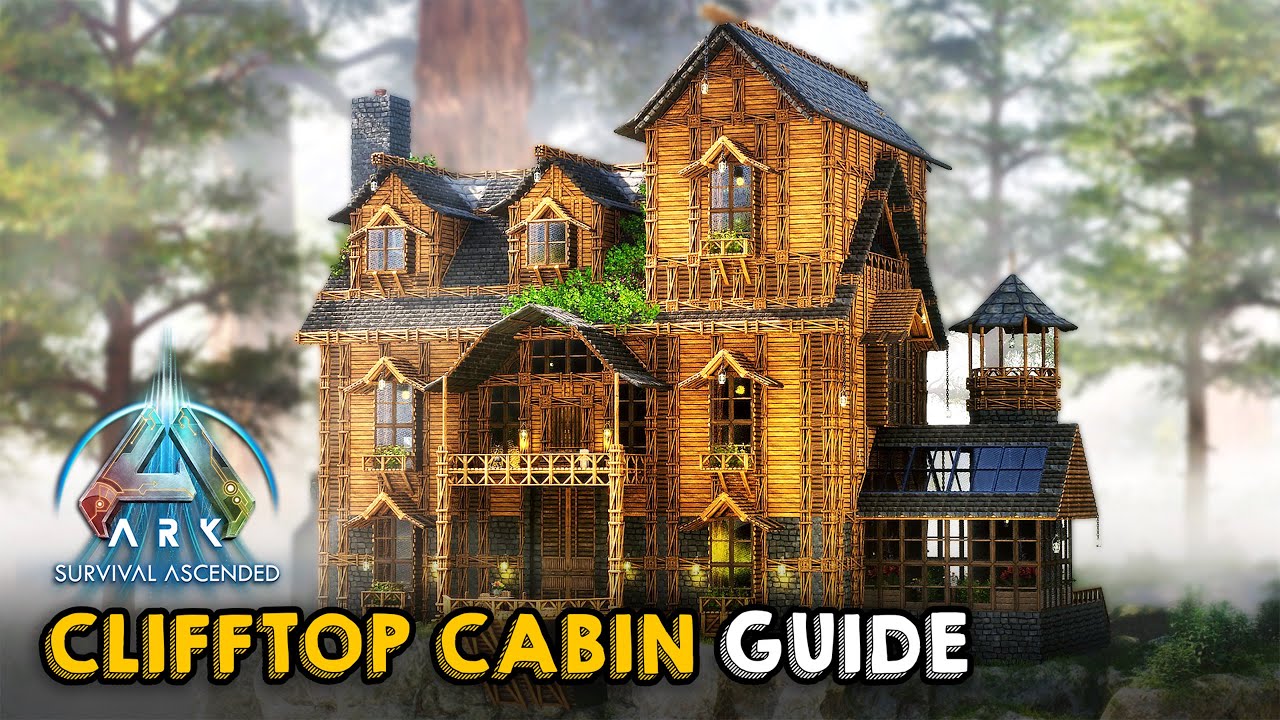
Building a shelter in Ark Survival Ascended is one of the first and most important steps you’ll take to survive. Without a safe place to rest, store your items, and protect yourself from dangers, your chances of thriving are slim.
But don’t worry—this guide will show you exactly how to create a strong, reliable shelter that keeps you safe. Whether you’re new to the game or looking to improve your base-building skills, you’ll find easy-to-follow tips that make the process simple and effective.
Keep reading, and you’ll soon have a shelter that feels like home in the wild world of Ark.

Credit: www.youtube.com
Choosing The Right Location
Choosing the right location for your shelter in Ark Survival Ascended is one of the most important decisions you will make. It directly affects your survival chances, resource gathering efficiency, and safety from predators and hostile players. Picking a spot without thinking can lead to constant frustration or even losing everything you’ve built.
Factors To Consider
Start by looking for a balance between safety and accessibility. You want a place that is easy to defend but not so isolated that gathering materials becomes a chore. Think about the terrain—flat ground makes building easier, while elevated spots can give you a strategic advantage.
Check the climate of the area. Harsh environments like deserts or snowy regions can add extra challenges, such as managing temperature and food scarcity. Also, avoid regions with heavy predator activity unless you’re prepared for constant battle.
Remember, your shelter should grow with you. Will this location support expansion later? Can you easily add farming plots or dinosaur pens nearby? Planning ahead saves you from painful moves.
Safe Zones And Resource Availability
Safe zones near your shelter reduce the risk of sudden attacks. Look for areas where hostile creatures are less frequent or where natural barriers like cliffs or rivers provide protection. This can give you peace of mind, especially during early game nights.
Resource availability is just as crucial. Being close to wood, stone, fiber, and metal nodes cuts down travel time and danger exposure. You don’t want to trek miles just to find basic materials for repairs or upgrades.
- Water sources nearby ensure your survival and allow farming.
- Proximity to caves or special resource spots can boost your crafting options.
- Keep an eye on where other players tend to settle; overcrowding can lead to conflicts.
Have you noticed how some locations feel safer just because of the natural layout? Trust your instincts and scout thoroughly before committing. Your choice now shapes how smooth or stressful your Ark journey will be.

Credit: www.youtube.com
Gathering Essential Materials
Gathering essential materials is the first critical move when building a shelter in Ark Survival Ascended. Without the right resources, your shelter won’t stand strong against the environment or predators. You’ll want to focus on collecting the basics quickly so you can start crafting and protecting yourself.
Basic Resources Needed
Wood, thatch, and stone form the backbone of any shelter. Wood provides structure, thatch offers insulation, and stone adds durability. Don’t overlook fiber; it’s crucial for tying materials together and crafting tools.
Keep an eye out for these materials in forests and rocky areas:
- Wood:Chop down trees using your bare hands or tools.
- Thatch:Gather from small trees and bushes.
- Stone:Pick up from the ground near rocks or mine from larger boulders.
- Fiber:Collect from bushes and plants.
Have you noticed how some areas seem richer in certain materials? Knowing where to harvest efficiently saves you time and effort.
Tools For Efficient Collection
Starting with your fists is okay, but crafting simple tools speeds up gathering dramatically. A stone hatchet or pickaxe will cut wood and harvest stone much faster.
Here’s what to prioritize:
- Stone Pickaxe:Ideal for mining stone and flint.
- Stone Hatchet:Best for chopping wood and collecting thatch.
Once you craft these, your resource collection will become noticeably smoother. Don’t waste time with bare hands when tools can save you minutes on every harvest. How much more could you build if you gathered materials twice as fast?
Crafting Your First Shelter
Crafting your first shelter in Ark Survival Ascended is crucial for your survival. It offers protection from harsh weather, wild creatures, and other players. Starting with a solid foundation sets the tone for your entire gameplay experience.
Building Basic Structures
Begin by gathering essential resources like wood, thatch, and stone. These materials are easy to find and perfect for your initial shelter. Focus on creating a simple foundation, walls, and a roof to keep you safe.
Keep your structure small and manageable. A compact shelter uses fewer resources and is easier to defend. Have you noticed how a basic hut can still feel like a stronghold when crafted carefully?
- Collect wood from trees using your stone hatchet
- Gather thatch from plants around you
- Use stones from the ground to reinforce your base
- Place a foundation first to ensure stability
Remember to add a doorframe and a door to keep unwanted visitors out. Crafting a simple shelter quickly can mean the difference between life and death during your first nights.
Upgrading Materials For Durability
Once your basic shelter stands, upgrading materials is the next smart move. Wood structures are vulnerable to attacks and weather damage. Stone and metal provide much better protection and last longer.
Start by replacing thatch walls with wood, then work your way up to stone. Metal is the toughest but requires more advanced tools and resources. Have you thought about how upgrading your shelter can save you time rebuilding later?
| Material | Durability | Resources Needed | Tools Required |
|---|---|---|---|
| Thatch | Low | Thatch, Wood | None |
| Wood | Medium | Wood, Stone | Stone Hatchet |
| Stone | High | Stone, Wood | Metal Pick or Stone Pick |
| Metal | Very High | Metal Ingots, Stone | Metal Pickaxe |
Think about your shelter as a long-term investment. Each upgrade reduces the risk of losing your hard-earned items and progress. What’s your strategy for balancing resource gathering and shelter improvement?
Shelter Design Tips
Designing a shelter in Ark Survival Ascended is more than just placing walls and a roof. It’s about creating a space that supports your survival and growth while protecting you from threats. The right design choices can save you precious resources and time, and even keep you alive during intense attacks.
Maximizing Space
Efficient use of space helps you store more items and build more structures within your shelter. Start by planning your layout with key areas like storage, crafting stations, and sleeping spots close but not cramped.
Use vertical space smartly. Adding multiple levels or lofts can double your usable area without expanding your footprint. I once packed a small hut with vertical storage and crafting zones, and it felt like a mini base rather than a simple shelter.
Think about pathways too. Keep corridors wide enough to move quickly but don’t waste space on unnecessary hallways. Could your crafting bench fit right next to your storage instead of across the room?
Defensive Features
Your shelter needs to withstand attacks from wild dinos and hostile players. Building with strong materials like stone or metal is a must, but how you arrange your defenses matters just as much.
- Double walls:Add an extra layer of walls to slow down enemy progress.
- Elevated entrances:Place doors on raised platforms or use ramps to make access harder.
- Traps and turrets:Position them strategically near entry points to surprise attackers.
I once underestimated the power of a well-placed turret. It stopped a pack of raptors before they even got close. What defensive trick could you add that might turn the tide in your favor?
Protecting Your Shelter
Building a strong shelter in Ark Survival Ascended keeps you safe from creatures and weather. Choose a good location and gather materials quickly. Use walls, doors, and defenses to protect your base effectively.
Protecting your shelter in Ark Survival Ascended is vital. Your shelter is your safe haven. It shields you from threats and harsh weather. Enhancing its protection ensures your survival in the game. Below, discover how to fortify your shelter effectively.Traps And Barriers
Traps can deter predators. They act as early warning systems. Set up spike walls around the perimeter. These spikes injure any creature that approaches. Use bear traps near entry points. They immobilize intruders temporarily. Barriers such as stone walls are sturdy. They offer better defense against larger threats.Dealing With Threats
Threats can come from wild creatures or rival players. Keep a watchtower for spotting danger early. Equip it with a bow or rifle for defense. Train dinosaurs as guards. They act as deterrents against attackers. Always have a backup plan if things go wrong. Stockpile weapons and resources inside the shelter.
Credit: www.youtube.com
Expanding Your Base
Expanding your base in Ark Survival Ascended transforms a simple shelter into a thriving hub of activity. It’s not just about making your home bigger, but about making it smarter and more efficient. As you grow, you’ll want to add key elements that keep your resources organized and your crafting fast.
Adding Storage And Crafting Stations
Storage is the backbone of any well-maintained base. Start by building multiple storage boxes and organizing them by item type—separating resources like wood, metal, and fiber saves time when crafting.
Next, place crafting stations close to your storage units. This setup minimizes the time you spend running back and forth. For instance, having a smithy near metal storage speeds up weapon and armor production dramatically.
- Use large storage boxes for bulk materials.
- Label your storage to avoid confusion during raids.
- Position crafting stations logically—like a fabricator near your tech materials.
Have you noticed how much faster crafting feels when everything you need is at arm’s reach? Your efficiency in the game depends heavily on this kind of thoughtful layout.
Incorporating Tameable Creatures
Tameable creatures can be a huge asset to your base. They offer protection, help gather resources, and even assist in combat.
Build pens or enclosures near your base to keep your tames safe and ready. Different creatures serve different roles—some are excellent for harvesting berries, while others provide heavy defense.
- Keep smaller creatures like Dodos or Trikes near storage for quick farming runs.
- Place larger, defensive creatures like Rexes or Spinos on guard posts.
- Consider leaving feeding troughs accessible to keep tamed creatures happy and healthy.
Think about which creatures fit your play style best. Would a speedy mount help you gather resources faster, or do you need a strong defender to protect your expanding base? Your choices here can change how you survive and thrive.
Common Mistakes To Avoid
Building a shelter in Ark Survival Ascended requires more than just placing walls. Many players make simple mistakes that hurt their progress. Avoid these common errors to create a safe and effective base.
Poor Location Choices
Choosing the wrong spot can cause big problems. Avoid areas with many predators or harsh weather. Building near resources is smart but don’t ignore safety. Low ground can flood during rain. Open spaces leave you exposed to attacks. Pick a balanced location with access and protection.
Neglecting Defense
Defense is crucial for survival. Many players build pretty shelters but forget to protect them. Always add strong walls and gates. Use turrets or traps to keep enemies away. Don’t leave weak points like open doors or windows. Regularly check your base for holes or damage.
Frequently Asked Questions
How Do I Start Building A Shelter In Ark Survival Ascended?
Begin by gathering basic resources like wood, thatch, and stone. Use your crafting menu to create foundational structures. Place foundations on flat ground to ensure stability before building walls and a roof.
What Materials Are Best For A Strong Shelter?
Wood and thatch are easy to gather but less durable. Stone offers better protection against attacks. Metal is the strongest but requires advanced tools and resources to craft.
How Can I Protect My Shelter From Predators?
Build walls and doors to keep predators out. Use spikes around your shelter’s perimeter for added defense. Regularly upgrade materials to enhance durability and prevent damage.
Where Is The Best Location To Build A Shelter?
Choose flat, elevated terrain near water sources. Avoid areas with high predator activity for safety. Proximity to resources like trees and rocks is essential for easy gathering.
Conclusion
Building a shelter in Ark Survival Ascended keeps you safe from dangers. Start with simple materials and upgrade as you gather more resources. Place your shelter in a good spot near water and food. Always repair damage quickly to avoid losing your base.
Shelter helps you survive and enjoy the game longer. Keep practicing, and your shelter will become stronger over time. Stay prepared, stay safe, and enjoy your adventure fully.

