Imagine you find yourself in the wild with no tools and no shelter. What would you do?
Knowing how to build a survival shelter without tools could be the difference between staying safe or facing serious danger. You’ll discover simple, step-by-step ways to create a reliable shelter using only what nature provides. By the end, you’ll feel confident to protect yourself in any unexpected situation.
Keep reading, because your safety might depend on what you learn here.
Choosing The Right Location
Choosing the right location is the cornerstone of building a survival shelter without tools. The spot you pick impacts your safety, comfort, and chances of survival. You need to think about what the environment offers and what risks it holds before settling down.
Safety And Shelter From Elements
Your shelter must protect you from wind, rain, sun, and cold. Look for natural barriers like large rocks, dense trees, or hills that block strong winds. Avoid low spots where water can collect and flood your shelter during rain.
I once set up camp near a small ridge, and it stopped the cold wind from cutting through my makeshift shelter. It made a huge difference in keeping warm through the night.
Access To Resources
Water is your first priority. Choose a site near a clean water source but not too close to avoid flooding and insects. You also need nearby materials like branches, leaves, and moss to build and insulate your shelter.
Think about your food sources too. Are there berry bushes, edible plants, or signs of animals nearby? Being close to these resources saves energy and increases your survival chances.
Avoiding Hazards
Steer clear of areas with obvious dangers like dead trees that could fall, unstable ground, or animal trails. Check for signs of insects like ants or bees that may make your stay miserable. Also, avoid spots near cliffs or steep slopes to prevent accidents.
Ask yourself: Is this place truly safe to stay for the night or longer? Taking a moment to scan the environment carefully can save you from life-threatening problems later.

Credit: www.youtube.com
Selecting Natural Materials
Choosing the right natural materials is the foundation of building a sturdy survival shelter without tools. Your shelter’s strength and comfort rely heavily on the wood, leaves, moss, and fibers you gather. Knowing what to look for can save you time and effort while increasing your chances of staying safe and dry.
Types Of Wood And Branches
Look for branches that are strong but not too thick to handle. Dead branches on the ground are often dry and easier to snap, but avoid brittle ones that crumble under pressure. Fresh, green wood is flexible and great for tying or weaving, but it can be heavier and harder to break.
Thicker branches make great support beams, while thinner, flexible ones work well for framing and lashing. Pay attention to the type of wood around you—some, like cedar or pine, resist rot and insects better. Have you ever tested how much weight a branch can hold before using it for your shelter’s main structure?
Using Leaves And Moss
Leaves and moss are excellent for insulation and waterproofing. Collect large, broad leaves to create a thick, overlapping layer that can help keep rain out. Moss is soft and retains heat well, making it perfect for lining the inside of your shelter.
Gather leaves that are dry and intact to avoid adding moisture inside your shelter. Moss found near streams or shaded areas tends to be lush and plentiful—perfect for cushioning. Have you noticed how animals use moss for bedding? You can do the same to improve your shelter’s comfort.
Finding Vines And Fibers
Vines and natural fibers act as your binding material when you don’t have tools like rope or nails. Look for long, flexible vines that can be twisted or braided to tie branches together securely. Avoid brittle vines that snap easily under tension.
Fibers from plants like nettle, cattail, or inner bark can be stripped and twisted into strong cords. Testing their strength by pulling gently before relying on them is crucial. Can you imagine creating your own rope in the wild, using only what nature provides?
Basic Shelter Designs
Building a survival shelter without tools requires creativity and resourcefulness. Basic shelter designs offer practical solutions for staying safe and warm in the wild. Each design uses natural materials found in the environment. Let’s explore three simple structures you can build: Lean-To Shelter, A-Frame Shelter, and Debris Hut.
Lean-to Shelter
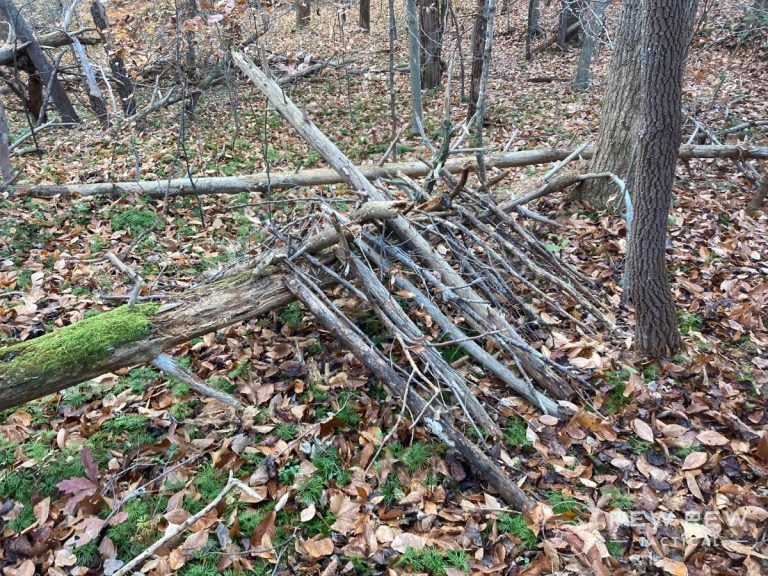
The Lean-To Shelter is a straightforward design. Find a sturdy, long branch or pole. Position it against a tree or secure it between two supports. This forms the main ridge of your shelter. Next, lean smaller branches against the ridge pole at a slant. Cover these branches with leaves, grass, or bark for insulation. This shelter provides basic protection from wind and rain.
A-frame Shelter
The A-Frame Shelter offers more stability. Start by placing a long branch horizontally between two trees, forming a crossbar. Lean other branches on both sides of the crossbar, creating a triangle shape. Fill the gaps with leaves and debris for warmth. This structure is sturdy and can withstand moderate weather conditions.
Debris Hut
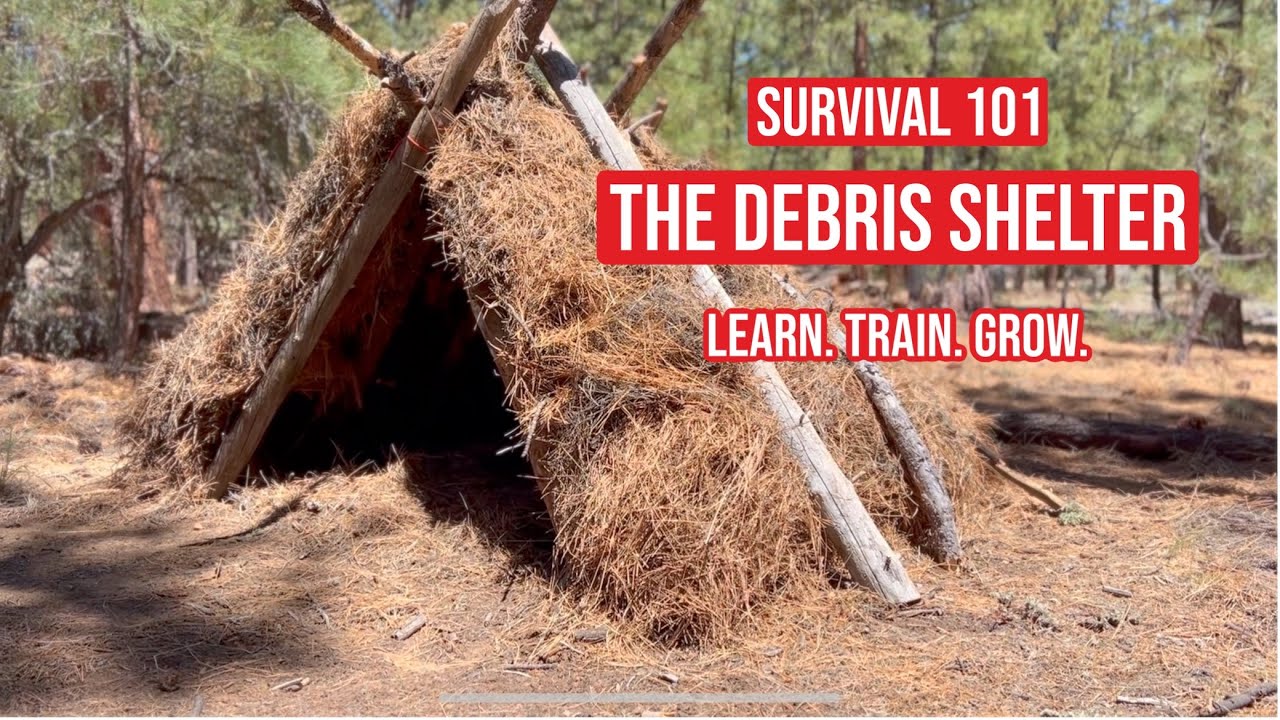
The Debris Hut is perfect for insulation. First, gather a large pile of leaves, grass, and small branches. Create a low, narrow frame using two sturdy sticks as a support. Cover this frame with the gathered debris. Leave a small entrance on one side. The thick layer of debris acts as excellent insulation, retaining body heat effectively.
Building Without Tools
Building a shelter without tools might sound impossible, but nature offers everything you need if you know where to look. Your hands become your primary tools, and understanding how to work with natural materials can turn a simple pile of branches and leaves into a sturdy refuge. Let’s break down the essential skills that will help you build a survival shelter using only what you find around you.
Breaking And Shaping Materials By Hand
You don’t need an axe or saw to break branches. Look for deadwood or dry sticks—they snap easier than green wood. Use your hands or feet to bend and break these materials into the sizes you need.
Sometimes, rubbing a branch against a rough rock surface can help smooth or shape it. This takes time, but patience pays off when you create pieces that fit together better. Try breaking branches into smaller sticks to use as supports or frame parts.
Using Rocks And Natural Supports
Rocks are your best friends for anchoring and stabilizing your shelter. Large, flat stones can serve as a solid base or even a wall. Smaller rocks can be piled to hold down branches or tied materials in place.
Look for natural supports like leaning trees or sturdy bushes. They can form part of your structure, saving you effort and materials. Position your shelter against these natural anchors to shield yourself from wind and rain.
Weaving And Binding Techniques
Without rope or nails, binding materials together is a challenge you can solve with weaving. Use flexible vines, strips of bark, or long grasses to tie or weave branches. This technique creates a strong connection that holds your shelter together.
- Start by wrapping a vine around two branches, then twist or knot it securely.
- Try weaving smaller sticks in a crisscross pattern to build walls that block wind.
- Practice making simple knots with natural fibers; they can hold surprisingly well.
Have you ever tried weaving with natural materials? It might seem tricky at first, but it’s a skill that can make your shelter much more reliable. Experiment with different plants and see which ones bend and tie best.
Insulating Your Shelter
Insulating your survival shelter is vital for staying warm and safe. Without tools, nature provides materials that trap heat and block cold air. Proper insulation keeps your body heat inside and the harsh weather out. Focus on layering natural materials and creating barriers to improve comfort.
Layering Leaves And Moss
Leaves and moss are excellent natural insulators. Collect dry leaves and soft moss to form thick layers inside your shelter. Start with a base layer on the ground to keep cold from seeping up. Add more layers on walls and roof for extra warmth. The thicker the layers, the better the shelter holds heat.
Creating Wind Barriers
Wind steals heat quickly. Use branches, shrubs, or piled leaves to block wind outside your shelter. Build a fence or mound of debris around the entrance and sides. Position your shelter behind natural windbreaks like rocks or trees. A solid wind barrier reduces heat loss and keeps the shelter stable.
Maintaining Warmth
Keep your shelter warm by minimizing openings. Seal gaps with moss or leaves to stop drafts. Sleep close to the ground on a thick leaf mattress to avoid cold air. Use your body heat wisely by staying inside as much as possible. Small fires outside can warm the air but never inside the shelter.

Credit: www.youtube.com
Waterproofing Strategies
Waterproofing your survival shelter is essential for staying dry and comfortable in wet conditions. Without tools, you need to rely on natural materials and smart placement to keep rain out. Effective waterproofing prevents hypothermia and improves your chances of staying safe in the wilderness.
Using Large Leaves And Bark
Large leaves create a natural shield against rain. Look for broad leaves like those from banana plants or large ferns. Layer them thickly, starting from the bottom and overlapping upwards, so water runs off instead of seeping through.
Bark, especially from trees like cedar or birch, offers excellent waterproofing if you peel it carefully. Use large strips to cover your shelter’s frame. The bark’s natural oils repel water, making it a reliable barrier during heavy rain.
Positioning Shelter For Rain
Where you build your shelter can make a big difference in how wet you get. Choose a spot with natural drainage, like a slight incline, so water flows away from your shelter. Avoid low areas where water pools or heavy runoff might flood your camp.
Face the shelter’s narrowest side into the wind and rain direction. This positioning reduces the surface area exposed to the storm. Have you checked the wind direction before setting up? It’s a simple step that can save you from being drenched.
Sealing Gaps Naturally
Even small gaps let water and wind sneak inside. Use mud, clay, or moss to fill holes and cracks in your shelter walls. These materials dry hard and act like natural caulking, sealing your shelter against moisture.
Leaves, grass, or pine needles can stuff gaps too. Press them tightly to block airflow and water entry. Sealing your shelter this way keeps the inside warm and dry, even when the rain won’t stop.
Enhancing Shelter Comfort
Building a survival shelter without tools is challenging, but making it comfortable is just as important. Comfort helps you conserve energy and stay focused in tough situations. Small adjustments can make a big difference in how well you rest and protect yourself from the elements.
Flooring Options
Sleeping directly on the ground can sap your energy and make you cold quickly. Look for natural materials like dry leaves, pine needles, or grass to create a soft and insulating layer. If you find large flat bark or branches, lay them down first to lift you off damp soil.
Have you tried using moss or ferns as a natural mattress? They work surprisingly well to keep moisture away and add warmth. Keep in mind, thicker layers provide better insulation, so don’t be shy about piling up materials under you.
Ventilation And Airflow
A shelter that traps too much heat or moisture will make you uncomfortable and could lead to health issues. Leave small gaps or openings near the top of your shelter to allow hot air to escape. You can also create a simple vent by propping a stick to keep part of the shelter’s wall slightly open.
Think about wind direction when positioning your shelter’s openings. Proper airflow reduces condensation on the inside walls and keeps the air fresh. Have you noticed how a little breeze can make even a cramped space feel much better?
Protecting Against Insects
Insects can quickly turn a survival shelter into a nightmare. Use natural repellents like crushed sage, cedar leaves, or mint placed around the sleeping area. You can also build a simple barrier by weaving branches or grasses tightly together to keep bugs out.
Be mindful of standing water near your shelter, as it attracts mosquitoes. Would you rather spend your night swatting bugs or resting peacefully? A little effort in sealing your shelter and clearing nearby water can save you from a lot of discomfort.
Safety Tips And Precautions
Building a survival shelter without tools requires careful attention to safety. Staying safe helps you avoid injuries and dangers in the wild. This section covers key safety tips and precautions. Follow these tips to protect yourself while creating your shelter.
Fire Safety
Fire is essential but can be dangerous. Choose a safe spot away from dry leaves and branches. Clear the ground around the fire area. Keep the fire small and controlled. Never leave a fire unattended. Always have water or dirt nearby to put out the fire quickly. Avoid building a fire inside your shelter to prevent smoke inhalation and burns.
Avoiding Animal Encounters
Animals can be a threat near your shelter. Store food away from your sleeping area. Use natural barriers like thorny bushes to keep animals out. Make noise while moving to avoid surprising wild animals. Avoid bright lights at night that attract insects and animals. Know which animals are common in the area and their habits. Stay calm if you encounter wildlife and slowly move away.
Regular Shelter Maintenance
Check your shelter daily for damage or weak spots. Fix broken branches or leaks quickly to stay dry and safe. Remove debris that can cause tripping or hide dangerous insects. Keep the shelter clean to avoid attracting animals. Clear snow or fallen leaves regularly to maintain shelter stability. Regular care keeps your shelter strong and comfortable.
Credit: www.pewpewtactical.com
Frequently Asked Questions
How Can I Build A Shelter Without Any Tools?
Use natural materials like branches, leaves, and vines. Find a sturdy frame such as fallen trees or large branches. Weave smaller sticks to create walls and cover with leaves for insulation and rain protection.
What Materials Are Best For A No-tool Shelter?
Look for dry branches, leaves, moss, and vines. Use flexible green branches to bind structures. Pine boughs and large leaves make excellent roofing and insulation materials.
How Do I Make A Waterproof Shelter Naturally?
Create a sloped roof using large leaves or bark. Layer materials thickly to shed rain. Avoid flat surfaces where water can collect and ensure good drainage around the shelter.
How Long Does It Take To Build A Shelter Without Tools?
Depending on experience and materials, it can take 1 to 4 hours. Preparation and location significantly impact building time. Practice speeds up the process over time.
Conclusion
Building a survival shelter without tools is possible with patience and care. Use natural materials like branches, leaves, and mud to create a strong roof and walls. Choose a safe, dry spot to stay protected from weather. Stay calm and work step by step.
Practice these skills to feel ready for any outdoor challenge. Remember, simple shelters can keep you safe and warm. Keep learning and stay prepared for your next adventure.