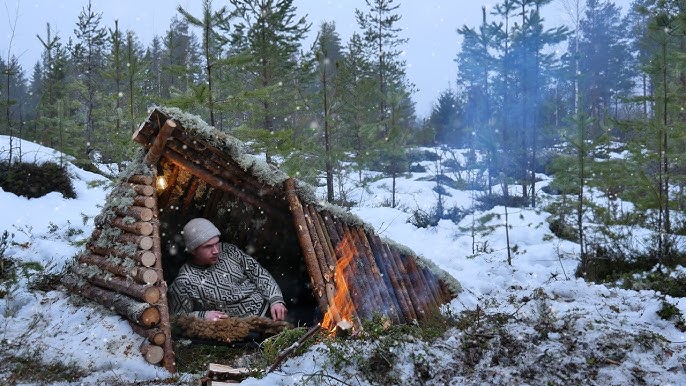
Imagine being caught in a snowstorm with no shelter in sight. How would you protect yourself from the biting cold and harsh winds?
Knowing how to make a survival snow shelter could be the difference between staying warm and safe or facing serious danger. In this guide, you’ll learn simple, step-by-step techniques to build a shelter using just the snow around you. Whether you’re an outdoor enthusiast or someone who wants to be prepared for emergencies, mastering this skill can give you confidence and peace of mind when nature turns tough.
Keep reading, and you’ll discover how to turn snow into your greatest ally for survival.
Choosing The Right Location
Choosing the right location for your survival snow shelter can make the difference between staying warm or facing extreme cold. Your choice affects safety, shelter stability, and how well you can withstand harsh weather. Take your time to pick a spot that supports your shelter’s structure and protects you from nature’s challenges.
Assessing Terrain And Snow Conditions
Look for flat or gently sloping ground to build your shelter. Steep slopes increase risk of snow slides and make construction difficult.
Check the snow depth and type. Deep, compact snow is easier to dig and provides better insulation. Powdery snow may collapse easily, so avoid it if you can.
Have you noticed how some snow feels solid underfoot while other snow crunches and falls apart? That’s your clue about its strength. Use your hands or a small shovel to test the snow’s firmness before settling on a spot.
Avoiding Hazards And Risks
Never build your shelter under unstable tree branches or avalanche-prone slopes. Falling branches and sudden snow slides are real threats that can trap or injure you.
Keep clear of wind funnels like narrow valleys or gaps between ridges. Strong winds can blow snow into your shelter or cause it to collapse.
Also, avoid areas near open water or thin ice. Cold drafts from these spots can chill your shelter and increase the risk of hypothermia.
Ask yourself: Is this spot truly safe to spend the night? Sometimes the most obvious location isn’t the safest one.
Gathering Necessary Tools And Materials
Before you start building a survival snow shelter, gathering the right tools and materials is crucial. Without the proper equipment, your efforts can become exhausting and less effective. Knowing what to bring and what to find naturally increases your chances of creating a safe, warm refuge in the snow.
Essential Equipment For Shelter Building
Some tools make shelter building much easier and faster. A sturdy snow shovel helps you move large amounts of snow efficiently. If you don’t have a shovel, a strong knife or multi-tool is useful for cutting ice blocks or shaping snow.
Also consider carrying:
- Ice axe or sturdy stick:To help with digging and stability.
- Rope or paracord:Useful for tying materials together or securing your shelter.
- Insulating materials:Such as a sleeping pad or emergency blanket to add warmth inside the shelter.
Think about your pack weight and prioritize tools that serve multiple purposes. Could you survive without a shovel? Possibly, but having one can drastically reduce the time exposed to cold.
Using Natural Resources
Nature offers many materials to help build and insulate your shelter. Snow itself is a primary building block, especially when compacted or carved into blocks. Look for areas where snow is deep and stable.
Consider using:
- Branches or evergreen boughs:These can provide structural support or extra insulation on the shelter’s roof and floor.
- Rocks or ice:Can act as anchors or walls if the snow isn’t solid enough.
- Leaves or moss:Useful for lining the floor to keep you off the cold ground.
Have you noticed how animals burrow or use natural materials for shelter? Mimicking these strategies can give you an advantage. What natural materials are abundant around you right now?
Types Of Snow Shelters
Snow shelters come in different forms like igloos, quinzhees, and snow caves. Each type offers protection and warmth in snowy conditions. Building a strong shelter helps you stay safe and conserve heat during winter survival.
When venturing into snowy terrains, knowing how to build a snow shelter can be lifesaving. Each type of snow shelter serves a unique purpose. Learning about these shelters enhances your survival skills in winter environments.Quinzhee Shelters
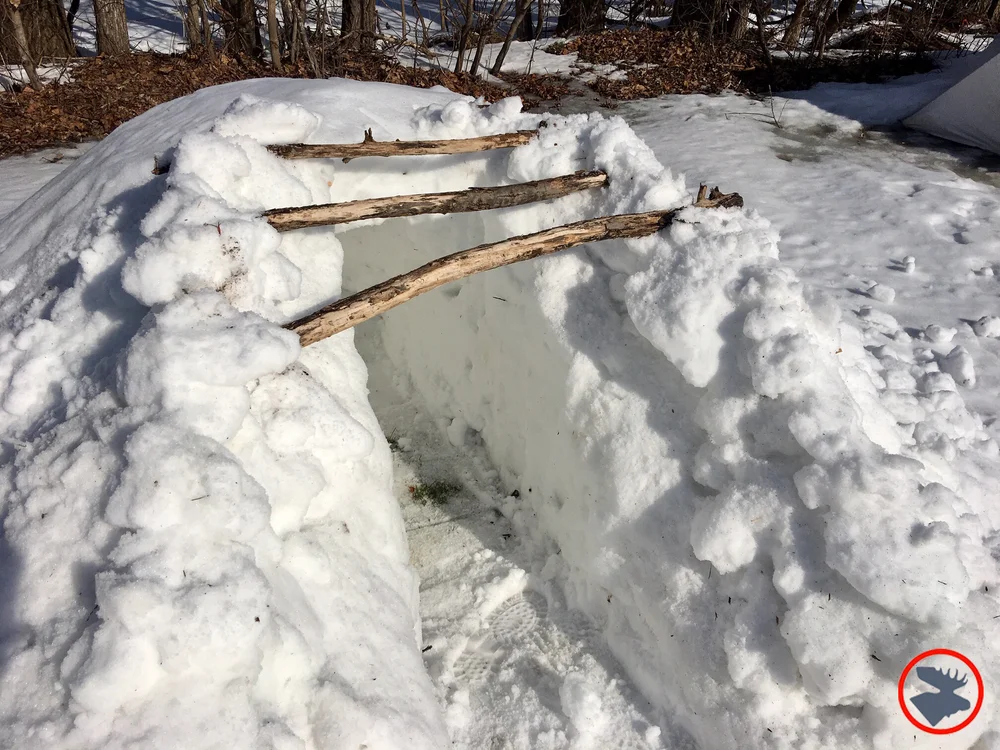
Quinzhees are simple and effective. They involve piling snow into a mound. Once the mound is solid, hollow it out. The quinzhee’s thick walls provide insulation. Keep the entrance low to the ground. This helps retain warmth inside. Make small ventilation holes for fresh air.Igloos
Igloos are iconic snow shelters. They require skill and patience to build. Use blocks of hard-packed snow. Stack them in a circular pattern. The dome shape is strong and stable. Igloos offer excellent insulation. They can withstand harsh weather conditions. Leave a small vent at the top. This allows heat to escape safely.Snow Caves
Snow caves are fast to build. Find a deep snowdrift or hillside. Dig into the snow to create a cave. Ensure the entrance is lower than the sleeping area. This traps heat inside. Snow caves are excellent for emergencies. Be cautious of potential cave-ins. Reinforce the roof if needed. Understanding these snow shelter types is crucial. They offer protection in freezing conditions. With practice, you can build them efficiently.Step-by-step Shelter Construction
Building a survival snow shelter needs careful planning and work. Each stage helps create a safe space against cold and wind. Follow these clear steps for a strong shelter.
Marking And Preparing The Site
Find a flat area with deep, packed snow. Avoid places near trees or unstable snowbanks. Clear loose snow to make a firm base. Mark the shelter’s shape using sticks or your hands. This helps keep the size and shape even.
Shaping And Compacting Snow
Cut blocks of snow from the marked area. Use a small saw or knife if available. Stack blocks in a circular or dome shape. Press blocks tightly to avoid gaps. Compact snow walls by pushing and tapping. This makes the shelter strong and warm.
Creating The Entrance And Ventilation
Dig a small entrance just big enough for crawling. Place the entrance away from the wind direction. Build a low tunnel to reduce cold air entering. Make a small hole near the top for air to flow. This stops stale air and moisture inside. Cover the entrance with a snow block or gear to keep warmth.
Safety Tips During Construction
Building a survival snow shelter demands more than just skill—it requires constant attention to safety. You must stay alert to risks that can arise during construction. Taking the right precautions keeps you protected and ensures your shelter stands firm against the elements.
Preventing Collapse
Snow shelters can collapse suddenly if not built carefully. Make sure the walls are thick enough—at least 12 to 24 inches of compacted snow—to hold weight safely. Avoid using weak or powdery snow that can crumble under pressure.
Creating a dome shape helps distribute weight evenly, reducing collapse risk. If you hear cracking sounds, stop immediately and reinforce the structure. Have a partner nearby to assist and watch for warning signs.
Maintaining Airflow
It’s easy to overlook ventilation, but fresh air is vital inside a snow shelter. Without airflow, carbon dioxide can build up, causing dizziness or worse. Drill a small breathing hole near the top of the shelter to allow air exchange.
Check the hole regularly to keep it clear of snow or ice. Remember, even when it’s freezing outside, stale air inside can be dangerous. How often do you think about the air quality around you during survival situations?
Monitoring Weather Conditions
Weather changes can turn a sturdy shelter into a hazard. Heavy snowfall adds extra weight, increasing collapse risk. High winds can cause drifting snow to block ventilation or collapse weak spots.
Keep an eye on the sky and local weather reports if possible. Be ready to reinforce or abandon your shelter if conditions worsen. Staying proactive can mean the difference between safety and danger in the wild.

Credit: www.bullmoosepatrol.com
Enhancing Shelter Comfort
Making a snow shelter is only half the battle; making it comfortable can be the difference between a rough night and a restful one. Enhancing your shelter’s comfort means focusing on warmth and dryness, which are crucial for survival. Small adjustments inside your shelter can keep you cozy and protect you from the harsh cold outside.
Insulating The Floor
Cold from the ground can quickly sap your body heat. Adding insulation under you is essential to stay warm. Use branches, pine boughs, or even your backpack to create a barrier between you and the snow.
Don’t just lay these materials flat; pile them thick to trap air, which acts as a natural insulator. Have you ever noticed how sitting on a cold bench feels worse than standing? That’s because the cold ground draws heat away fast.
Using Natural Bedding
Natural materials like dry leaves, grass, or pine needles can make your sleeping area softer and warmer. Collect these from nearby areas before settling in. Even a few inches of natural bedding can make a noticeable difference in comfort.
Keep in mind moisture—wet bedding will only make you colder. So, always pick dry, fresh materials. Think about how much better you sleep on a mattress than on a hard floor; natural bedding offers a similar benefit in your snow shelter.
Retaining Heat
Heat retention is the key to feeling warm inside your shelter. Use your body heat wisely—seal the shelter entrance tightly to keep warm air in and cold air out. You can also use a small hot water bottle or warm rocks wrapped in cloth to add extra heat.
Ventilation is important too, though. Without fresh air, moisture builds up, which can make you colder. How do you balance the need for fresh air with keeping warmth inside? A small, high vent can help air circulate without losing much heat.
Emergency Considerations
Building a survival snow shelter is just one part of staying safe in a harsh winter environment. Your chances of making it through improve dramatically when you plan for the unexpected. Emergency considerations are critical—they help you stay visible, hydrated, and warm while you wait for rescue or find your way out.
Signaling For Help
Making sure rescuers can find you is a priority. Use bright-colored items like a jacket or a tarp to create visible signals on the snow. Arrange rocks or sticks in large letters spelling “SOS” or “HELP” in an open area.
If you have a whistle or mirror, use them periodically to catch attention. Remember, sound and light signals can travel farther than you might expect in snowy terrain.
Think about the last time you tried to get help—did you consider how visible you were from above or at a distance? Planning your signaling strategy early can save precious time.
Staying Hydrated And Warm
Cold weather can make you forget to drink enough water, but dehydration is a real risk. Melt snow for water, but always boil or purify it before drinking to avoid illness. Carry a small stove or fuel if possible.
Wear layers to trap heat, but avoid sweating as wet clothes can chill you quickly. Use natural insulation like pine boughs inside your shelter for added warmth and comfort.
Have you noticed how quickly your body temperature drops when you stop moving? Staying warm isn’t just about shelter—it’s about managing moisture and heat loss every hour you spend outside.

Credit: m.youtube.com
Credit: www.bullmoosepatrol.com
Frequently Asked Questions
What Materials Are Needed To Build A Snow Shelter?
You need snow, a sturdy shovel, a snow saw, and a small knife. Insulating materials like pine boughs help improve comfort inside the shelter.
How Long Does It Take To Build A Snow Shelter?
Building a basic snow shelter typically takes 1 to 3 hours, depending on snow conditions and experience. More complex shelters may take longer.
What Is The Safest Type Of Snow Shelter?
An igloo or quinzhee is safest due to its strong dome shape. It provides good insulation and withstands wind and snow pressure effectively.
How Do You Keep Warm Inside A Snow Shelter?
Use insulating layers like pine boughs on the floor and wear dry clothing. Avoid direct contact with snow and minimize ventilation to retain heat.
Conclusion
Building a snow shelter can keep you safe in cold weather. Use snow blocks or dig out a space carefully. Make sure the shelter is strong and insulated well. Always check for air holes to breathe easily. Practice these steps before you need them in real life.
Staying warm and dry saves energy and helps you survive. A simple shelter can make a big difference outside. Keep learning and stay prepared for winter adventures.