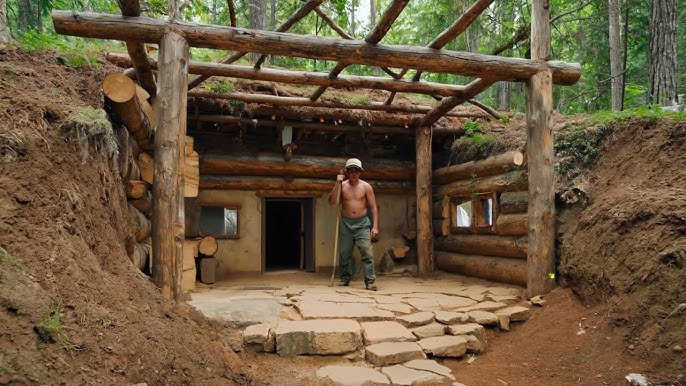
Imagine having a safe place that protects you and your loved ones no matter what happens outside. Building an underground survival shelter can give you that peace of mind.
You might think it’s complicated or expensive, but it doesn’t have to be. In this guide, you’ll learn simple, clear steps to create a shelter that keeps you secure and comfortable. Whether you’re preparing for emergencies or just want to be ready, this article will show you exactly how to make your own underground refuge.
Keep reading—your safety starts here.
Choosing The Right Location
Choosing the right location for an underground survival shelter is crucial. The spot affects safety, durability, and ease of access. It can also impact how well the shelter handles water and weather. Careful planning helps avoid costly mistakes and ensures the shelter lasts long.
Soil Types And Drainage
Soil type plays a key role in building a stable shelter. Sandy soil drains well but may shift easily. Clay soil holds water and can cause flooding. Loamy soil is ideal because it balances drainage and stability.
Good drainage prevents water from seeping inside. Avoid areas where water pools after rain. Check the land slope and natural water flow. Adding gravel or drainage pipes can improve water control.
Accessibility And Safety
The shelter should be easy to reach in an emergency. Choose a location near your home or a safe area. Avoid places prone to landslides, floods, or falling debris. Keep the entrance hidden but accessible.
Consider nearby hazards like power lines, busy roads, or wildlife paths. The area should feel secure and offer protection from natural threats. Easy access helps during urgent evacuations or supply runs.
Legal Considerations
Check local laws before building. Some areas require permits for underground structures. Zoning rules may limit where and how deep you can dig. Fines and legal troubles can delay or stop your project.
Contact local building departments or homeowners’ associations. Get clear information about regulations and restrictions. Document all permissions and keep records for future reference.
Planning Your Shelter Design
Planning your underground survival shelter design is the foundation of a safe and functional refuge. Every detail matters—from how many people it must hold to how fresh the air will be. Thoughtful planning helps avoid costly mistakes and ensures your shelter truly meets your needs.
Size And Capacity
Start by deciding how many people your shelter must accommodate. Think about essentials like sleeping space, storage for food and water, and room to move comfortably. A cramped shelter can increase stress and reduce your chances of staying safe.
Consider the length of time you might stay inside. Will your shelter support short-term emergencies or longer stays? A good rule is to plan for at least 10 square feet per person for sleeping and living space.
Ventilation Systems
Fresh air is critical underground. Without proper ventilation, carbon dioxide can build up quickly, making the space dangerous. You’ll need a system that brings in fresh air and expels stale air without compromising security.
Passive ventilation options like air vents placed at different heights can promote airflow. For better control, you might add hand-crank or solar-powered fans. Have you thought about how you will keep air moving if power fails?
Emergency Exits
One exit is not enough in an emergency. You should plan at least two exits, ideally in different directions. This gives you alternative escape routes if one is blocked.
Make sure exits are hidden but accessible. They should be easy to open from the inside without tools or keys. Have you tested how quickly you can reach and open these exits under stress?
Gathering Materials And Tools
Building an underground survival shelter starts with gathering the right materials and tools. This step ensures a safe, sturdy, and long-lasting shelter. Choosing quality items saves time and effort during construction. Prepare everything before digging to avoid delays or mistakes.
Essential Building Materials
- Concrete or cement for strong walls and floors
- Steel rebar to reinforce concrete structures
- Wood for framing and support beams
- Gravel and sand for drainage and base layers
- Bricks or blocks for additional wall strength
- Insulation materials to maintain temperature
Tools For Excavation And Construction
- Shovels and spades for digging soil
- Pickaxe to break hard ground or rocks
- Wheelbarrow for moving dirt and materials
- Measuring tape and level for accuracy
- Concrete mixer for consistent cement blend
- Hammer, nails, and saw for woodwork
- Protective gloves and safety goggles
Waterproofing Supplies
- Waterproof membranes to stop moisture seepage
- Sealant or caulk for cracks and joints
- Drain pipes to direct water away
- Tarps or plastic sheeting for extra protection
- Waterproof paint or coating for walls

Credit: www.youtube.com
Excavation And Site Preparation
Excavation and site preparation set the stage for your underground survival shelter. Getting this phase right can save you time, effort, and future headaches. It’s about choosing the right spot, digging carefully, and making sure your shelter rests on solid ground.
Marking And Digging The Site
Start by clearly marking the area where you want your shelter. Use stakes and string to outline the exact shape and size. This visual guide helps avoid digging mistakes and keeps your project organized.
Digging requires patience and precision. Aim for straight walls and a level floor to make the next steps easier. Watch out for roots, rocks, or underground pipes that could slow you down or cause damage.
Managing Soil Removal
Soil removal can quickly become overwhelming if you don’t plan ahead. Create a dedicated spot nearby to pile the dirt, but keep it far enough to avoid it sliding back into your excavation.
Think about how you’ll move the soil—wheelbarrows and shovels work well, but if you have access, renting a small excavator can speed things up. Also, consider what type of soil you have; sandy soil behaves differently than clay.
Creating A Stable Foundation
A stable foundation prevents your shelter from shifting or flooding. After digging, level the floor and compact the soil to create a firm base.
Adding a layer of gravel can improve drainage and keep moisture away from your shelter walls. You might also want to use concrete or treated wood beams depending on your shelter design.
Have you thought about how water will flow around your shelter? Proper site grading can keep your foundation dry and strong, which is crucial for long-term safety.
Constructing The Shelter Walls And Roof
Constructing sturdy walls and a roof is vital for an underground survival shelter. Use strong materials like concrete or metal. Ensure proper insulation to maintain temperature and protect against moisture.
Constructing the walls and roof of an underground survival shelter is crucial. It ensures safety and durability. Proper construction shields you from external elements and potential threats. Let’s explore how to build strong walls, install support beams, and seal and insulate the roof effectively.Building Strong Walls
Strong walls are the foundation of your shelter. Use sturdy materials like concrete or reinforced bricks. These materials provide strength and longevity. Consider using steel mesh for added support. Ensure walls are thick enough to withstand pressure. This prevents collapse and maintains safety. Regularly inspect walls for cracks or signs of weakness.Installing Support Beams
Support beams hold up the roof securely. Choose durable materials like steel or treated wood. These materials resist rot and corrosion. Space the beams evenly across the roof. This distributes weight and pressure effectively. Secure beams firmly to the walls. Use bolts or heavy-duty brackets for added stability. Proper installation ensures the roof remains intact.Sealing And Insulating The Roof
A well-sealed roof keeps moisture and elements out. Use waterproof membranes or tarps for protection. These materials prevent leaks and water damage. Apply insulation to maintain a stable temperature. Foam boards or fiberglass are good options. Insulation keeps the shelter comfortable in all weather. Check for gaps or vulnerabilities and seal them. A properly sealed roof enhances shelter longevity.Installing Doors And Ventilation
Installing doors and ventilation in your underground survival shelter is critical for safety and comfort. Doors protect you from outside threats and weather, while proper ventilation keeps fresh air flowing and prevents dangerous buildup of gases. Getting these elements right can make your shelter a secure and livable space.
Choosing Secure Doors
Your shelter’s door is the first line of defense. Choose a door made of heavy-duty steel or reinforced materials that can withstand impact and resist tampering.
Look for doors with strong locking mechanisms, such as deadbolts or multi-point locks. Don’t forget about a secure frame; even the best door is weak if the frame can be forced open.
Consider adding a hatch or secondary door inside for extra protection. Have you thought about how easy it will be to open the door from inside during an emergency?
Setting Up Airflow Systems
Ventilation is essential to keep air fresh and avoid suffocation risks. You need both intake and exhaust vents to create proper airflow.
Use pipes or ducts that extend above ground, fitted with covers to keep debris and pests out. Adding manual or battery-powered fans can help circulate air when natural airflow is limited.
Test your ventilation system before you finish your shelter. Can you comfortably breathe inside for extended periods without feeling stuffy?
Preventing Moisture Build-up
Moisture can cause mold and structural damage in underground shelters. Install vents in locations that promote cross-ventilation to reduce humidity.
Use moisture barriers on walls and floors to keep water from seeping in. Adding a dehumidifier or moisture absorber can also help maintain a dry atmosphere.
Keep an eye on condensation during different weather conditions. How will you monitor and manage moisture levels to keep your shelter safe and comfortable?
Waterproofing And Drainage Solutions
Waterproofing and drainage are the backbone of a reliable underground survival shelter. Without proper protection against water, your shelter can quickly become a damp, uncomfortable, and even unsafe space. Addressing moisture and water flow early will save you from costly repairs and potential health risks down the line.
Applying Waterproof Coatings
Choose a waterproof coating designed for below-ground structures, such as bituminous membranes or liquid rubber sealants. These materials create a strong barrier that stops water from seeping through concrete or soil walls.
Make sure to clean and dry surfaces thoroughly before applying the coating. Multiple layers often work best—each layer strengthens the shield against moisture.
Have you considered how temperature changes can affect the coating’s flexibility? Flexible coatings help prevent cracks that let water in during freeze-thaw cycles.
Setting Up Drainage Channels
Drainage channels redirect water away from your shelter, reducing pressure on the walls and floor. Dig trenches around the perimeter and line them with gravel for better water flow.
Add perforated pipes inside these trenches to guide water to a safe exit point. Position the pipes with a slight slope to encourage continuous drainage.
Don’t overlook the importance of a gravel layer beneath your shelter’s floor. This layer helps water drain downward instead of pooling beneath your shelter.
Preventing Flooding
Flooding risks can be minimized by combining waterproofing and drainage with smart site selection. Avoid low-lying areas prone to water accumulation if possible.
Install a sump pump in the lowest part of your shelter to actively remove any water that sneaks in. Make sure the pump has a reliable power source and backup options.
Consider adding a raised entryway or berm around your shelter’s entrance to block surface water during heavy rains. How prepared is your shelter to handle unexpected storms?

Credit: www.youtube.com
Furnishing And Stocking Your Shelter
Furnishing and stocking your underground survival shelter is vital for lasting comfort and safety. Proper planning ensures you stay prepared for any emergency. Focus on essential supplies, lighting, and storage for food and water. Organize items for quick access and efficient use of space.
Essential Survival Supplies
- First aid kit with bandages, antiseptics, and medicines
- Fire-starting tools like lighters and waterproof matches
- Multi-tool or knife for various tasks
- Emergency blankets and warm clothing
- Communication devices such as a battery-powered radio
- Sanitation supplies including biodegradable soap and waste bags
- Backup batteries and power banks
Comfort And Lighting
Choose lighting that lasts long and uses low power. LED lanterns and solar-powered lights work well. Keep extra bulbs and batteries on hand.
Furnish your shelter with sleeping mats, pillows, and blankets. Use compact furniture or foldable chairs to save space. Ventilation is important to keep air fresh and reduce moisture.
Food And Water Storage
Store non-perishable foods like canned goods, dried fruits, and nuts. Rotate supplies regularly to keep them fresh. Use airtight containers to protect food from pests and moisture.
Water is crucial. Keep large water containers and smaller bottles. Include water purification tablets or filters. Plan for at least one gallon of water per person per day.
Safety Checks And Maintenance
Building an underground survival shelter requires ongoing safety checks and maintenance. These actions keep the shelter secure and livable. Regular inspections help spot problems early. Simple maintenance tasks prevent bigger issues. Stay proactive to protect yourself and your shelter.
Inspecting Structural Integrity
Check walls and ceilings for cracks or leaks. Look for signs of water damage or mold. Examine support beams for rust or rot. Ensure the entrance and exit points are stable. Fix any damage immediately to avoid collapse. Use a flashlight to see hidden areas clearly.
Maintaining Ventilation
Clear vents from dust and debris regularly. Confirm air filters are clean and replaced as needed. Test airflow to prevent stale or harmful air buildup. Avoid blocking ventilation openings with stored items. Proper ventilation keeps oxygen levels safe. It also reduces moisture and mold growth.
Regular Upkeep Tips
- Keep the shelter dry by fixing leaks quickly.
- Store tools and supplies in organized containers.
- Test emergency lights and batteries often.
- Clean floors and surfaces to prevent pests.
- Review and update emergency plans yearly.
- Document maintenance dates and tasks for tracking.

Credit: www.youtube.com
Frequently Asked Questions
What Materials Are Best For Underground Survival Shelters?
Durable materials like concrete, steel, and treated wood are ideal. They resist moisture, pressure, and pests. Proper insulation is essential for temperature control and comfort.
How Deep Should An Underground Shelter Be?
A depth of 6 to 8 feet is generally safe. This depth protects from surface threats and temperature fluctuations. Deeper shelters offer more safety but require more effort to build.
How Do You Ventilate An Underground Survival Shelter?
Use air vents with filters to allow fresh air in. A manual or battery-powered ventilation system helps maintain airflow. Proper ventilation prevents moisture buildup and keeps air breathable.
What Essentials Should Be Stored In An Underground Shelter?
Store water, non-perishable food, first aid kits, and tools. Include batteries, flashlights, and communication devices. These essentials ensure survival during extended stays underground.
Conclusion
Building an underground survival shelter takes time and care. Choose a safe location with good soil and drainage. Use strong materials to protect yourself from weather and animals. Keep the shelter well-ventilated and dry to stay healthy. Plan for food, water, and light inside the shelter.
Regularly check and maintain the structure to avoid problems. A well-built shelter can keep you safe during emergencies. Stay prepared and take small steps every day. Safety and readiness come from careful planning and action. Your efforts will help you stay secure underground.