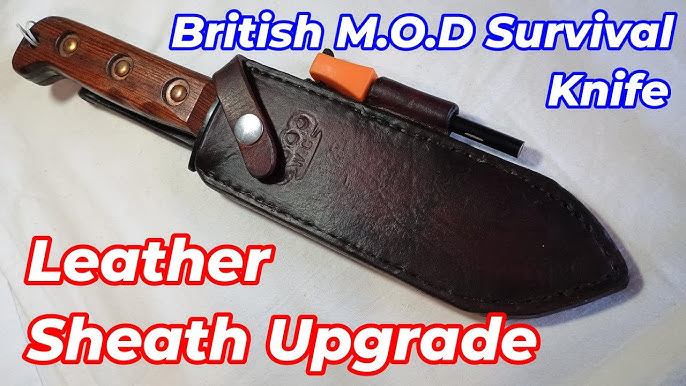
If you rely on your knife for survival, having a well-made sheath survival kit can be a game-changer. Imagine having all your essential tools organized and ready, right where you need them most.
This guide will show you how to create a knife sheath survival kit that fits your needs perfectly. By the end, you’ll have everything set up to boost your safety and confidence in any situation. Ready to take your survival skills to the next level?
Let’s dive in.

Credit: www.youtube.com
Choosing The Right Materials
Choosing the right materials is the foundation of crafting a reliable knife sheath survival kit. The durability and protection your sheath provides depend heavily on what you select. Understanding the pros and cons of different materials will help you make a choice that fits your survival needs perfectly.
Types Of Leather And Alternatives
Leather is a popular choice because it offers strength and flexibility. Full-grain leather is the toughest and lasts the longest but can be expensive. If you want something lighter, top-grain leather is a good alternative, though it sacrifices some durability.
Not a fan of leather? Consider synthetic materials like Kydex or nylon. Kydex molds well to your knife, offering excellent retention and water resistance. Nylon is affordable and easy to work with, but it may wear out faster in harsh conditions.
Think about your environment and how you’ll use your sheath. Will it face moisture? Rough terrain? Your answers will guide you to the right material choice.
Tools And Supplies Needed
Gathering the right tools makes the crafting process smoother and your sheath more professional. Basic supplies include:
- Cutting tools like a sharp utility knife or rotary cutter
- Leather punch or hole punch for making precise holes
- Strong thread and needles designed for heavy-duty stitching
- Rivets or snaps for secure fastening
- Edge bevelers and burnishing tools to finish edges cleanly
Don’t forget adhesives if you want extra bonding strength before stitching. Having the right tools saves you time and frustration, especially when handling tough materials like leather or Kydex.
What tools do you already have that could help? Often, survival kits benefit from multi-use tools you already own.

Credit: www.youtube.com
Measuring And Cutting The Sheath
Measuring and cutting the sheath is a crucial step in creating a survival knife sheath that fits perfectly and functions reliably. Getting this right ensures your knife stays secure and is easy to access when you need it most. Let’s look at how to size your sheath properly and cut it with precision.
Sizing For Your Knife
Your knife’s dimensions determine the sheath size. Measure the blade length and width carefully, including the handle if it will be enclosed. Don’t forget to add a little extra space for ease of insertion and removal—about 1/8 inch on each side usually works well.
Consider how thick your knife is. A sheath that’s too tight can damage the knife or make drawing difficult, while one that’s too loose may let it slip out unexpectedly. Think about whether you’ll carry the knife in different conditions, like with gloves on, which might require extra room.
Marking And Cutting Techniques
Mark your material clearly with a pencil or fabric chalk before cutting. Use a ruler or straight edge to ensure your lines are straight and precise. Double-check your measurements—once you cut, there’s no going back!
Cut slowly and steadily with a sharp utility knife or heavy-duty scissors. If you’re working with leather, a rotary cutter paired with a cutting mat can make your cuts cleaner and easier. Always cut slightly outside your marked lines; you can trim excess later for a perfect fit.
- Use clamps or weights to hold the material steady while cutting.
- Score the surface lightly first if the material is thick—this prevents slipping.
- Keep your blades sharp to avoid jagged edges.
Have you noticed how small errors in measuring can cause big issues later? Taking your time here saves frustration and improves the final product significantly.
Assembling The Sheath
Assembling the sheath is where your survival kit really starts to take shape. This part demands patience and precision because the durability of your sheath depends on how well you put it together. Whether you choose leather, nylon, or Kydex, the way you join and reinforce the parts will determine how long your sheath holds up in tough conditions.
Stitching Methods
Stitching is the backbone of your sheath’s strength. You can use a simple running stitch, but a saddle stitch offers much more durability and can withstand heavy wear. The saddle stitch involves using two needles and thread simultaneously, creating a tough and even seam.
Hand stitching gives you control over each stitch’s tightness. If you’re working with thick material like leather, using an awl to pre-punch holes makes stitching easier and prevents tearing. Don’t rush this step—loose stitches can lead to early failure when you need your sheath most.
Adding Reinforcements
Reinforcements protect the sheath from wear and add strength at stress points. Consider adding rivets or metal eyelets near the opening where the knife slides in and out. These small additions can prevent the material from stretching or fraying over time.
Another great reinforcement is adding a double layer of material at the belt loop or attachment points. This extra thickness helps distribute the force when you’re moving, so your sheath won’t tear. Have you checked if your sheath feels solid at these points before use?
Creating The Survival Kit Components
Creating the survival kit components is a crucial step for any outdoor enthusiast. A well-prepared kit fits neatly inside the knife sheath. It holds tools and items that help in emergencies. Each component must be useful and compact. This section guides you through selecting and organizing these essentials.
Essential Items To Include
Choose items that serve multiple purposes and save space. Focus on basics that aid in shelter, fire, and first aid. Here is a list of must-have items:
- Water purification tablets or a small filter
- Fire starter such as waterproof matches or a flint
- Small fishing kit with hooks and line
- Compact first aid supplies like bandages and antiseptic wipes
- Emergency whistle for signaling
- Needle and strong thread for repairs
- Miniature multitool or small screwdriver
Keep the kit simple. Avoid bulky or unnecessary objects. This makes it easier to carry and access.
Organizing The Kit Inside The Sheath
Arrange items for quick reach. Use small waterproof bags or pouches to separate things. This prevents damage and loss.
- Place fire starters in a waterproof case
- Wrap fishing gear in a small cloth or plastic
- Store first aid items in a compact pouch
- Keep sharp or metal tools away from fragile items
Secure everything tightly to avoid movement. Use elastic bands or Velcro straps inside the sheath. Test the kit’s fit often. Adjust the arrangement for comfort and access.
Attaching And Securing The Sheath
Attaching and securing your knife sheath properly is crucial for both safety and convenience. If the sheath isn’t firmly fixed, your knife could slip out or become difficult to access when you need it most. The right attachment method keeps your knife stable, accessible, and comfortable to carry during your outdoor adventures.
Belt Loops And Clips
Belt loops are a classic way to attach your sheath. They offer a simple, secure hold by sliding your belt through the loop, keeping the sheath close to your body. When adding a belt loop, make sure it’s wide enough for your belt size but snug enough to prevent excessive movement.
Clips provide a quicker way to attach or remove your sheath. Metal or plastic clips can hook onto your belt, pants, or even backpack straps. Clips are great if you want flexibility, but test their grip—some clips loosen over time and may need reinforcement.
- Use strong stitching or rivets to secure belt loops to the sheath.
- Choose corrosion-resistant clips for durability in wet environments.
- Consider the clip’s shape to ensure it won’t easily catch on branches or gear.
Straps And Fasteners
Straps add extra security, especially if you’re moving through dense brush or rough terrain. A strap with a snap button or Velcro around the knife handle prevents it from slipping out accidentally. I once lost my knife because the sheath lacked a reliable strap—don’t let that happen to you.
Fasteners like snaps, buckles, or Velcro should be strong but easy to open when you need your knife quickly. When attaching straps, think about accessibility: Can you release the fastener with one hand? This small detail can make a big difference in an emergency.
- Use heavy-duty Velcro for repeated use without wear.
- Snap buttons provide a firm hold but require two hands to open safely.
- Leather straps can blend well with natural gear but need regular maintenance.

Credit: www.knifekits.com
Maintaining Your Knife Sheath
Maintaining your knife sheath helps it last longer and protects your blade well. A well-kept sheath keeps your knife safe and ready for use. Regular care prevents damage and keeps the leather flexible and strong.
Cleaning And Conditioning Leather
Clean your sheath gently to avoid drying the leather. Use a soft cloth or brush to remove dirt and dust. Avoid soaking the leather in water. Instead, use a damp cloth for surface cleaning.
After cleaning, apply a leather conditioner. This keeps the leather soft and prevents cracks. Use a small amount and rub it evenly on the surface. Let it dry naturally, away from direct heat or sunlight.
Repairing Common Damages
Check your sheath regularly for scratches or loose stitches. Small scratches can be rubbed gently with leather oil to reduce their appearance. Use a needle and strong thread to fix loose stitches.
For deeper cuts or tears, use leather glue or take it to a professional. Avoid using harsh chemicals that can weaken the leather. Keep your sheath dry to stop mold and mildew from forming.
Frequently Asked Questions
What Materials Do I Need For A Knife Sheath?
To make a knife sheath, you’ll need leather, a cutting tool, strong thread, and a needle. Leather glue and a snap button for closure are also essential. These materials ensure durability and functionality in your survival kit.
How Do I Sew A Knife Sheath?
Begin by cutting the leather to fit your knife. Sew the edges using a strong thread and needle. Ensure stitches are tight and evenly spaced. This provides durability and secures the knife effectively.
Why Include A Knife Sheath In A Survival Kit?
A knife sheath protects the blade and ensures safety during transport. It keeps the knife sharp and ready for emergencies. A well-made sheath also prevents accidental cuts, making it essential for survival situations.
Can I Personalize My Knife Sheath?
Yes, you can personalize your sheath by adding custom designs or initials. Use leather stamps or dyes to create unique patterns. Personalization adds a personal touch and makes it easily identifiable in a survival kit.
Conclusion
Making a knife sheath survival kit keeps your tools safe and ready. It helps you stay prepared in outdoor situations. Choose simple items that fit your needs and space. Practice using your kit often to build confidence. Stay safe and enjoy your adventures with ease.
A well-made kit can make a big difference. Keep it handy and check it regularly. Your survival skills will improve with each use. Ready for any challenge.