If you want to be ready for any outdoor adventure or unexpected emergency, having a paracord survival kit is a smart move. You might already know paracord is strong and versatile, but do you know how to turn it into a kit that can truly save your day?
In this guide, you’ll discover simple steps to create your own paracord survival kit. By the end, you’ll have the confidence and tools to handle tough situations with ease. Keep reading, because your safety and peace of mind are worth every minute.
Choosing The Right Paracord
Choosing the right paracord is key to creating a useful survival kit. The right cord can help in many situations, from making shelter to repairing gear. Different types of paracord have varied strengths and features. Picking the best one ensures your kit works well when you need it most.
Types Of Paracord
Paracord comes in several types. The most common is Type III, also called 550 paracord. It holds up to 550 pounds and has seven inner strands. This type works well for most survival needs.
Other types include Type I and Type IV. Type I is thinner and less strong. Type IV is thicker and stronger but less flexible. Choose the type based on your planned uses and weight needs.
Strength And Durability
Strength matters for survival tasks. Look for paracord with a high tensile strength. It should hold heavy loads without breaking.
Durability means the cord can resist wear and tear. Nylon paracord lasts longer than polyester under rough conditions. Water resistance is also important to keep it strong in wet weather.
Color And Visibility
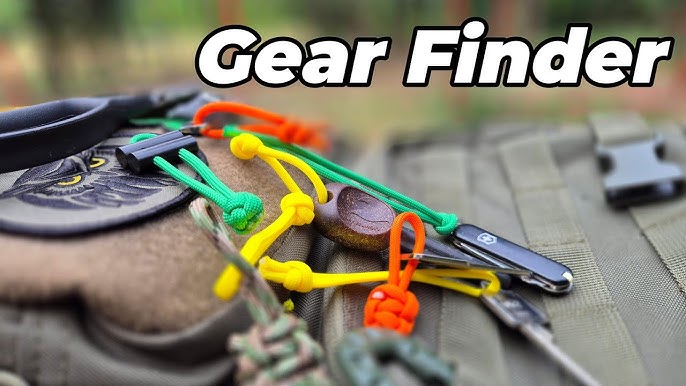
Color affects visibility and camouflage. Bright colors like orange or yellow are easy to find in nature. They help avoid losing your gear.
Camouflage colors blend with the environment. Good for hunters or those who want to stay hidden. Choose colors that fit your survival style and environment.

Credit: www.gearaid.com
Essential Tools And Materials
Creating a paracord survival kit starts with gathering the right tools and materials. These essentials will ensure your kit is practical, compact, and ready for various situations. Choosing the right components can be the difference between a stressful emergency and a manageable one.
Basic Tools Needed
At the core of your survival kit is the paracord itself. Opt for a durable, high-quality 550 paracord, which offers strength and versatility. Around 15 to 30 feet should suffice for most uses, from building shelters to making traps.
Next, a reliable knife is indispensable. A sharp, sturdy blade can cut paracord, prepare food, or even defend yourself. I once found that a fixed blade with a comfortable grip made all the difference during a weekend hiking trip where I needed to quickly craft a shelter.
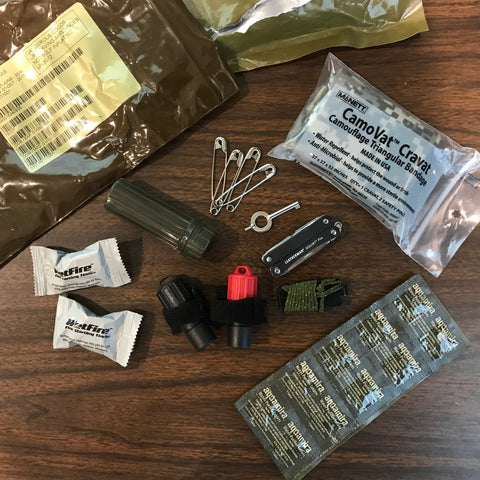
Don’t forget a fire starter. Waterproof matches or a ferrocerium rod are excellent choices. Fire is crucial for warmth, cooking, and signaling, so having a dependable way to light one is a must.
Additional Accessories
While the basics cover many survival scenarios, adding a few extras can enhance your kit’s usefulness. A small compass helps with navigation, especially if your phone dies or loses signal. Have you ever tried finding your way without one? It’s frustrating and risky.
Include a compact first aid kit with bandages, antiseptic wipes, and pain relievers. Minor injuries can escalate quickly in the wild, and having these supplies can save you from serious trouble.
Consider adding a whistle for signaling help. Its piercing sound can carry farther than your voice. Also, a small multi-tool with pliers and screwdrivers can handle unexpected repairs and adjustments.
Step-by-step Kit Assembly
Building a paracord survival kit takes focus and care. Each part matters for a reliable kit. This section breaks down the assembly process clearly. Follow these simple steps to create a useful survival tool. Start with measuring and cutting the paracord accurately. Then, learn key knotting techniques to secure your kit. Finally, add essential survival items to complete your setup.
Measuring And Cutting Paracord
Measure the length of paracord needed for your project. The size depends on the type of kit you want. Use a ruler or tape measure for accuracy. Cut the paracord with sharp scissors or a knife. Melt the ends slightly with heat to stop fraying. Keep your cuts clean for better knotting and durability.
Knotting Techniques
Choose knots that hold tight under pressure. The cobra knot is popular for survival bracelets. Try the square knot for joining two paracord pieces. Practice tying knots until they feel secure and neat. Tight knots prevent unraveling during use. Use a lighter to seal knots if needed for extra strength.
Adding Survival Items
Select small, lightweight survival tools to include. Common items are a fire starter, whistle, or small blade. Attach items securely using loops or pouches made from paracord. Keep the kit compact and easy to carry. Test each item to ensure it stays in place during movement.
Including Key Survival Items
Including key survival items in your paracord survival kit is crucial. Each item serves a specific purpose that can make a big difference in an emergency. Think about what you would need to stay safe, find your way, and handle unexpected situations.
Fire Starting Tools
Fire is essential for warmth, cooking, and signaling for help. Add a reliable fire starter like a ferrocerium rod or waterproof matches. Small, lightweight, and easy to use tools work best in your kit.
I once had only a lighter in my kit during a hiking trip. When it got wet, I struggled to start a fire. That experience taught me to always carry a backup fire-starting tool.
Navigation Aids
Getting lost can turn a simple hike into a dangerous situation. Include a compact compass and a detailed map of your area. A small whistle can also help you signal rescuers if needed.
Have you ever tried using your phone’s GPS in the wilderness? Batteries die fast, so traditional navigation tools are a must. These aids give you control over your route, even without technology.
Fishing Gear
Fishing gear boosts your chances of finding food in the wild. Pack a few fishing hooks, a small spool of fishing line, and some sinkers. These items fit easily into your kit and can provide protein when other food isn’t available.
During a weekend camping trip, I used a simple hook and line from my kit to catch fish for dinner. It was a practical reminder that a little fishing gear can go a long way.
First Aid Essentials
Injuries happen, so your kit must include first aid supplies. Add adhesive bandages, antiseptic wipes, pain relievers, and tweezers. Basic medical items help you treat wounds and prevent infections until help arrives.
Think about the last time you got a cut outdoors. Having first aid supplies made a big difference in how quickly I healed and avoided complications. Your kit should prepare you for minor injuries.
Compact And Efficient Packing
Packing your paracord survival kit to be both compact and efficient is crucial for easy carrying and quick access. A bulky kit slows you down and makes you less likely to bring it along. You want your gear ready to deploy without a fight.
Space-saving Techniques
Start by choosing multi-use items. For instance, a small knife with a built-in firestarter cuts down on space. Use paracord itself as a tool for bundling and securing other gear tightly.
Roll items instead of stacking them flat. Rolling reduces empty space and keeps things from shifting. Compress soft items like bandages with rubber bands to shrink their size.
Have you tried using vacuum-seal bags? They can dramatically reduce volume, especially for fabric or clothing. Just be cautious about moisture if you’re outdoors.
Organizing Components
Sort your items by function, like first aid, fire-starting, and fishing supplies. Grouping related gear lets you grab what you need instantly. A small pouch system or clear zip bags work well to keep groups visible and separate.
Label your pouches or use color coding to reduce search time. I once spent precious minutes fumbling for a lighter because I hadn’t organized my kit properly. Don’t let that happen to you.
Place heavier items at the bottom of your pack to maintain balance. Keep frequently used tools near the top or in outer pockets. This setup saves time and keeps your kit stable during movement.
Testing Your Survival Kit
Testing your paracord survival kit ensures it works well when needed. Building the kit is just the start. You must check every item and how it fits together. Testing shows if your kit can handle tough situations. It also helps build confidence in your gear.
Try to use the kit in real conditions. This reveals the true value of each tool. Testing also uncovers any missing items or weak spots. Make sure your kit is easy to carry and access quickly.
Real-world Scenarios
Use your survival kit in different outdoor settings. Simulate situations like starting a fire or building a shelter. Practice using paracord to secure items or make traps. Test how well your tools perform under stress. Check if you can open packages or cut rope easily.
Time yourself completing tasks. This helps spot delays or difficulties. Try packing and unpacking the kit several times. Notice if anything feels heavy or awkward to reach. Testing in various weather conditions adds value too.
Adjustments And Improvements
After testing, list what worked and what didn’t. Remove items you never used. Add tools that could make tasks easier. Replace weak or unreliable gear with better quality ones. Adjust the layout for faster access to essentials.
Keep your kit lightweight but functional. Regularly update the kit based on new skills or experiences. Store items in waterproof bags to protect them. Tighten paracord knots and check for wear. A well-maintained kit lasts longer and stays ready.
Maintaining Your Kit
Maintaining your paracord survival kit is key to ensuring it serves you well when you need it most. A well-kept kit boosts your confidence and readiness in any survival situation. Neglecting maintenance can lead to unexpected failures and wasted resources.
Regular Inspections
Set a schedule to check your kit, ideally every few months. Look closely at the paracord for frays or weak spots—you don’t want it snapping under pressure.
Examine every item for damage or wear. Check that tools still function properly and that fire starters ignite quickly. Have you ever reached for a tool only to find it rusted or broken? Avoid that frustration by staying on top of inspections.
Replacing Used Items
After using any item from your kit, replace it immediately. Running low on essentials like tinder, matches, or bandages can leave you vulnerable in an emergency.
Keep a small stash of spare items ready for quick swaps. This habit helped me once when I used my last emergency whistle during a hike—having a backup saved the day.
Ask yourself: Do you have enough replacements to cover multiple uses? Think ahead to avoid surprises when you need your kit most.

Credit: arbutuscoast.co
Paracord Projects For Skill Enhancement
Building a paracord survival kit is not just about gathering materials; it’s also about sharpening your skills. Taking on paracord projects helps you master techniques that can be crucial in emergencies. These projects turn simple cords into practical tools while boosting your confidence with your gear.
Crafting With Paracord
Crafting with paracord goes beyond making bracelets. You can create lanyards, keychains, and even small rescue slings. Each project teaches you how to measure, knot, and weave efficiently, which are essential skills in survival situations.
Try making a survival bracelet with integrated tools like a firestarter or a whistle. This adds functionality and pushes your crafting skills further. How precise are you when working with different paracord thicknesses or textures?
- Practice cutting and melting ends to prevent fraying
- Experiment with different weaving patterns for strength and flexibility
- Use color combinations to improve visibility or camouflage
Advanced Knot Techniques
Knowing a few knots won’t cut it in a survival scenario. Learning advanced knots like the constrictor, bowline, or trucker’s hitch can make a huge difference. These knots serve specific purposes such as securing loads, creating loops, or tightening ropes.
While practicing, ask yourself: Can you tie a knot quickly under pressure? Can you untie it just as fast when needed? These are real challenges you’ll face outdoors.
| Knot Name | Use | Difficulty Level |
|---|---|---|
| Constrictor Knot | Binding objects tightly | Intermediate |
| Bowline Knot | Creating a fixed loop | Beginner to Intermediate |
| Trucker’s Hitch | Tightening and securing loads | Advanced |
Consistent practice with these knots will prepare you for unpredictable situations. Which knot do you find most challenging, and why?

Credit: roarmag.org
Frequently Asked Questions
What Essential Items Go In A Paracord Survival Kit?
A paracord survival kit should include a knife, firestarter, whistle, fishing gear, and a small first-aid kit. These essentials help with shelter, signaling, food gathering, and emergency care in outdoor situations.
How Much Paracord Is Needed For A Survival Kit?
Typically, 50 to 100 feet of paracord is sufficient for a survival kit. This length provides enough cordage for building shelters, traps, and other emergency uses without adding excessive weight.
Can Paracord Be Used For Emergency Shelter Building?
Yes, paracord is strong and versatile, making it ideal for constructing emergency shelters. It can secure tarps, tie branches, and create sturdy support structures in survival scenarios.
How Do You Maintain A Paracord Survival Kit?
Keep your paracord kit dry, clean, and regularly check for wear or damage. Replace any frayed cord or expired items to ensure reliability during emergencies.
Conclusion
Making a paracord survival kit is simple and useful. You only need a few tools and paracord. This kit helps you stay ready for outdoor trips or emergencies. Each item has a clear purpose. Carry it with you to solve small problems quickly.
Practice using your kit to feel confident. Stay safe and prepared wherever you go. Building your own kit saves money and gives peace of mind. Try it today and enjoy the benefits of being prepared.