Have you ever faced the stress of losing important files or a system crash? If you have an Acronis Survival Kit, you already have a powerful tool to bring your data back quickly.
But do you know exactly how to use it when the time comes? In this guide, you’ll discover clear, simple steps to restore your system using the Acronis Survival Kit. By the end, you’ll feel confident and ready to recover your data without hassle.
Keep reading to make sure you never lose a moment or a file again.

Credit: us.informatiweb.net
Preparing For Restoration
Preparing for restoration with the Acronis Survival Kit is crucial for a smooth recovery. This phase ensures you have everything ready before starting the process. It minimizes errors and saves time during restoration. Follow the steps carefully to avoid data loss or interruptions.
Check Acronis Survival Kit Contents
First, inspect the Survival Kit package. It should include:
- An external hard drive or USB device
- Bootable media such as a USB stick or DVD
- Acronis recovery software files
Make sure the external drive has enough free space. Confirm the bootable media is not damaged or corrupted. These items are essential for the restoration process.
Verify Backup Integrity
Next, verify your backup files. Open Acronis software and select the backup location. Run a backup validation check to ensure data is intact. This step detects any corruption or missing files early. Valid backups prevent restoration failures.
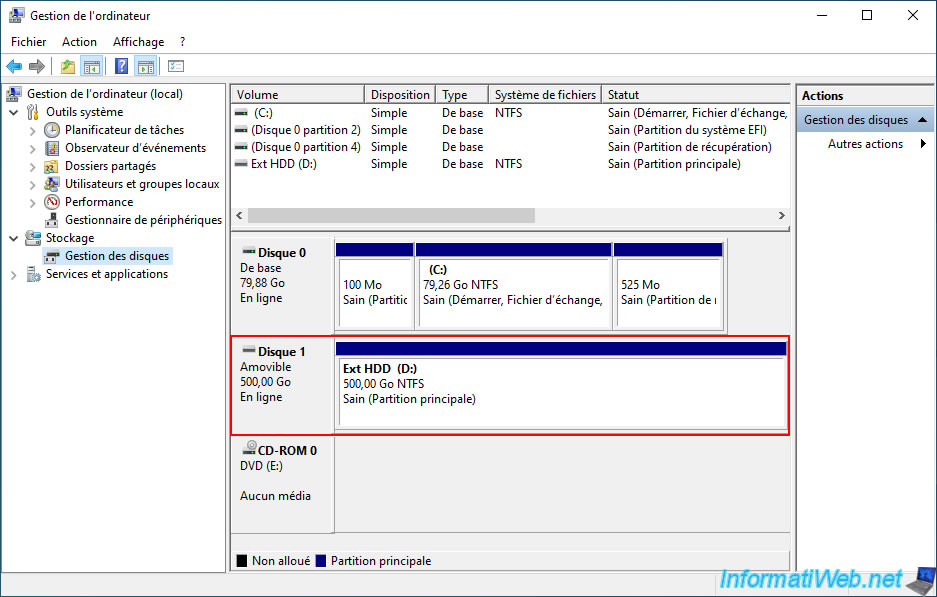
Connect Survival Kit To Computer
Connect the external drive containing the Survival Kit to your computer. Use a USB port that works reliably. Avoid hubs or adapters that may cause connection issues. Power on the device and wait for it to be recognized by your system.
Once connected, access the bootable media to start the recovery process. Proper connection ensures smooth communication between your computer and the Survival Kit.
Launching Acronis Software
Launching Acronis software is the first step in restoring your data from the Acronis Survival Kit. This process prepares the system to access backup files and recovery tools quickly. It ensures you can start the restoration without delay and with minimal hassle.
Before you begin, make sure your Acronis Survival Kit is connected to your computer. This kit contains the necessary backup files and recovery utilities to bring your system back to a previous state. Once connected, the software will guide you through the recovery process.
Start Acronis True Image
To start, open the Acronis True Image software on your computer. Locate the program icon on your desktop or in the start menu and double-click it. The software will launch and display the main interface.
If you do not see the icon, check your installed programs list or use the search function. Starting the program correctly ensures access to all recovery features. Wait for the software to load completely before moving to the next step.
Access Recovery Options
Once Acronis True Image opens, find the recovery section on the main screen. This area allows you to restore files, folders, or your entire system from the backup. Select the option that best fits your recovery needs.
Next, point the software to your Acronis Survival Kit as the backup source. This step lets the program read the saved data and prepare it for restoration. Follow the on-screen instructions carefully to avoid errors.
Selecting Backup To Restore
Selecting the right backup to restore is a key step in using the Acronis Survival Kit. This process ensures you recover the correct files or system image without errors. Picking the right version helps avoid data loss and saves time during restoration.
Focus on understanding where the backup files are stored and which version fits your needs. Proper selection sets the stage for a smooth and successful restore.
Locate Backup File On Survival Kit
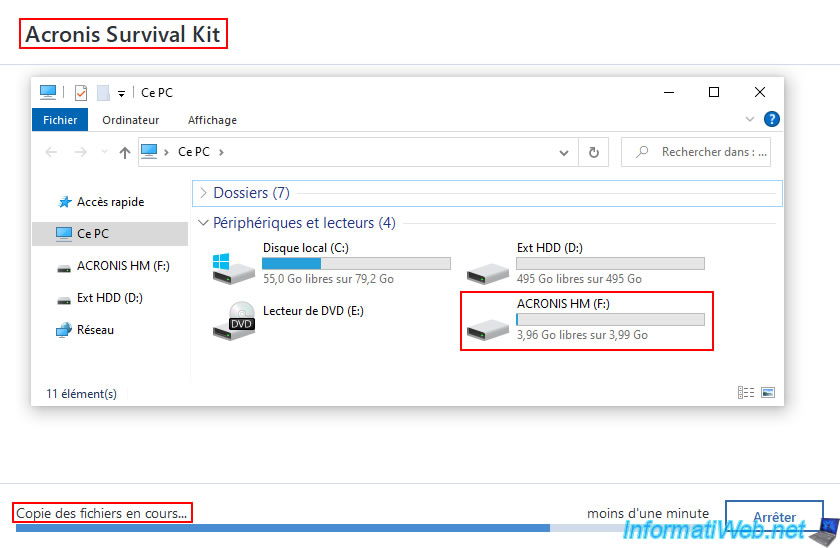
Start by connecting the Survival Kit to your computer. Open the file explorer and navigate to the external drive. Look for a folder named “Acronis” or “Backup.”
Inside, find files with extensions like .tib or .tibx. These are your backup files. Note the file names and sizes to identify the correct backup.
Choose Backup Version
Acronis often creates multiple backup versions over time. Each version has a date and time stamp. Review these details carefully to pick the most suitable backup.
Select the latest backup for the most recent data. Choose an older version if the latest one is corrupted or missing important files.
Credit: us.informatiweb.net
Configuring Restore Settings
Configuring restore settings in Acronis Survival Kit is a crucial step. It ensures your data returns safely and correctly. Careful selection of each setting prevents errors and data loss. This section guides you through the main settings you need to adjust.
Select Destination Drive
Choose the drive where you want to restore your backup. The drive must have enough space for the data. Select carefully to avoid overwriting important files. Double-check the drive letter or name before proceeding.
Adjust Restore Options
Review the available restore options to fit your needs. You can choose to restore the entire disk or specific partitions. Decide if you want to exclude certain files or folders. Set options for whether to overwrite existing data or keep it.
Confirm Restore Parameters
Before starting the restore, verify all settings. Check the destination drive, restore options, and backup source. Make sure the settings match your recovery goals. Confirming these parameters helps avoid mistakes during restore.
Executing The Restore Process
Executing the restore process from the Acronis Survival Kit is straightforward. It ensures your system returns to its previous state safely and quickly. Follow clear steps to avoid any issues during restoration.
Begin Restoration
Start by connecting the Acronis Survival Kit to your computer. Power on your device and enter the boot menu. Select the Survival Kit as the boot device. The Acronis recovery environment will load automatically. Choose the restore option from the menu. Select the backup image you want to restore from the Survival Kit. Confirm the destination disk where the data will be restored. Make sure the destination is correct to prevent data loss. Click the start button to begin the restoration process.
Monitor Progress
The restore process shows a progress bar on the screen. It displays how much data has been restored and estimated time left. Keep an eye on the status to ensure smooth operation. The software provides details about files being restored. Avoid turning off the computer during this time. Let the process complete fully for best results. A notification will appear once restoration finishes successfully.
Handle Potential Errors
Errors can occur due to corrupted files or hardware issues. If an error appears, read the message carefully. Common errors include missing files or disk write problems. Restart the process if possible after fixing the issue. Use Acronis tools to check disk health before retrying. If the problem persists, contact support for help. Keep backup copies safe to avoid data loss during errors.
Post-restore Steps
After completing your restoration from the Acronis Survival Kit, taking the right post-restore steps is crucial to ensure your system runs smoothly and your data remains safe. These actions help confirm the success of the restore and prepare you for future backups without hiccups. Let’s dive into what you should do immediately after restoring.
Restart System
Once the restore process finishes, restart your system to apply all changes properly. A reboot helps clear temporary files and resets system processes that may have been interrupted during restoration.
Don’t rush this step—sometimes a system might look ready but still needs a fresh boot to stabilize. Have you noticed how a simple restart often fixes lingering issues after big updates or restores?
Verify Data Integrity
After rebooting, check your files and applications to make sure everything is intact and working as expected. Open important documents, test applications, and confirm your settings are back to normal.
If you spot missing or corrupted files, it’s better to know early. You can then run another restore or seek support before relying on the system for critical tasks. Have you ever missed this step and faced surprises later?
Update Backup Plan
Your restoration is a reminder to revisit your backup plan. Adjust schedules or add new files to the backup list to avoid future data loss.
Consider setting reminders to review backups regularly. This small habit can save you from stress and downtime. How often do you update your backup strategy to keep pace with changes?
Credit: us.informatiweb.net
Frequently Asked Questions
What Is An Acronis Survival Kit?
An Acronis Survival Kit is a recovery tool that includes a bootable media and a full backup. It is designed to help users restore their system quickly and effectively in case of hardware failure or data loss.
How Do I Create An Acronis Survival Kit?
To create it, use Acronis True Image software. Select the “Tools” tab, then choose “Acronis Survival Kit. ” Follow the step-by-step instructions to complete the process. Ensure you have an external drive for storage.
Can I Restore Without An Acronis Survival Kit?
Yes, restoration is possible without it if you have a backup. Use Acronis True Image to access your backup files. However, using the Survival Kit simplifies the process and ensures a quicker recovery.
Is An Acronis Survival Kit Bootable?
Yes, the Acronis Survival Kit includes a bootable media. This allows you to start your computer even if the operating system fails. It provides access to recovery tools and your backup files, facilitating a seamless restoration process.
Conclusion
Restoring from Acronis Survival Kit is simple and clear. Follow each step carefully to avoid errors. Keep your backup device ready and connected. Regularly check your backups to stay safe. This process helps protect your important files and system. Stay calm and take your time during restoration.
With practice, the steps will feel easier. Always keep your data secure and backed up. Trust the process to recover your system smoothly.