
Imagine finding yourself caught in the wild with no shelter to protect you from the elements. What will you do?
Knowing how to build a lean-to survival shelter could be the difference between staying safe and facing danger. This simple structure can keep you warm, dry, and shielded when you need it most. In this guide, you’ll learn easy steps to create your own lean-to shelter using natural materials around you.
By the end, you’ll have the confidence to protect yourself in any emergency situation. Ready to master this essential survival skill? Let’s get started.
Choosing The Right Location
Choosing the right location for your lean-to survival shelter is a critical decision that impacts your safety, comfort, and ability to stay warm and dry. The perfect spot balances protection from the elements with easy access to resources. Your choice can make the difference between a tough night and a manageable one.
Assessing Terrain And Shelter Needs
Look for flat ground that is slightly elevated. This helps prevent water pooling around your shelter during rain. Avoid low spots or depressions that collect water or cold air, making your shelter damp and chilly.
Consider natural windbreaks like dense bushes, rock formations, or fallen trees. These can shield you from strong winds without much extra effort. Also, think about how much space you need for your shelter and whether the area allows you to build it quickly.
Have you ever tried to set up a shelter on uneven or rocky ground? The discomfort and instability make it clear why terrain matters. Comfort affects your ability to rest, which is crucial in survival situations.
Avoiding Hazards And Finding Resources
Steer clear of areas near dead trees or branches that could fall on your shelter. Check above and around for any loose rocks or unstable slopes that might pose dangers. Safety is the top priority in choosing your spot.
Water sources are vital, but don’t camp too close to rivers or lakes where flooding or insects can be a problem. Aim for a spot within a reasonable walking distance to fresh water.
Look around for firewood, dry leaves, and other natural materials you’ll need. Having resources nearby saves time and energy, especially when you’re already tired. How often do you find yourself trekking far just to gather essentials?
Gathering Materials
Gathering the right materials is crucial for building a lean-to survival shelter that stands strong and protects you from the elements. The quality and type of materials you choose can make a huge difference in how effective your shelter will be. Let’s look at how you can find and collect durable natural materials efficiently.
Selecting Durable Natural Materials
Focus on materials that can withstand wind, rain, and weight. Hardwoods like oak or hickory offer sturdy branches for the frame. Avoid soft or rotten wood; it breaks easily and won’t hold your shelter together.
Look for long, straight branches about 1 to 3 inches thick to create a strong framework. Leaves, pine needles, and bark can serve as excellent insulation and roofing to keep moisture out. Don’t forget to gather plenty of smaller twigs to fill gaps and add extra support.
Ask yourself: How will each material react to wet conditions? Choosing materials that stay strong even when wet can prevent your shelter from collapsing unexpectedly.
Using Tools For Efficient Collection
Having the right tools speeds up gathering and helps you collect better materials. A sturdy knife or hatchet can cut branches cleanly and shape wood as needed. If you have a saw, use it to create precise cuts on thicker branches.
Gloves protect your hands from splinters and thorns while collecting wood. A backpack or large bag helps carry more materials in fewer trips, saving energy. Even a simple rope can bundle sticks together, making transport easier.
Think about how much time you want to spend gathering. Are you prepared to carry heavy loads, or should you prioritize lighter materials? Efficient tool use can save you from unnecessary fatigue and frustration in the wild.
Constructing The Frame
Begin by selecting strong, straight branches for the frame. Secure them firmly to create a sturdy, slanted support. This structure will hold the shelter’s weight and protect against wind and rain.
Constructing the frame of a lean-to survival shelter is vital. It provides the essential support for the entire structure. A well-constructed frame ensures stability and durability. This guide will walk you through creating a solid frame.Building A Stable Lean-to Structure
First, select a suitable location for your shelter. Look for a spot with natural support, like a tree or rock. This will serve as the backbone of your structure. Measure the length and width you want for your lean-to. Gather sturdy branches or logs. These will form the main support beams of your shelter.Securing Supports And Crossbeams
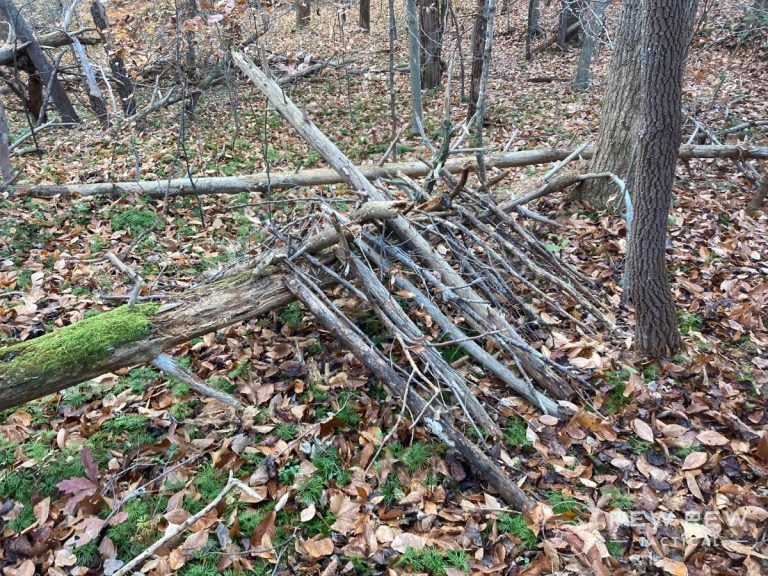
Start by placing two large branches vertically. These will be your main supports. Ensure they are firmly planted in the ground. Use smaller branches for crossbeams. Lay them horizontally across the vertical supports. Secure them tightly with rope, vines, or twine. Make sure they are stable and won’t shift. This creates a strong frame for your shelter.Adding Shelter Cover
Adding cover to your lean-to survival shelter is key to keeping you protected from the elements. Without a solid roof layer, rain, wind, and cold can quickly make your shelter uncomfortable or even dangerous. This stage is where your shelter truly becomes a safe haven.
Layering Branches And Leaves
Start by gathering plenty of branches with leaves still attached. Use long, sturdy branches to create a base layer over the lean-to frame. Then, pile smaller branches and leafy material on top to build thickness.
The goal is to trap air and create insulation, which helps keep you warm. Think of it like a natural blanket. The thicker you layer, the better the shelter holds heat and blocks wind.
Have you noticed how animals gather leaves and twigs for their nests? Mimicking this can make a big difference in your shelter’s comfort. Don’t hesitate to add more layers if you hear rain or feel wind getting through.
Waterproofing With Natural Elements
Simply piling leaves isn’t enough to keep water out during heavy rain. You need to add waterproofing by using natural materials that repel moisture.
Try using large, broad leaves like those from rhubarb, banana, or palm plants if available. Lay these leaves with their shiny side facing up to shed water effectively. Overlap them like roof shingles to prevent leaks.
Another great option is using bark strips or layers of moss, which absorb water but also create a barrier that slows rain from penetrating. Don’t forget to pack these materials tightly to avoid gaps where water can sneak in.
Ask yourself: What natural materials are abundant around you right now that could serve as a rain shield? This kind of thinking can turn an ordinary shelter into a dry refuge.
Insulating The Shelter
Insulating a lean-to survival shelter is key to staying warm and safe. Proper insulation keeps cold air out and traps body heat inside. Using natural materials found in the environment can make a big difference. Focus on layering and filling gaps to create an effective barrier against the cold.
Using Moss, Grass, And Other Insulators
Moss, grass, and leaves are excellent natural insulators. They trap air, which helps keep warmth inside the shelter. Collect dry moss or grass and stuff it between the frame and the shelter walls. Create thick layers for better insulation. Avoid wet materials, as they can cause heat loss and discomfort.
Other good insulators include pine needles and dry leaves. Use these to fill holes and gaps in the shelter walls. Layering these materials around your shelter’s exterior enhances protection from cold winds. Always check for moisture before using natural insulators.
Creating A Comfortable Interior
Inside the shelter, add soft bedding made from dry leaves or pine needles. This keeps you off the cold ground and adds warmth. Build a sleeping platform using branches or logs if possible. Cover it with a thick layer of insulating materials.
Keep the shelter tidy to avoid moisture buildup. Arrange your bedding so air can circulate slightly. Place your gear and clothing close to help retain heat. A warm interior helps rest and recovery during survival situations.

Credit: www.youtube.com
Ensuring Safety And Stability
Ensuring safety and stability is crucial when building a lean-to survival shelter. A shelter that isn’t secure can collapse or fail to protect you from the elements, putting your safety at risk. Paying attention to how you reinforce and maintain your shelter can make all the difference in a survival situation.
Reinforcing The Shelter Against Weather
Wind and rain are the biggest threats to a lean-to shelter. Strengthen the frame by using strong, sturdy branches and lash them tightly with rope or vines. Don’t just rely on one support point—brace the shelter with diagonal poles to prevent it from swaying or collapsing.
Cover the roof with layers of leaves, pine needles, or bark to create a waterproof barrier. Adding a tarp or plastic sheet, if you have one, can improve protection dramatically. Think about where the wind usually blows from and angle your shelter’s open side away from it to reduce exposure.
Maintaining The Shelter Over Time
Your shelter won’t stay safe if you build it once and forget about it. Check the structure daily for any signs of weakening, like loose bindings or sagging supports. Replace or tighten bindings immediately to keep everything secure.
Clear away debris or snow buildup regularly to prevent extra weight from causing a collapse. Also, inspect the natural materials you used—wet leaves and branches can rot quickly, so swap them out as needed. How often you maintain your shelter depends on the weather and the materials used, but staying proactive is key to your survival.
Additional Survival Tips
Building a lean-to survival shelter is just the start. Small details can make a big difference in your safety and comfort. These extra tips help you stay safe and ready in the wild. Pay attention to fire safety and supply storage to avoid hazards and keep essentials protected.
Fire Placement Near Shelter
Place your fire at least 10 feet away from the shelter. This prevents sparks from reaching your shelter materials. Choose a spot shielded from wind to keep the fire steady. Clear the area around the fire pit of dry leaves and twigs. Use stones to form a fire ring for added safety. Always have water or dirt nearby to put out the fire quickly. Avoid building fires under low branches or close to your shelter’s entrance.
Storing Supplies Safely
Keep your supplies off the ground to protect from moisture and insects. Use a tarp, plastic bags, or containers for waterproof storage. Hang food items from a tree branch at least 10 feet high and 5 feet away from the trunk. This keeps animals like bears and rodents away. Store sharp tools in a safe place to prevent accidents. Check your supplies regularly to ensure nothing is damaged or missing. Organize your items so you can find them quickly in an emergency.

Credit: medium.com
Credit: www.pewpewtactical.com
Frequently Asked Questions
What Materials Are Best For A Lean-to Survival Shelter?
Use sturdy branches, dry leaves, and waterproof tarps. Natural materials like bark and moss help insulation. Avoid weak or wet wood to ensure stability and warmth.
How Do You Position A Lean-to Shelter For Protection?
Face the open side away from prevailing winds. Position the shelter near natural barriers like trees or rocks. This reduces wind chill and enhances safety.
Can A Lean-to Shelter Keep You Warm Overnight?
Yes, if insulated well with leaves or pine needles. Use a fire nearby for added warmth. Proper insulation traps body heat inside the shelter.
How Long Does It Take To Build A Lean-to Shelter?
It usually takes 1 to 3 hours depending on skill. Gathering materials may add extra time. Preparation and practice reduce building time.
Conclusion
Building a lean-to shelter can save your life in the wild. It uses simple materials and basic skills anyone can learn. A strong shelter keeps you dry, warm, and safe. Practice building one before you need it. Remember to choose a good spot with natural protection.
Keep your shelter small and sturdy. Stay calm and focused while building. This shelter type works well for short trips or emergencies. Start with these easy steps and improve with experience. Survival feels easier when you know how to build a shelter.


