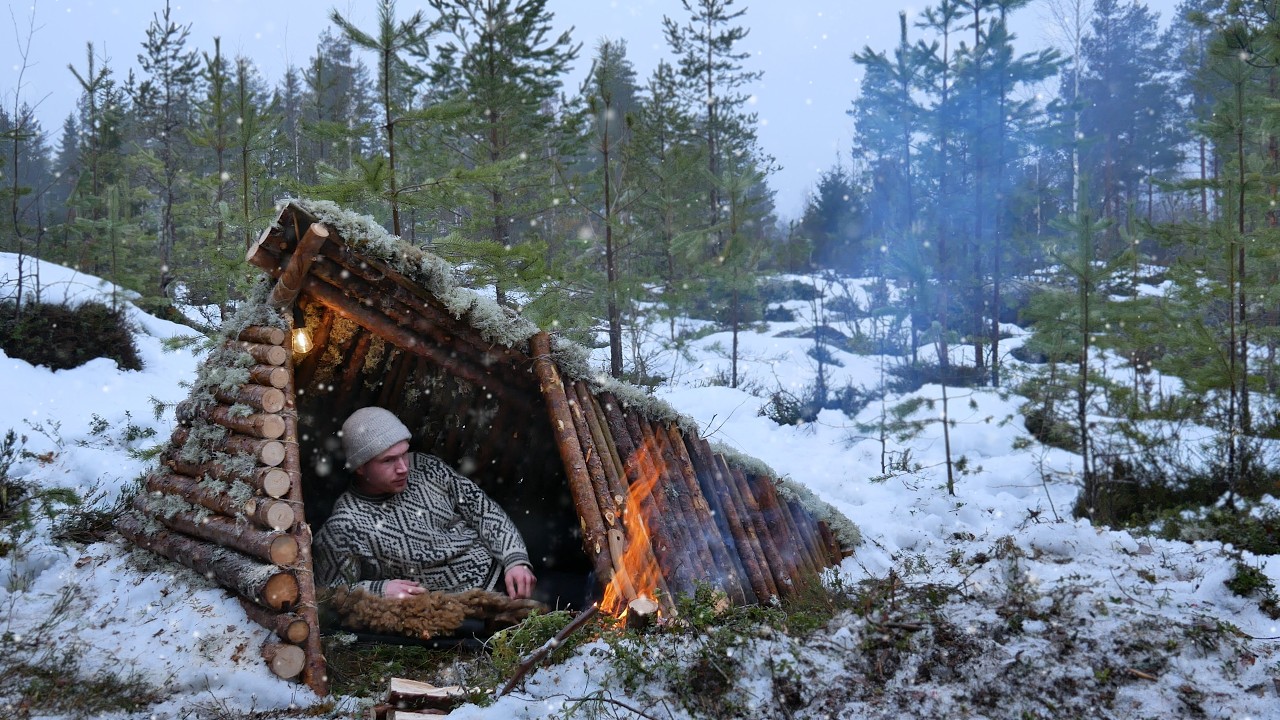
When winter hits hard, having a safe, warm place to stay can be the difference between comfort and danger. Knowing how to build a survival shelter in the winter isn’t just a skill—it’s your lifeline.
Imagine being out in the cold, with wind biting at your skin, and snow piling up around you. What will you do? This guide will show you simple, effective steps to create a shelter that keeps you warm and protected.
By the end, you’ll feel confident and ready to face winter’s toughest challenges. Keep reading to learn how to turn the wild into your safe haven.
Choosing The Right Location
Choosing the right location for your winter survival shelter can be the difference between comfort and danger. Your shelter’s spot will affect how well it protects you from the elements and keeps you safe. Careful thought about where you build will save you energy and increase your chances of staying warm and dry.
Finding Natural Windbreaks
Look for areas shielded by trees, rocks, or hills. These natural windbreaks reduce the harsh impact of cold winds, helping to keep your shelter warmer. I once built a shelter behind a large boulder, and it blocked the biting wind perfectly, making the inside much more bearable.
Dense evergreen trees often provide the best cover. Position your shelter on the leeward side, the side protected from the wind. This simple choice can cut down on heat loss dramatically.
Avoiding Hazards
Steer clear of areas prone to avalanches, falling branches, or flooding. Check for signs like unstable snowbanks or dead trees overhead. One time, I ignored nearby dead branches, and they fell during a storm—luckily, I wasn’t underneath.
Also, avoid low spots where cold air settles, as these can get freezing cold at night. High ground is often safer and warmer, but not exposed ridges. Always scan your surroundings before settling in.
Proximity To Water
Having water nearby is important for hydration and melting snow for drinking. But don’t build too close to streams or lakes, as ice may break or water levels can rise unexpectedly. I usually set up camp about 100 to 200 feet away from water sources.
Check the ground moisture too; soggy soil can make your shelter cold and damp. Find a spot with dry, stable ground to stay comfortable and avoid health risks from moisture.
Selecting Shelter Types
Choosing the right type of shelter can make all the difference when you’re facing harsh winter conditions. Each shelter style has its own strengths and weaknesses depending on the environment and available materials. Think about what you can realistically build with what you have around you and how much time you can spend on construction.
Lean-to Shelters
Lean-to shelters are simple and quick to build. They use a sturdy frame leaned against a natural support like a tree or rock face, then covered with branches or a tarp. You can easily add insulation like leaves or pine needles to trap heat, which is crucial in winter.
Imagine being able to set this up in under an hour after a long day outdoors. The open side allows a fire’s warmth to reach you directly. However, the downside is exposure to wind and snow from the open front, so positioning is key.
Snow Caves
Snow caves offer excellent insulation by using the snow itself as a barrier against the cold. Digging into a snowbank, you create a hollow space that traps warm air inside. It can feel surprisingly warm compared to the freezing air outside.
They require solid snow that’s deep enough to dig safely without collapsing. Be cautious about ventilation to avoid carbon monoxide buildup if you bring a heat source inside. Have you ever experienced the calm quiet inside a snow cave? It’s a unique shelter that feels like a hidden refuge.
Debris Huts
Debris huts rely on natural materials like leaves, twigs, and branches to form a thick insulating layer. You build a frame, usually a leaning ridgepole, and pile debris densely around it. This method works well if you’re in a wooded area with plenty of forest floor materials.
What makes debris huts great is their ability to block wind and retain body heat. But they do take time to gather enough material and build properly. If you focus on layering debris tightly, you’ll create a surprisingly warm and camouflaged shelter.
Gathering Materials
Building a survival shelter in winter requires gathering materials. It’s essential for protection against cold. Efficient material collection ensures a sturdy, warm shelter. Focus on natural resources around you.
Using Available Wood
Search for fallen branches and logs. These make excellent structural supports. Choose dry wood for strength. Avoid rotting pieces. Stack logs to form walls. Use thicker branches for the base. Secure them tightly to prevent collapse.
Collecting Insulating Materials
Insulation keeps the shelter warm. Gather leaves and pine needles. These trap air, providing warmth. Also, use grass and moss. Layer them between wood walls. This adds extra insulation. Cover the roof with thick layers. Ensure no gaps for wind.
Tools For Construction
A few tools simplify building. A small hatchet or knife helps cut wood. Use a shovel to clear snow. It also helps dig a foundation. Rope or cord secures materials in place. Keep these tools handy. They speed up construction.

Credit: www.youtube.com
Building The Shelter Frame
Building the shelter frame is the first key step in creating a safe winter shelter. A strong frame holds the entire structure together. It supports the weight of snow and wind. The frame must be sturdy and stable to protect you from harsh weather.
Constructing Stable Supports
Select straight, strong branches or poles for the supports. Look for wood that is thick and not brittle. Place the supports deep into the snow or ground for extra stability. Arrange them in a triangular or A-frame shape to spread weight evenly. This shape resists snow pressure well. Tie the tops of the supports securely with rope or strong vines. Check that the supports do not wobble before moving on.
Securing The Structure
Use cross braces to connect the supports horizontally. This adds strength and keeps the frame rigid. Lash the braces tightly with rope or strips of fabric. Add diagonal braces if the frame feels weak. Press snow around the base of the supports to lock them in place. Test the frame by gently pushing it. It should hold firm without shifting. A well-secured frame provides a solid foundation for the shelter walls.
Insulating The Shelter
Insulating your winter survival shelter is crucial to maintaining warmth and staying safe in harsh conditions. Without proper insulation, the cold seeps in, making your shelter uncomfortable and potentially dangerous. You can use natural materials around you to create effective barriers against the cold, keeping your body heat inside.
Layering With Leaves And Branches
Gather dry leaves and small branches to create thick layers on the walls and roof of your shelter. These materials trap air, which acts as a natural insulator against cold temperatures.
Make sure the leaves are dry; wet leaves will only make your shelter colder. Pile the branches tightly to block wind and add stability to the insulation layer.
Snow As Insulation
Snow might seem cold, but it’s an excellent insulator if used correctly. Pack snow around your shelter’s exterior to form a dense wall that traps heat inside.
Be careful not to let snow melt into your shelter, as moisture will reduce insulation quality. Have you tried feeling how snow can keep your hand warm when pressed gently? That’s the insulating power working.
Creating A Warm Floor
A cold floor can drain your body heat fast, so lift yourself off the ground using natural materials. Use thick layers of pine needles, dry leaves, or branches to build a soft, insulating floor.
Adding extra layers beneath your sleeping area can make a big difference in staying warm overnight. Think about how your feet feel walking barefoot on snow versus a thick carpet of leaves—that’s the warmth you want under you.

Credit: m.youtube.com
Ensuring Ventilation And Safety
Ensuring ventilation and safety is crucial when building a survival shelter in winter. Proper airflow prevents suffocation and keeps the air fresh. It also helps control moisture inside the shelter. Safety measures reduce the risk of fire and harmful gases. Understanding how to maintain airflow, vent smoke, and avoid carbon monoxide is vital for survival.
Maintaining Airflow
Airflow stops the shelter from becoming stuffy. Create small openings near the top and bottom of the shelter. These vents allow fresh air to enter and stale air to exit. Avoid sealing the shelter completely. Use natural materials like branches or leaves to cover vents loosely. This keeps warmth inside but lets air move freely.
Smoke Venting
Smoke can build up quickly if you use a fire inside the shelter. Make a smoke vent above the fire area. This vent should be large enough to let smoke escape but small enough to keep heat in. Position it so wind can carry smoke away from the shelter. Keep the fire low and controlled to reduce smoke production.
Avoiding Carbon Monoxide
Carbon monoxide is a deadly gas produced by fires. Never block airflow vents. Avoid using fires in enclosed spaces without vents. Use only dry wood to reduce smoke and gas. Check the shelter often for signs of gas buildup. Symptoms include headache, dizziness, or nausea. If you notice these, open vents immediately and leave the shelter.
Maintaining Warmth Inside
Keeping warm inside your winter survival shelter is more than just comfort—it’s about staying alive. Cold air can sap your energy quickly, so your focus should be on trapping and maximizing heat. Simple strategies can make a huge difference when the temperature drops.
Using Body Heat
Your body is a powerful heat source. Stay close to others if you’re not alone; sharing body heat can raise the temperature inside the shelter noticeably.
Wear dry, layered clothing to trap heat effectively. Avoid sweating because wet clothes will cool you down fast. If possible, create a sleeping area with insulation underneath you to prevent heat loss to the cold ground.
Building A Small Fire
A small fire inside or just outside the shelter can provide vital warmth. Use a contained fire pit or a small stove designed for enclosed spaces to avoid smoke buildup.
Gather dry wood and kindling before it gets dark to ensure you have enough fuel. Always have a ventilation plan to keep fresh air flowing and prevent carbon monoxide poisoning.
Storing Warmth
Heat doesn’t last long if you don’t trap it. Use materials like leaves, pine needles, or even your clothing to insulate walls and floors.
Keep hot water bottles or heated stones wrapped in cloth near your body. They release warmth slowly and can make a big difference during cold nights.
Have you ever noticed how some animals burrow deep to stay warm? Mimicking this by creating layers of insulation can help you hold onto precious heat inside your shelter.

Credit: www.youtube.com
Additional Tips For Winter Survival
Surviving winter outdoors demands more than shelter. Proper clothing, food, and signaling increase safety and comfort. These extra tips help you stay warm, nourished, and visible in harsh conditions.
Clothing And Gear
Wear layers to trap heat and stay dry. Start with a moisture-wicking base layer.
Add insulating layers like fleece or wool. Top with a waterproof, windproof outer layer.
- Keep your head, hands, and feet covered.
- Carry extra socks and gloves.
- Use insulated boots to prevent frostbite.
Pack a good sleeping bag rated for cold weather. Bring a thermal blanket for extra warmth.
Food And Hydration
Choose high-energy, easy-to-carry foods like nuts, chocolate, and dried fruit.
Eat small amounts often to keep energy steady.
Drink water regularly to avoid dehydration, even if you don’t feel thirsty.
- Melt snow for water but always boil or purify it.
- Carry a portable stove or heat source for cooking and water purification.
- Avoid alcohol; it lowers your body temperature.
Emergency Signaling
Make yourself visible to rescuers using bright colors or reflective materials.
Carry a whistle and use it in short bursts to signal for help.
- Use a signal mirror or flashlight to catch attention.
- Create large ground signals with rocks or branches.
- Keep a fully charged phone or GPS device if possible.
Frequently Asked Questions
What Materials Are Best For Winter Survival Shelters?
Use insulating materials like pine boughs, leaves, and snow. Wood and tarp help create a sturdy frame. Avoid wet or thin materials to stay warm and dry.
How Do You Insulate A Winter Shelter Effectively?
Layer natural insulation like pine needles or leaves inside the shelter. Snow walls also trap heat. Add a tarp or emergency blanket for extra warmth and wind protection.
Where Should You Build A Winter Shelter?
Choose a location sheltered from wind, near natural resources like water and wood. Avoid low spots prone to flooding or heavy snow accumulation.
How Can You Keep Warm Inside A Survival Shelter?
Use body heat, insulation layers, and a small safe fire if possible. Wear dry clothing and stay off cold ground using leaves or a sleeping pad.
Conclusion
Building a shelter in winter can save your life. Use strong materials like wood, snow, or branches. Keep the shelter small to hold heat better. Always check for wind direction before starting. Stay dry and avoid cold air inside. Practice these steps before you need them.
Being ready helps you stay safe and warm. Shelter is your best defense against cold weather. Remember, simple actions can make a big difference. Stay calm, work carefully, and protect yourself. Winter survival starts with a good shelter.