Imagine finding yourself in the wild, with no shelter to protect you from the cold, wind, or rain. What if you could create a simple, effective shelter using just a survival sheet?
Knowing how to build a shelter with a survival sheet can be the difference between staying safe or facing harsh conditions. In this guide, you will learn easy steps to turn a basic survival sheet into a strong, reliable shelter.
By the end, you’ll feel confident and ready to protect yourself whenever you need to. Keep reading—your safety could depend on it.
Credit: www.creekstewart.com
Choosing The Right Survival Sheet
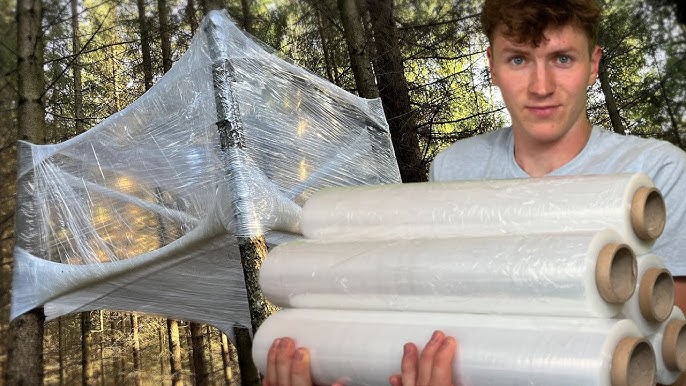
Choosing the right survival sheet can make a big difference when you’re building a shelter in the wild. It’s not just about grabbing any sheet you find; you want one that fits your needs and can handle the conditions you expect. Think about the environment, how long you might use it, and the weight you’re willing to carry.
Types Of Survival Sheets
There are several types of survival sheets to consider:
- Emergency Mylar Sheets:Thin, reflective, and great for retaining body heat.
- Polyethylene Tarps:Durable and waterproof, ideal for heavy rain or wind protection.
- Canvas or Nylon Sheets:Heavier but strong and reusable for longer-term shelter.
Each type serves a different purpose. Ask yourself: Do you need lightweight warmth or sturdy protection? Your answer guides your choice.
Material Benefits
Material affects how well your sheet performs. Mylar sheets reflect up to 90% of your body heat, which can save your life in cold conditions. However, they tear easily and don’t hold up well against rough terrain.
Polyethylene offers excellent water resistance and durability but can be heavier and bulkier. Canvas and nylon offer toughness and reusability but come at the cost of added weight.
Think about what matters most: warmth, durability, or portability. Which material aligns with your survival priorities?
Size And Weight Considerations
The right size ensures you have enough coverage without adding unnecessary bulk. A sheet too small won’t protect you fully, while an oversized one can weigh you down.
Consider how you’ll carry it—will it fit comfortably in your pack? Lightweight sheets under 200 grams are ideal for hiking and backpacking. Heavier sheets suit car camping or base camps where weight is less critical.
Have you ever struggled carrying gear that was too heavy? Choosing the right size and weight can keep you agile and prepared.
Essential Tools And Supplies
Building a shelter survival sheet requires more than just the sheet itself. You need the right tools and supplies to make your shelter sturdy, functional, and safe. Gathering these essentials ahead of time can save you frustration and even danger when you’re out in the wild.
Basic Tools Needed
Start with a reliable knife. It’s your most versatile tool for cutting branches, trimming fabric, and even making emergency repairs. A sturdy multitool can also come in handy, offering pliers, scissors, and screwdrivers in one compact package.
Don’t forget a lightweight saw or folding pruning saw. It helps you collect wood quickly without exhausting your energy. Finally, bring strong cordage like paracord or nylon rope. These will secure your shelter and allow you to tie down your survival sheet effectively.
Additional Survival Gear
Think beyond the basic tools. A tarp or extra plastic sheets can provide additional layers of protection from rain and wind. Ground pads or insulating mats prevent heat loss and keep moisture from seeping up through the ground.
Consider packing a compact tarp clip or tarp tie-downs. They make it easier to attach your survival sheet to trees or poles without damaging the fabric. A headlamp or flashlight is invaluable for setting up shelter after dark or signaling for help if needed.
Safety Equipment
Your shelter is only as safe as the environment it’s in. Bring a first aid kit with essentials like bandages, antiseptic wipes, and pain relievers. This can address minor injuries that might happen while building or staying in your shelter.
Also include insect repellent and sunscreen to protect your skin during extended stays outdoors. A whistle can alert others to your location in an emergency, giving you peace of mind. How will you prepare to keep yourself safe while relying on your survival sheet shelter?
Site Selection For Shelter
Choosing the right site for your survival shelter is crucial. It ensures safety and comfort in challenging conditions. A good site protects you from weather and other dangers. Let’s explore key factors to consider.
Assessing Terrain
Look for flat ground to build your shelter. Sloped land can cause water to flow into your shelter. Avoid rocky areas as they are uncomfortable. Check for signs of recent landslides or erosion. These can indicate unstable ground.
Avoiding Hazards
Stay away from potential dangers. Avoid areas prone to flooding or with falling branches. Check for animal tracks and nests. This ensures you’re not in a wildlife pathway. Be cautious of insect nests nearby. They can cause problems.
Proximity To Resources
Choose a site near water sources, but not too close. This helps avoid flooding risks. Ensure the location has access to firewood. It is essential for warmth and cooking. Look for natural features like caves or tree cover. They offer additional protection.
Credit: www.creekstewart.com
Shelter Designs Using Survival Sheets
Survival sheets are lightweight and versatile tools for building quick shelters. Their reflective surface helps retain body heat and protects from wind and rain. Different shelter designs suit various environments and needs.
Using survival sheets, you can create simple structures that offer protection and comfort. Each design has unique benefits depending on space, weather, and available materials.
Lean-to Shelter
The lean-to shelter is easy to build and effective. It requires a sturdy support like a branch or rock wall. Drape the survival sheet over the support at an angle.
- Secure edges with rocks or stakes to prevent wind from lifting it.
- Leave one side open for ventilation and easy access.
- Face the open side away from wind to block cold air.
This shelter works well for blocking wind and rain on one side. It provides a dry, warm space with minimal effort.
A-frame Shelter
The A-frame shelter offers strong protection from rain and wind. Create an A-shape frame using two poles or branches tied together at the top. Lean the survival sheet over the frame.
- Secure the edges to the ground with stakes or rocks.
- Make sure the sheet is taut to shed rain effectively.
- Leave openings at both ends for ventilation.
This design is stable and sheds water well. It is good for longer stays and harsher weather.
Tarp Tent Shelter
The tarp tent shelter is versatile and easy to customize. Tie the survival sheet between two trees or poles to create a roof. Angle it to allow rain to run off.
- Use cords or paracord to secure the sheet tightly.
- Stake down the edges to prevent flapping in the wind.
- Adjust height and angle depending on weather and space.
This shelter provides good coverage and airflow. It is useful for hot or wet conditions and can fit multiple people.
Step-by-step Shelter Construction
Building a shelter with a survival sheet is a skill that can make a huge difference in an emergency. The process breaks down into clear actions that anyone can follow, even without prior experience. Focus on creating a sturdy frame, securing your sheet properly, and adding reinforcements to keep warmth and protection.
Setting Up The Frame
Your frame is the skeleton of the shelter. Use strong, flexible branches or poles about shoulder height. Arrange them in a simple A-frame or lean-to style to create a stable structure.
Make sure the frame is firmly planted in the ground. You don’t want it collapsing in wind or rain. If you’re near trees, you can tie the branches to trunks for extra support.
Securing The Survival Sheet
Once the frame is ready, drape the survival sheet over it. Position the reflective side outward to reflect heat back inside. Use cord, rope, or even strips of cloth to tie the sheet tightly to the frame.
Pin down the edges of the sheet with rocks or stakes to keep wind from slipping underneath. Ask yourself: how can you prevent gaps where cold air might sneak in? Securing the sheet well is your best defense.
Reinforcing And Insulating
Add layers of leaves, pine needles, or grass around the base of your shelter. This will block drafts and help trap heat inside. You can also place a thick layer inside the shelter as a ground cover to keep moisture away.
Think about what you have on hand—extra clothing, blankets, or even spare survival sheets can add insulation. Reinforcement isn’t just about strength; it’s about comfort and safety in tough conditions.

Credit: medium.com
Maintaining Shelter Safety And Comfort
Maintaining shelter safety and comfort is vital for survival. A well-kept shelter protects from harsh weather and keeps you healthy. Small efforts can greatly improve your shelter’s livability. Regular care prevents damage and ensures safety throughout your stay.
Ventilation Techniques
Good airflow stops moisture buildup inside the shelter. Moist air leads to mold and discomfort. Create small vents near the top and bottom of your shelter. Use mesh or breathable fabric to keep insects out. Position vents to allow fresh air to flow freely. Avoid sealing the shelter completely to prevent suffocation.
Weatherproofing Tips
Weatherproofing shields you from rain, wind, and cold. Use waterproof materials like tarps or plastic sheets over your shelter. Secure edges with rocks, logs, or stakes to block wind and rain. Add an extra layer of leaves or branches for insulation. Check for gaps or holes and patch them quickly. A dry shelter keeps you warm and prevents illness.
Regular Inspection
Inspect your shelter daily for damage or weakness. Look for tears, holes, or loose materials. Check that supports remain strong and stable. Fix any issues immediately to avoid bigger problems. Keep the ground around the shelter clear of debris. A safe shelter increases your chances of survival and comfort.
Emergency Tips And Troubleshooting
Building a shelter with a survival sheet is vital in emergencies. Knowing how to handle problems and changes keeps you safe. Quick fixes and smart moves can protect you from weather and danger. Here are key tips to manage issues and stay secure.
Dealing With Damage
Survival sheets can tear or get holes. Small tears can be fixed using duct tape or strong adhesive strips. Cover holes quickly to keep warmth and dryness inside. If the sheet rips badly, use spare materials like plastic bags or cloth. Secure these with cords or branches. Check your shelter often for new damage. Repair problems early to avoid bigger risks.
Adapting To Changing Conditions
Weather changes fast outdoors. A shelter must adjust to stay effective. Add layers for warmth when it gets cold. Open flaps or sides for air when hot. Move the shelter to a safer spot if flooding or strong winds appear. Use natural materials like leaves or branches to improve insulation. Stay flexible and change your shelter setup as needed.
Signaling For Help
Getting attention can save your life. Use bright colors or shiny objects near your shelter. Create large symbols or messages on the ground using rocks or sticks. Reflect sunlight with mirrors or any shiny surface. Make noise by banging objects or shouting at intervals. Keep signals clear and visible from the sky or distance. Always prepare signaling tools before building your shelter.
Frequently Asked Questions
What Materials Do I Need For A Shelter Survival Sheet?
You need a durable survival sheet, strong cords, and sturdy stakes. These materials ensure your shelter is weather-resistant and stable. A reflective survival sheet helps retain body heat, making it ideal for emergencies.
How Do I Set Up A Survival Sheet Shelter?
Find a flat area, tie cords between two supports, and drape the sheet over. Secure edges with stakes or rocks. This creates a simple, effective shelter to protect against wind and rain.
Can A Survival Sheet Protect Against Harsh Weather?
Yes, a survival sheet shelters you from wind, rain, and cold. Its reflective surface retains heat, making it suitable for various weather conditions during survival situations.
How Long Does A Survival Sheet Shelter Last?
A well-set shelter can last several days if maintained. Durability depends on weather conditions and the quality of your materials. Regular checks and adjustments improve its lifespan.
Conclusion
Building a shelter with a survival sheet is simple and quick. It protects you from wind, rain, and cold. Use basic tools and follow steps carefully. Practice this skill to feel more prepared outdoors. A good shelter can keep you safe and warm.
Always carry a survival sheet in your gear. Stay calm and focused during emergencies. Your safety depends on your actions. Keep learning and stay ready for nature’s challenges.


