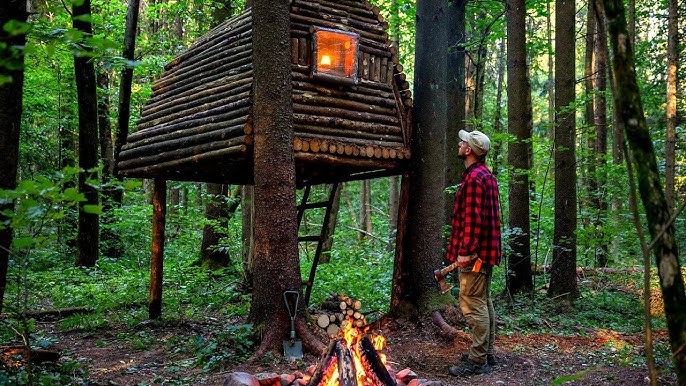
Imagine having a safe place that can protect you and your loved ones no matter what happens. A long term survival shelter isn’t just a structure—it’s your lifeline when everything else fails.
You might think building one is complicated, but it’s easier than you expect. You’ll discover simple, practical steps to create a shelter that lasts. By the time you finish reading, you’ll feel ready to take control of your safety and peace of mind.
Keep going—your future self will thank you.
Choosing The Right Location
Choosing the right location is key to building a long-term survival shelter. The site affects safety, comfort, and access to resources. Careful thought helps avoid dangers and ensures the shelter lasts. Take time to study the land and environment before building.
Assessing Terrain And Resources
Select terrain that offers natural protection. Look for elevated ground to avoid floods. Check for nearby water sources like streams or lakes. Find areas with wood or stone for building materials. Soil quality matters for planting food or digging latrines.
Avoiding Hazards
Stay away from steep slopes that can cause landslides. Avoid low areas that flood easily. Watch for signs of animal activity, especially predators. Keep distance from unstable cliffs or loose rocks. Identify poisonous plants or dangerous insects around the site.
Considering Weather Patterns
Note prevailing wind directions to position your shelter properly. Pick a spot that receives sunlight for warmth and light. Avoid areas prone to heavy snow or strong storms. Choose locations that stay dry and have good drainage. Think about seasonal changes and how they affect the shelter.

Credit: www.youtube.com
Selecting Shelter Types
Choosing the right type of shelter is key for long-term survival. It affects your safety, comfort, and ability to live off the land. Different shelter types suit different environments and resources. Understanding your options helps you plan better. Focus on what materials you can find and what weather you expect. This guide covers natural shelters, man-made structures, and hybrid designs. Each has unique benefits and challenges.
Natural Shelters
Natural shelters use the environment to protect you. Examples include caves, rock overhangs, and fallen tree shelters. They require little building effort but may offer limited comfort. These shelters blend well with nature and often keep you hidden. They can protect from wind and rain but might need extra insulation. Always check for safety hazards like loose rocks or wildlife. Natural shelters work best if you know the area well.
Man-made Structures
Man-made structures offer more control over design and comfort. They include tents, cabins, lean-tos, and dugouts. Building these requires tools and materials like wood, tarps, or metal sheets. They protect better against harsh weather and pests. You can customize size, ventilation, and insulation. Man-made shelters take more time and skill but provide lasting protection. Planning for drainage and stability is important.
Hybrid Designs
Hybrid shelters combine natural and man-made elements. They use natural features for foundation or walls and add built components for strength. For example, a lean-to built against a rock face or a dugout covered with branches and tarps. These designs save time and materials while improving safety. They adapt well to the environment and offer good insulation. Hybrid shelters balance ease of construction with durability and comfort.
Gathering Materials
Building a long-term survival shelter begins with gathering essential materials. The right materials ensure durability and comfort. Here’s a closer look at what you need.
Wood And Branches
Wood forms the backbone of your shelter. Look for sturdy branches and logs. Choose pieces that are straight and free from rot. These will provide a strong frame for your structure. Gather fallen branches from the forest floor. They’re often dry and ready for use. Avoid cutting live trees unless absolutely necessary.
Leaves And Insulation
Leaves offer excellent insulation against the elements. Collect large piles of dry leaves. They provide warmth by trapping air. Spread them thickly on the shelter’s roof and walls. Consider using grass or pine needles too. These materials add extra insulation. They help keep the interior dry and warm.
Tools And Fasteners
Basic tools and fasteners are crucial. A sturdy knife or machete helps cut branches. Rope or cordage ties the structure together. Use vine or flexible branches as natural fasteners. Gather materials from the surrounding environment. Ensure you have enough to secure the shelter. With the right tools, building becomes efficient and safe.
Building The Framework
Building the framework of your long-term survival shelter sets the foundation for everything else. This stage demands both strength and precision to ensure your shelter withstands harsh weather and time. A well-constructed framework not only supports the structure but also maximizes safety and comfort.
Constructing Support Structures
Start by selecting sturdy materials like treated wood, metal poles, or thick branches. Your support structures should form a strong skeleton that can hold the weight of walls and roofing without bending or breaking.
Focus on creating a solid base by digging post holes deep enough to prevent shifting. Use cross braces to add extra stability, especially in areas prone to strong winds or heavy snow.
Have you considered the local climate and natural hazards? Adjust your support design accordingly to avoid common pitfalls like weak joints or insufficient anchoring.
Creating Walls And Roof
Walls serve as your first defense against elements, so choose materials wisely—options range from mud and clay to plywood or even insulated panels. Layer your walls for insulation and strength, adding natural barriers like leaves or straw if available.
For the roof, angle it to allow rain and snow to slide off easily. Use waterproof materials such as tarps, metal sheets, or tightly packed thatch to keep the interior dry.
Think about ventilation—how will you keep fresh air flowing without letting in cold drafts? Small adjustable openings can balance airflow and warmth effectively.
Securing The Shelter
Once your frame, walls, and roof are in place, reinforce connections with nails, screws, or strong bindings. Don’t overlook the importance of sealing gaps with caulk, moss, or fabric to prevent heat loss and insect entry.
Anchor your shelter to the ground using stakes, ropes, or concrete footings to resist shifting or collapsing during storms. Regularly inspect these fastenings, especially after harsh weather.
How will you maintain your shelter’s integrity over months or years? Building in easy access points for repairs will save you time and effort when nature tests your craftsmanship.
Insulating And Waterproofing
Insulating and waterproofing your long-term survival shelter is crucial for comfort and safety. Proper insulation keeps the cold out and warmth in, while waterproofing prevents moisture from seeping through walls and floors. Neglecting these steps can lead to a damp, cold shelter that quickly becomes unlivable.
Using Natural Insulators
Natural materials like straw, dry leaves, and moss work surprisingly well as insulators. They trap air, which slows down heat loss and keeps your shelter warmer. I once used layers of dry pine needles between wooden planks, and it made a noticeable difference on chilly nights.
Try stuffing these materials into wall cavities or between layers of your shelter’s structure. You can also lay thick mats of dried grass on the floor to add insulation from the cold ground. Have you considered which natural materials are abundant in your area that you could use?
Applying Waterproof Layers
Waterproofing is about keeping rain and ground moisture out of your shelter. You can use tarps, plastic sheeting, or even natural options like thick bark or clay. I tested a shelter covered with clay mixed with straw; it repelled water surprisingly well and lasted through heavy rains.
Lay waterproof layers over the roof and walls, ensuring they overlap to prevent leaks. Don’t forget to seal any gaps or holes where water could sneak in. What local materials could you use to create a reliable waterproof barrier?
Maintaining Ventilation
Even a well-insulated and waterproofed shelter needs airflow to prevent mold and keep air fresh. Small vents near the roof or floor can help moisture escape without letting cold drafts in. I learned this the hard way when a sealed shelter became damp and uncomfortable after just a few days.
Use adjustable vents or cover openings with breathable fabrics to control airflow. Proper ventilation also reduces condensation, keeping your shelter dry and healthier over time. How will you balance staying warm while allowing enough air circulation?
Establishing Safety Measures
Creating a long-term survival shelter requires strong safety measures. Safety protects you from dangers inside and outside the shelter. It helps ensure your shelter lasts through tough conditions. Focus on fire safety, wildlife protection, and structural stability. Each area plays a key role in your shelter’s security.
Fire Safety
Fire is essential for warmth and cooking but can be dangerous. Build a fire pit away from the shelter walls. Clear dry leaves and wood from the area around the fire. Use stones or metal to contain the fire. Keep water or sand nearby to put out flames quickly. Never leave a fire unattended. Ventilate the shelter properly to avoid smoke build-up inside.
Wildlife Protection
Wild animals pose risks to safety and supplies. Secure food in airtight containers and store it outside the shelter. Keep the shelter entrance clear for quick exits. Use natural barriers like thorny bushes or rocks around the shelter. Avoid strong smells that attract animals. Make noise or set simple alarms to warn of nearby wildlife. Regularly inspect the shelter for signs of animal activity.
Structural Stability
Strong shelter construction prevents collapse and injury. Choose a flat, dry location to build your shelter. Use sturdy materials like logs, stones, or heavy branches. Anchor the shelter firmly to the ground. Check for loose parts or weak spots often. Reinforce the roof to handle heavy rain or snow. Design the shelter to resist wind and other weather forces.
Enhancing Comfort And Livability
Creating a long-term survival shelter goes beyond just protection from the elements. Comfort and livability play crucial roles in maintaining morale and health over extended periods. Small improvements in your shelter can make a big difference in how you experience daily life during tough times.
Flooring Solutions
Hard, cold floors can drain your energy and increase discomfort. Adding flooring materials like wooden pallets, rubber mats, or even thick carpets can provide insulation and a warmer surface.
Think about durability and moisture resistance. Raised wooden platforms keep you off damp ground, while interlocking foam tiles offer cushioning and are easy to clean.
Have you considered how a simple change in flooring might affect your overall shelter environment? Even a small rug can boost comfort and reduce fatigue.
Storage Options
Clutter can quickly turn a shelter into a stressful environment. Efficient storage helps you stay organized and saves space.
Use stackable plastic bins or hanging shelves made from strong fabric or wood. Label everything clearly to find essentials fast.
Remember, a tidy space can improve your mental state. How often do you feel overwhelmed by mess? Proper storage lets you avoid that feeling when resources are limited.
Lighting And Heating
Good lighting and heating are key to making your shelter livable. Solar-powered LED lights or battery-operated lanterns offer safe, steady illumination without relying on fuel.
For warmth, consider a small wood stove or insulated thermal blankets. Ventilation is vital—make sure any heating source has proper airflow to prevent carbon monoxide buildup.
Have you tested your lighting and heating setup in different weather conditions? Small adjustments can save you from discomfort and danger.

Credit: www.youtube.com
Maintaining The Shelter Long-term
Building a long-term survival shelter is only half the battle. Maintaining it ensures it remains safe, comfortable, and functional over time. Your shelter must withstand wear, weather, and unexpected challenges to truly serve you in the long run.
Regular Inspections
Make it a habit to inspect your shelter regularly. Look for signs of wear like cracks, leaks, or pest damage. Small issues can quickly become serious problems if ignored.
Check critical points such as the roof, walls, and foundation. Are there gaps letting in drafts or moisture? Seal these immediately to keep the interior dry and secure.
Ask yourself: When was the last time you thoroughly checked your shelter? Setting a schedule, like monthly or after storms, helps keep you accountable.
Repair Techniques
Carry basic tools and materials with you for quick fixes. Patch holes with tarps, use waterproof sealant on leaks, and replace broken supports promptly.
If wood parts rot, swap them out with treated lumber or natural alternatives like hardwood. Using nails or screws instead of just tying materials can increase durability.
Remember, temporary fixes are just that—temporary. Plan for permanent repairs as soon as possible to avoid repeat problems.
Adapting To Seasonal Changes
Your shelter should change with the seasons to stay livable. In winter, add insulation like foam panels or thick blankets to retain heat.
During hot months, focus on ventilation. Open vents or windows, and consider shade covers to reduce heat buildup.
Rainy seasons demand waterproofing upgrades. Check drainage around the shelter and reinforce the roof to prevent leaks.
How will you prepare your shelter to face the next season? Anticipating these changes keeps you comfortable and safe year-round.

Credit: m.youtube.com
Frequently Asked Questions
What Materials Are Best For A Long Term Survival Shelter?
Use natural materials like wood, stone, and clay for durability. Include waterproof tarps and insulated layers to protect from elements. Choose materials available locally to ensure ease of repair and sustainability over time.
How Do I Ensure Shelter Insulation In Survival Situations?
Insulate with leaves, moss, or grass between walls and roof. Use earth or snow as natural insulators. Proper insulation retains heat and keeps moisture out, essential for long-term comfort and survival.
Where Is The Ideal Location For Building A Survival Shelter?
Choose elevated, dry ground away from flood zones. Ensure proximity to water and natural resources. Avoid areas with heavy wind exposure or wildlife paths for safety and sustainability.
How Can I Make My Shelter Weatherproof?
Seal gaps with mud, clay, or foam. Use waterproof covers or tarps on the roof. Proper sealing prevents rain, wind, and cold from entering, enhancing shelter durability and comfort.
Conclusion
Building a long term survival shelter takes time and effort. Choose a safe location and use strong materials. Keep your shelter dry and well-ventilated for comfort. Remember to store enough supplies for many days. Practice building it before you need it.
A good shelter can protect you in tough situations. Stay prepared and stay safe. Your effort today can save your life tomorrow.